Text to Video with Voiceover: A Practical Production Guide

Text to Video with Voiceover. Learn how to turn scripts into polished short videos with natural voiceovers. Covers drafting, voice selection, scene syncing
You've got a content calendar full of ideas, but the next short still needs a script, footage, narration, captions, editing, and exports for several platforms. By the time you've opened a camera app and found a quiet room, the publishing window has already moved on. Text to video with voiceover removes much of that setup by turning a written concept into a narrated sequence, but speed alone won't make the result watchable. The difficult work starts when the voice, visuals, captions, and localized versions must agree down to the moment.
Why Text to Video with Voiceover Changed Creator Workflows
A creator can now begin with a product angle, educational point, or story premise instead of a filming plan. The script becomes the production brief, the voiceover establishes the rhythm, and the system assembles scenes around the spoken message. For a social media manager or DTC brand, that changes the bottleneck from “How do we shoot this?” to “Which version deserves to ship?”
The commercial momentum reflects that shift. The AI video generator market is projected to reach about $946.4 million in 2026, rising from roughly $788.5 million in 2025, and it's forecast to reach about $3.44 billion by 2033 at a 20.3% CAGR, according to Grand View Research's AI video generator market analysis. The same source projects text-to-video to represent 46.25% of global revenue in 2026, making script-led creation a substantial part of the category rather than a novelty.
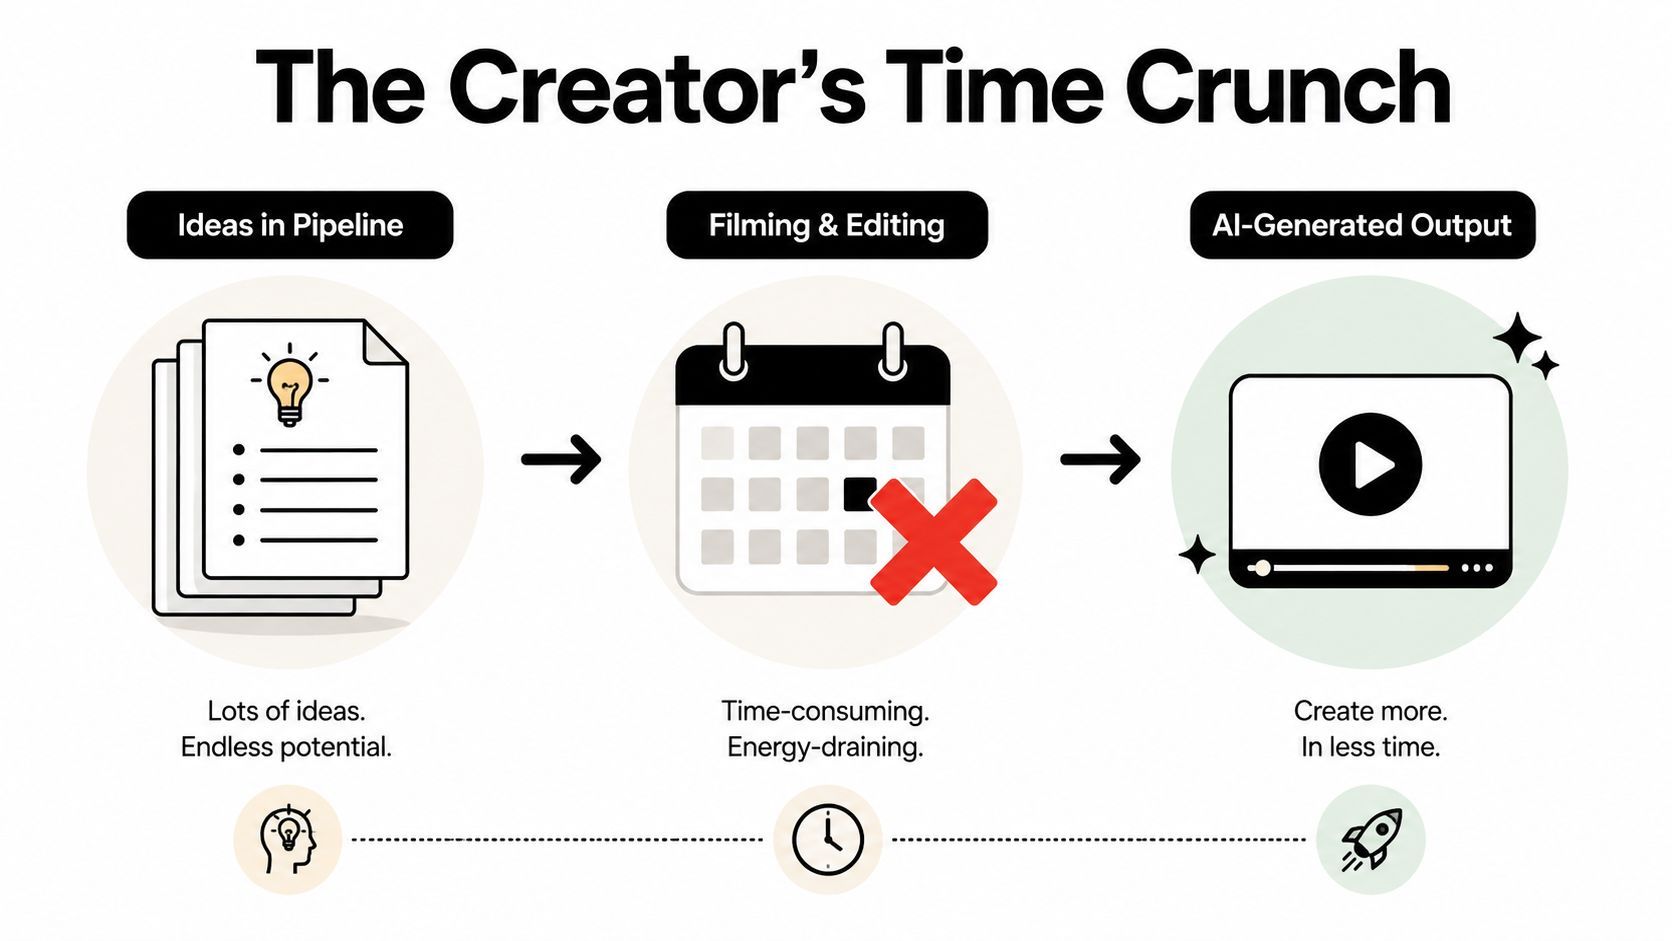
The workflow has a clear handoff
The practical pipeline looks like this:
- Start with one viewer problem. A short should answer one question, demonstrate one use case, or create one emotional reaction.
- Write for speech. The narration needs pauses, emphasis, and wording that sounds natural aloud.
- Divide the script into visual beats. Each beat should give the generator a specific subject, setting, action, and mood.
- Choose the voice before locking scenes. A calm narrator and an energetic presenter create different timing requirements.
- Assemble and validate. Scene relevance, narration timing, captions, transitions, and music all need separate checks.
- Create platform versions. The master edit may need different framing, safe zones, and caption treatment across feeds.
This approach doesn't replace traditional filming in every situation. A founder's real demonstration, a customer interview, or a tactile product close-up may still benefit from a camera and human performance. Avatar video has a different strength too, especially when a consistent presenter needs to appear repeatedly. Text-to-video with voiceover works best when the story depends on clear narration, illustrative visuals, product context, or rapid creative iteration.
The market's adoption also extends beyond specialist creators. Broader usage data cited by Luma AI says 63% of video marketers use AI to help make videos, reinforcing that AI-assisted production has entered ordinary marketing workflows rather than remaining an edge case (Luma AI's text-to-video statistics overview). The useful question isn't whether automation can produce a video. It's whether the finished video communicates the intended idea without timing, tone, or localization errors.
Drafting a Script That Sounds Natural When Spoken
A script can look polished in a document and still sound stiff through a voice generator. Written language tolerates long clauses, visual references, and dense transitions. Spoken language needs breathing room, clear emphasis, and phrasing that a listener can process without rereading.
Read the draft aloud before you generate anything. If you run out of breath, stumble over a phrase, or lose the subject of a sentence, the voice model may struggle too. A spoken script should sound like one person explaining something to another person, not like a paragraph designed to occupy a page.
Build the script around listening
Use a simple spoken structure:
- Open with the tension. State the problem or surprising observation before adding background.
- Deliver one useful idea at a time. A new point should have a matching visual beat or caption emphasis.
- Write pauses into the draft. Line breaks, short sentences, and punctuation give the narrator room to breathe.
- End with a clear action. Tell the viewer what to try, compare, download, or consider next.
Avoid packing every benefit into one narration. A voiceover that races through features forces the editor to use cramped captions and disconnected visuals. If the topic needs more context, split it into a series instead of asking one short to carry an entire guide.
Voice selection belongs in the writing phase, not after the edit. A warm narrator can make an instructional script feel approachable, while an authoritative voice may suit a technical explanation. An energetic delivery needs shorter lines and stronger beat changes. A measured voice can support more reflective storytelling, but it still needs visual movement to prevent the sequence from feeling static.
Mark visual beats before generation
Add production notes directly beside the spoken lines:
| Script element | Visual direction | Editorial purpose |
|---|---|---|
| Problem statement | Close-up of the frustrating task | Establishes immediate relevance |
| Main explanation | Demonstration, interface, or illustrative B-roll | Makes the abstract point concrete |
| Important phrase | On-screen text with restrained emphasis | Reinforces memory without duplicating every word |
| Final instruction | Product, result, or clear next action | Gives the ending a visual destination |
A useful resource for tightening the narrative before production is Contesimal's guide to video script to boost views. Use it as a reference for shaping the hook and progression, then adapt the language for the ear rather than copying a written format unchanged.
Before committing to a voice, perform three tests. Read the opening at normal speed, read the middle section without stopping, and read the final line as if you're speaking to one specific viewer. If the tone changes unintentionally or the key phrase gets buried, revise the script first. Voice generation is fast, but regenerating an audio track after scene timing is locked still creates avoidable work.
Generating Visuals and Assembling Scenes
Once the voice-ready script exists, translate each beat into a visual instruction rather than pasting the entire paragraph into a generator. A strong scene prompt usually identifies the subject, action, environment, visual style, camera behavior, and relationship to the narration. “Show productivity” is too broad. “Overhead view of a creator sorting content cards on a clean desk, high-contrast editorial style, slow push-in, space on the upper third for captions” gives the system a usable production brief.
Keep a sequence coherent
Choose the visual source according to the job:
- Stock footage works well for recognizable environments, people performing ordinary actions, and factual context.
- AI-generated scenes suit concepts that are difficult to film, stylized brand worlds, and rapid visual exploration.
- Motion graphics are usually clearer for numbers, comparisons, interfaces, and process explanations.
- Product footage deserves manual treatment when texture, packaging, or physical interaction affects trust.
Individual clips can look impressive and still fail as a sequence. A cinematic macro shot followed by a flat stock clip may create a tonal break that the narration can't repair. Set a visual rule for the whole short, such as documentary realism, clean product editorial, or graphic explainer, then allow variation inside that rule.
Use timing as a creative constraint
Generate scenes around the voiceover's meaning, not around an arbitrary clip length. A sentence describing a three-part process may need three visual changes. A short emotional statement may work better with one stable image and a deliberate pause. Trim or extend shots so the viewer sees the relevant action while the narrator names it.
Thumbnails and opening frames need their own pass. The first image should communicate the subject before the viewer deciphers the caption. Use a clear face, object, contrast, or unusual composition when it supports the message. Surreal effects can stop a scroll, but they're counterproductive when the viewer needs to understand a product demonstration quickly.
A practical assembly pass should answer four questions:
- Does every scene show what the narration is discussing?
- Does the visual style remain consistent from opening frame to final card?
- Does the subject stay legible after captions and platform interface elements are added?
- Does each transition reflect a change in idea, energy, or location?
ShortGenius's AI video creation platform is one example of a workflow that brings script, scene generation, narration, captions, and resizing into the same production environment. Whether you use an all-in-one tool or separate applications, keep the same principle: make the voiceover the timing spine, then fit visuals to its meaning.
Syncing Voice and Scenes Without Timing Errors
Most failed text-to-video-with-voiceover projects don't fail because one frame looks imperfect. They fail because the viewer hears one idea while seeing another. The narrator mentions a completed action, the screen still shows preparation, or the caption changes after the voice has already moved on. Those mismatches make the edit feel careless even when every component was generated cleanly.
Microsoft Research's AVGen-Bench benchmark evaluates text-to-audio-video generation across 11 real-world categories and uses multi-granular scoring instead of relying on one overall quality score. That structure offers a useful production habit: validate the pipeline in layers rather than judging the finished file by visual appeal alone.
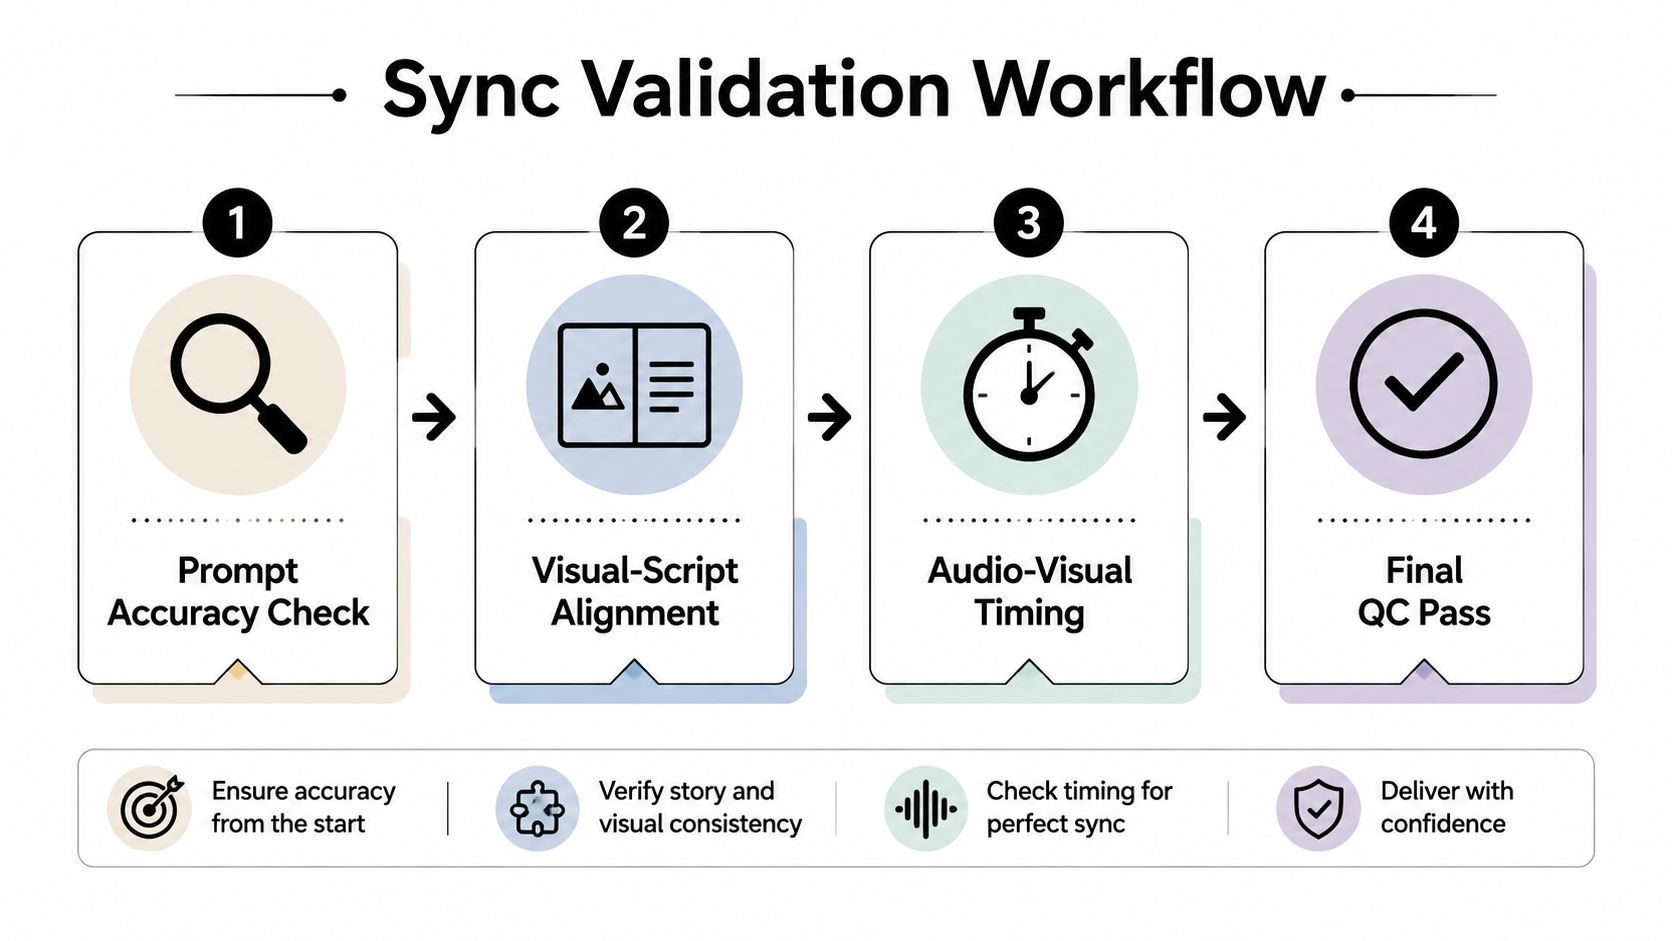
Run four separate checks
Prompt accuracy comes first. Confirm that the generated scene contains the requested subject, setting, action, and visual relationship. A beautiful clip of a laptop doesn't satisfy a prompt about a phone checkout flow.
Visual-script alignment comes next. Play the video with the sound muted and read the script alongside it. Mark every point where the image stops supporting the spoken claim. Replace a scene when trimming can't fix the semantic mismatch.
Audio-visual timing needs focused attention. Listen for narration that starts before the relevant shot, finishes after the shot has changed, or carries a level of energy that conflicts with the image. Check pronunciation, pauses, music ducking, and caption timing at the same time.
The final quality pass evaluates the experience. Watch once as a viewer, not as an editor. Look for distracting transitions, repeated imagery, awkward holds, tiny text, and an ending that arrives without a clear conclusion.
This method aligns with the technical lesson from TAVGBench, which reports an evaluation corpus of over 1.7 million clips totaling 11.8 thousand hours and highlights the need to assess synchronization and temporal coherence alongside image quality (TAVGBench coverage). The practical takeaway is simple: short clips can hide timing defects, so inspect them deliberately instead of assuming a polished frame means a finished edit.
Practical rule: If the viewer has to choose between trusting the voice and trusting the image, the edit needs another pass.
Use the least expensive fix first. Trim a scene when the meaning is right but the duration is wrong. Swap the scene when the narration is correct but the image is irrelevant. Swap the voice when the pacing or emotional register is wrong. Apply the brand kit only after the underlying timing works, because color and typography can't solve semantic drift.
Before publishing, verify the opening beat, every major scene change, the final caption, and the export with sound on and off. The first few seconds deserve special scrutiny because a delayed hook, mismatched visual, or unreadable caption can lose attention before the message has started.
Adding Captions and Publishing Across Platforms
Captions serve three jobs at once. They support viewers who watch without sound, improve accessibility, and reinforce the spoken message with readable visual structure. Automatic transcription saves time, but it shouldn't receive automatic approval. Names, product terms, punctuation, and line breaks can all change meaning.
Treat captions as part of the edit
Keep captions synchronized to speech rather than displaying full sentences for too long. Break lines at natural phrases, emphasize only the words that matter, and preserve enough contrast for the text to survive bright footage. A branded caption style should be consistent, but it shouldn't overpower the scene or force every word into an animated treatment.
Check these details before export:
- Transcription: Correct names, technical terms, contractions, and punctuation.
- Timing: Make sure each caption appears with the spoken phrase and disappears before the next idea.
- Placement: Keep text away from faces, product labels, and platform interface zones.
- Readability: Test the smallest screen you expect your audience to use.
- Sound-off meaning: Confirm that the captions still communicate the basic story without audio.
A single master file can support multiple platform versions, but resizing isn't just a button press. Reframe faces and products, reposition captions, and preview the complete composition inside each destination's interface. A caption that sits safely in an editing canvas may be obscured by buttons or descriptions after upload.
Build a repeatable publishing system
Organize related videos as themed series rather than isolated files. Use consistent naming for the source script, voice track, scene assets, captioned master, and platform exports. That structure makes it easier to revise a voice, replace a product shot, or create a localized version without rebuilding the entire project.
Schedule only after each platform preview passes review. Check the thumbnail, opening frame, caption position, audio level, description, and call to action. Auto-publishing can protect consistency, but it can't detect a scene that became awkward after a late trim or a caption that moved into a user-interface area.
Scaling Globally with Multilingual Voiceovers
Localization is more than translating the script and selecting another voice. A direct translation may be grammatically correct but wrong for the market, too formal for the channel, or poorly matched to the timing of the original edit. Regional vocabulary, pronunciation, humor, claims, and legal language all deserve human review.
The business context is already international. Voices' 2025 agency report says 63% of respondents hired voice talent outside North America, showing that agencies already treat non-North American voices as part of ordinary production workflows (Voices' agency trends report). Industry coverage also describes AI dubbing systems that localize a source video into dozens of languages with synchronized mouth movements, with one report citing support for 130+ languages. Capability doesn't remove the editorial decisions.
Localize the message, not only the audio
Create a source script with locked claims, brand terminology, visual references, and pronunciation notes. Then have each language version reviewed for:
- Meaning: Does the translation preserve the intended promise and qualification?
- Tone: Does the voice sound credible for that audience?
- Regional fit: Are examples, idioms, and accents appropriate?
- Timing: Does the localized narration still match scene changes and captions?
- Compliance: Do local advertising or disclosure requirements change the wording?
AI voices can work well for frequent content, testing, and markets where speed matters more than a distinct human performance. Native voice talent remains valuable for campaigns where trust, cultural nuance, or brand identity carries the sale. The right choice depends on the audience and the consequence of getting the tone wrong.
For a broader explanation of why language support affects usability beyond simple translation, read the case for multilingual voice input. Apply the same discipline to video: review the localized voice and captions against the visuals, then ask a native speaker whether the result sounds like local communication rather than imported copy.
ShortGenius (AI Video / AI Ad Generator) combines scriptwriting, scene generation, video assembly, natural voiceovers, captions, resizing, scene and voice swaps, and brand kit application in one workflow. If you want to test text to video with voiceover while checking synchronization before publishing and preparing multi-channel versions, visit ShortGenius (AI Video / AI Ad Generator) and build your next production from a script-led project.