How to Screen Record on Windows 10: A Creator's Guide
Learn how to screen record on Windows 10 with the Game Bar, PowerPoint, or OBS. Get pro tips on audio, editing, and preparing footage for social media.
You've probably been there. You need to capture a quick tutorial, a bug for support, a gameplay moment, or a walk-through for social media, and you need it now. Windows 10 gives you a built-in way to do it, but whether that's enough depends on what happens after the recording.
That's the part most guides skip. Recording is only the capture stage. If your real goal is a polished tutorial, a YouTube clip, or a vertical social video, the recorder you choose affects everything that comes next, including audio cleanup, editing speed, captioning, and resizing.
Your Guide to Flawless Windows 10 Screen Recording
You open Windows 10 to record a quick tutorial, a product walkthrough, or a bug report. Hitting record is easy. Keeping the footage usable after the capture is the part that decides whether the job stays quick or turns into cleanup.
Good screen recording is a production workflow, not a button press. The first choice is not just how to capture the screen. It is how much work you want later with trimming, audio repair, captions, reframing, and export for YouTube, TikTok, Instagram, or internal training.
Built-in tools are fine for simple jobs. They start fast, they cost nothing, and they remove setup friction. They also tend to show their limits the moment you need cleaner audio, more control over what gets captured, or footage that needs to be repurposed across formats.
Think like a producer, not just someone hitting record
I use a simple filter before choosing any recorder.
- Disposable clip: You need to capture one app, save it, and send it.
- Editable asset: You already know the clip needs trimming, voiceover, captions, or callouts.
- Multi-platform content: One recording will feed a tutorial, a short social cut, and maybe a vertical version for reels or TikTok.
Those are different production jobs. The capture method should match the editing path.
Practical rule: If the footage only needs to exist, use the fastest recorder. If the footage needs to perform, use the option that gives you cleaner inputs for editing.
Windows 10 gives you several ways to record your screen. Xbox Game Bar is the quickest starting point for basic app capture. PowerPoint can cover presentation-heavy workflows. OBS Studio is usually the next step once you need full-screen capture, scene control, and better recording settings. After capture, tools like ShortGenius make more sense because the ultimate finish line is not a raw file. It is a polished social video or tutorial that is ready to publish.
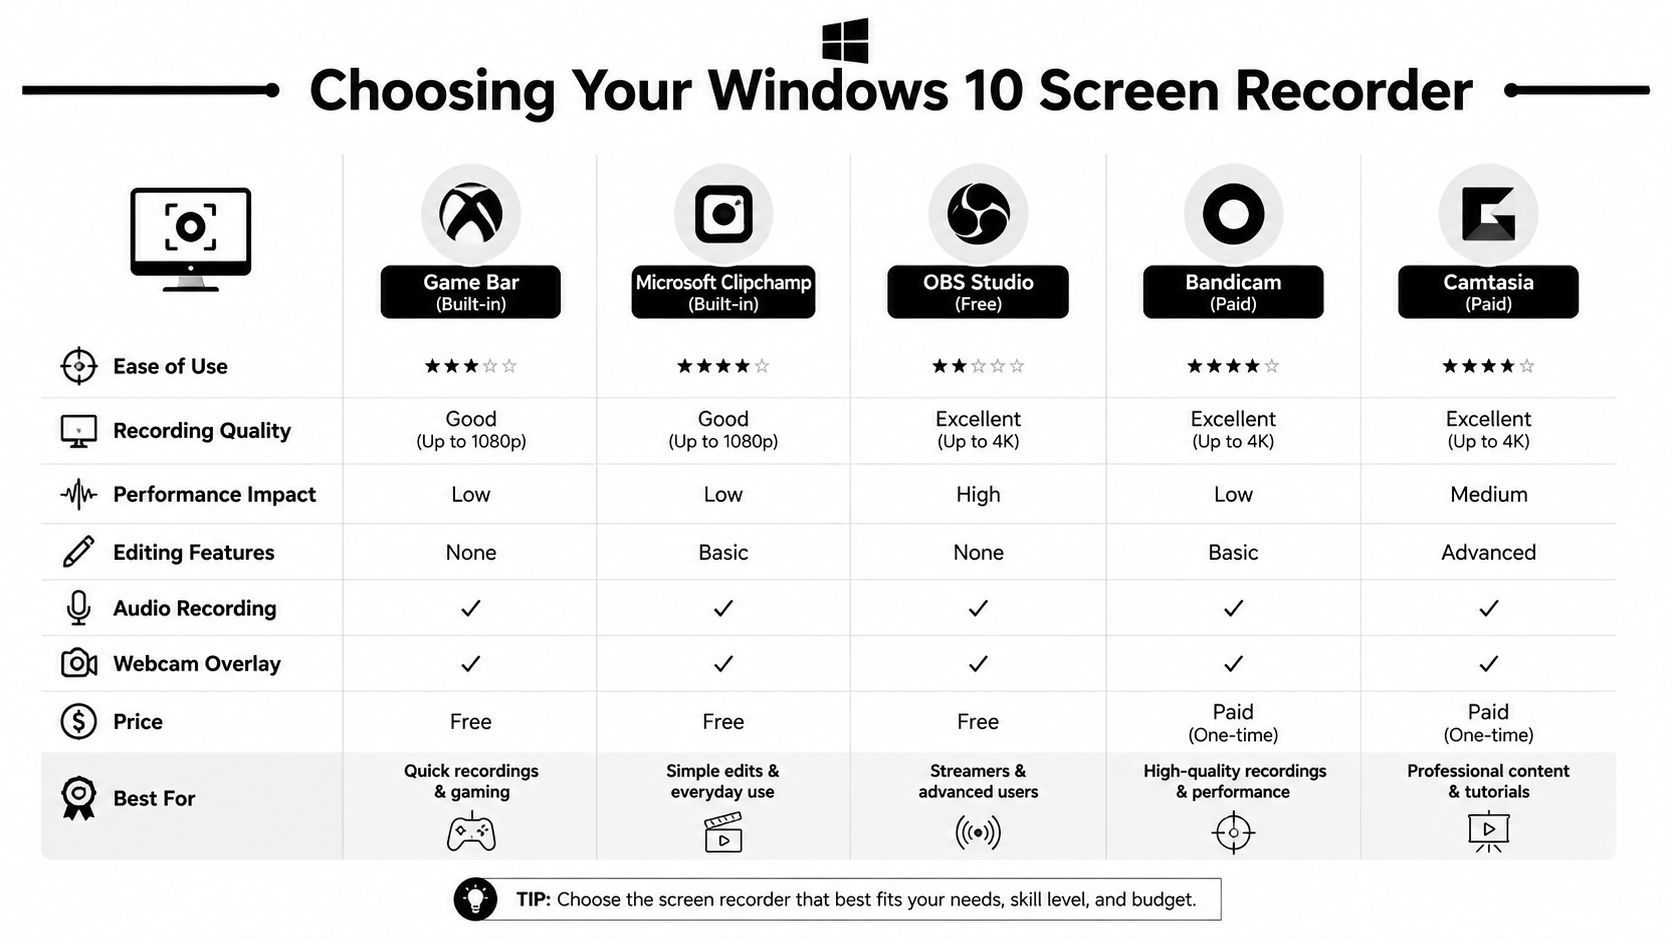
Choosing Your Windows 10 Screen Recorder
The recorder you choose shapes everything that happens after capture. A quick internal clip has different needs than a tutorial you plan to trim, caption, crop for vertical, and post on social later.
I usually make the call based on the final deliverable, not the recording itself. If the file only needs a clean handoff, the built-in option is often enough. If the recording will become a tutorial, a client demo, or a short-form social asset, capture quality and flexibility matter much more because editing exposes every limitation.
The fast comparison
| Tool | Best for | Where it works well | Where it breaks down |
|---|---|---|---|
| Xbox Game Bar | Quick app capture | Fast launch, no install, simple audio capture | No custom region, weak for desktop tutorials |
| PowerPoint recorder | Slide-based presentations | Decent when your content lives inside slides | Not ideal for broader screen workflows |
| OBS Studio | Tutorials, demos, creator workflows | Full desktop capture, scene control, flexible audio | More setup, more interface complexity |
| User-friendly third-party apps | People who want less setup than OBS | Easier onboarding, editing extras, guided workflows | Usually less flexible than OBS or require payment |
Match the recorder to the production job
A basic recorder can save time up front and cost time later. I see that most often with tutorial footage. The capture starts out fine, then the edit needs a cleaner crop, a webcam layer, separate audio control, or a full desktop view that was never recorded properly.
That is why the tool choice should follow the workflow.
- Use Xbox Game Bar for one app, one task, and minimal editing.
- Use PowerPoint recorder if the presentation lives inside slides and that is the whole job.
- Use OBS Studio if you need the desktop, multiple windows, overlays, scene control, or cleaner recording settings.
- Use a paid recorder/editor if speed matters more than tweaking settings and you want capture plus editing in one package.
When Game Bar is enough
Game Bar works well for lightweight recording jobs. Bug reports, product walkthroughs inside a single app, and quick gameplay clips all fit its strengths. You open the app, record, and get a file without setting up scenes or output profiles.
That simplicity is useful.
It also has a clear ceiling. Once your recording moves across the desktop, jumps between apps, or needs to look polished after editing, the shortcuts that made capture easy start to limit the result.
When OBS saves time
OBS takes longer to configure the first time, but it prevents a lot of rework. You can capture the full desktop, isolate sources, add a webcam, control audio inputs, and keep a recording layout that is ready for repeat use. For anyone making tutorials regularly, that setup cost pays back fast.
I recommend skipping straight to OBS if the recording is part of a repeatable content workflow. That includes product education, YouTube tutorials, course material, and raw footage you plan to repurpose into shorter clips later.
Why paid tools still make sense
Tools like Snagit and Camtasia sit in the middle. They reduce setup friction, give you built-in editing, and can be a better fit for teams that want dependable results without learning OBS.
The trade-off is control and cost. You pay for convenience, and in many cases that is a fair production decision. If your recording volume is high, shaving time off every capture and edit session matters.
For social content, the recorder is only the first step anyway. Good capture gives you cleaner raw material. The finished result usually comes from what happens after recording. Trimming dead space, reframing for vertical, adding captions, and packaging the clip for TikTok, Reels, or Shorts. That is the point where a workflow tool like ShortGenius starts to make more sense than treating screen recording as the whole job.
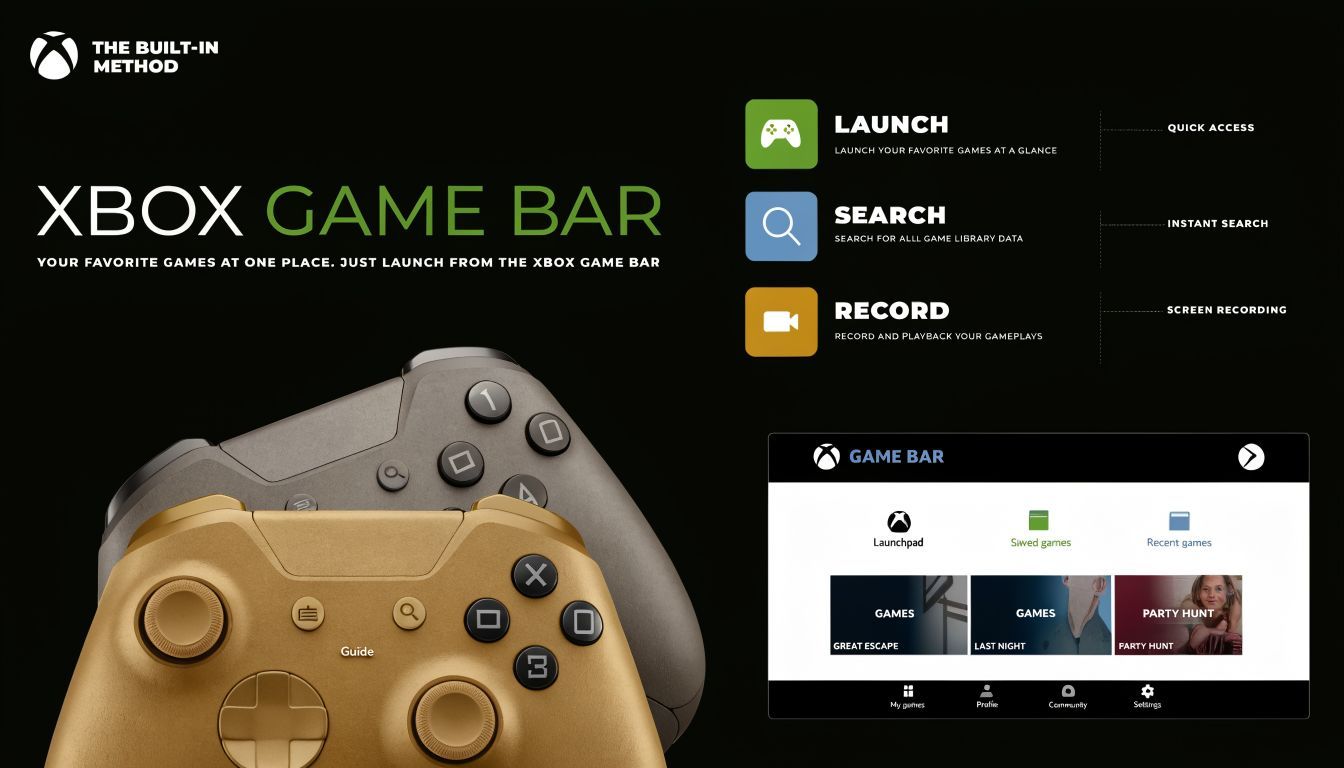
The Built-In Method Xbox Game Bar
Need to grab a quick product walkthrough before a meeting, record a bug for your dev team, or capture a clean app demo without installing anything first? On Windows 10, Xbox Game Bar is the fastest built-in way to record your screen and move from raw capture into editing.
It works best when the job is simple. One app window, light setup, quick turnaround. Press Win+G to open it, press Win+Alt+R to start recording, and Windows saves the file automatically in your Captures folder. You can also record system audio and microphone input together, which is enough for many first-pass tutorials and software demos.
The basic workflow
Open the app you want to capture before you launch Game Bar. That matters because Game Bar is designed around recording a specific app, not your whole desktop.
Press Win+G to bring up the overlay. If Windows asks whether the current window is a game, approve it so recording can attach to that app. From there, use the Capture widget, or skip the overlay and use the shortcut below.
Shortcut: Press Win+Alt+R to start or stop recording instantly.
Before you hit record, check audio once. If you want narration, confirm the correct microphone is active. If you also need system sound, make sure the app audio is coming through your normal output device and that Game Bar is picking it up.
When you stop, Windows saves the file automatically in C:\Users[Username]\Videos\Captures.
What it does well
Xbox Game Bar is good at reducing friction. There is no project setup, no scene building, and no extra software to maintain. For quick captures, that speed matters more than advanced controls.
It is a practical choice for:
- recording a single app demo
- capturing software bugs or workflow issues
- making a quick internal tutorial
- saving rough footage you plan to trim later for Shorts, Reels, or TikTok
I use it when I need the clip fast and already know the recording will get cleaned up later. In a real production workflow, that is often enough for the capture stage.
Where it starts to fall short
The limits show up once the recording needs precision. Game Bar is not great for full desktop tutorials, selective region capture, layered layouts, or detailed audio control. If your recording includes switching between apps, arranging windows on purpose, or combining screen, webcam, and branded overlays, you will hit those limits quickly.
It also gives you less control over the final frame than a dedicated recording setup. That matters if the end goal is polished content, not just proof that something happened.
Treat Xbox Game Bar as a fast capture tool. If the footage is headed toward a full tutorial, YouTube video, or repurposed social clip, capture is only the first step. The better your raw recording, the less cleanup you need later. Once your workflow includes reframing, captioning, clipping highlights, and packaging content for social, tools built for post-production and repurposing, such as ShortGenius, make a lot more sense than relying on the recorder alone.
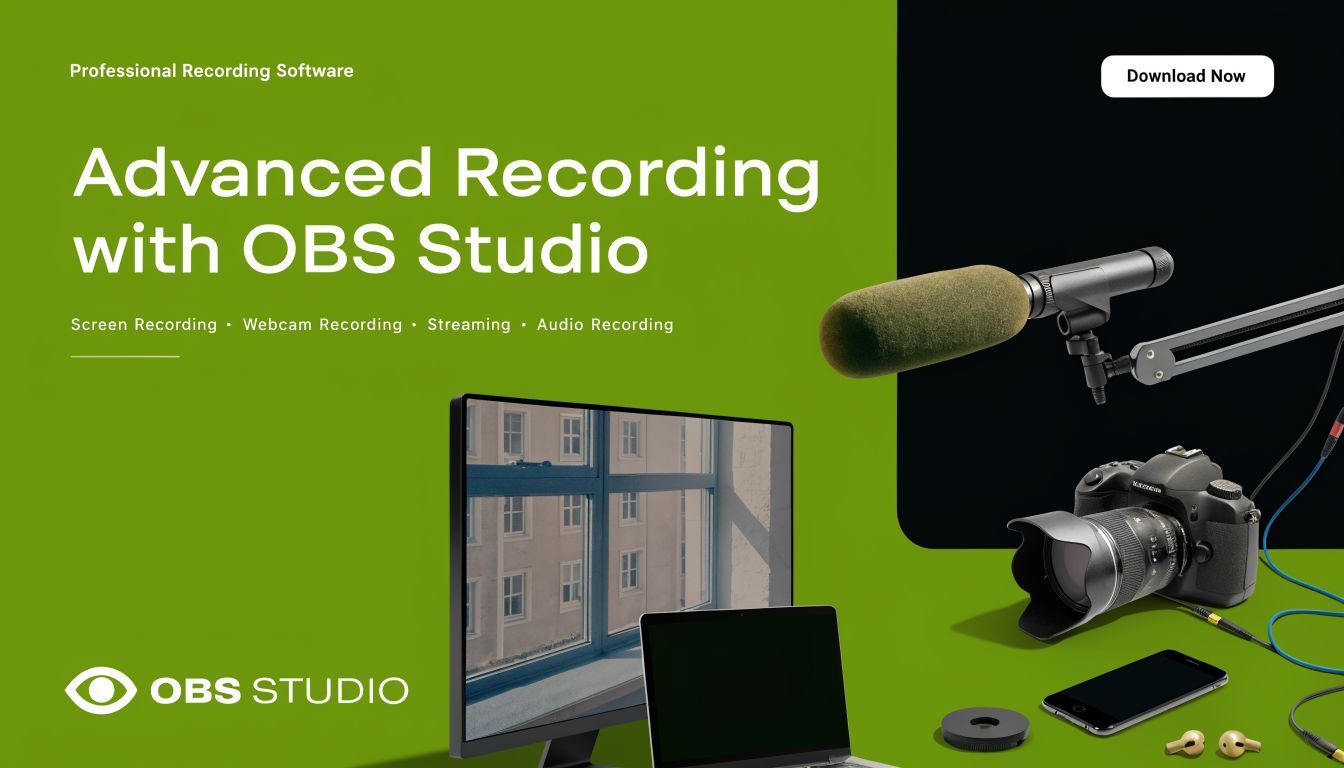
Advanced Recording with OBS Studio
OBS Studio is the free tool I recommend when the built-in options stop being practical. It's the best step up for creators who need full-screen recording, custom layouts, webcam overlays, and better control over what gets captured.
People often bounce off OBS because the interface looks busy. In practice, you only need to understand two ideas to get productive fast: Scenes and Sources.
Scenes and Sources
A Scene is your canvas. Think of it as the recording layout you want to produce.
A Source is each ingredient on that canvas. Your display is a source. Your microphone is a source. A webcam, browser window, image overlay, or text label are all sources too.
Once that clicks, OBS becomes much less intimidating.
Your first five minutes in OBS
Create a new scene and give it a name that matches the job. Something like “Tutorial Full Screen” is better than “Scene 2” because you'll find it again later.
Add your screen as a source. For most Windows 10 users, that means either Display Capture if you want the full monitor, or Window Capture if you want one specific app. If your content includes File Explorer, desktop icons, or switching between apps, use Display Capture.
Then add your microphone in the audio section. OBS usually detects a default input automatically, but don't trust that blindly. Speak into the mic and watch the meter move before you record anything important.
A clean starter layout usually includes:
- Display Capture: For the full screen or monitor
- Audio Input Capture: For your narration mic
- Optional Video Capture Device: If you want a webcam box in the corner
- Optional Image or Text source: Useful for branding or callouts
The settings that matter most
You don't need to spend an hour tuning OBS before your first clip. Start with the settings that affect output quality and workflow.
Video settings
Check your recording resolution and frame rate first. Match the resolution to your intended output, and keep frame rate consistent with the kind of content you're making. For software tutorials, smooth cursor movement matters, but so does readable text.
If you're teaching a process on screen, clarity beats style. A sharp recording with legible menus is more useful than a flashy setup with tiny UI text.
Recording path
OBS lets you choose exactly where files are saved. Set that early. It sounds minor, but losing time hunting for recordings across drives and folders gets old fast.
I like to use a dedicated project folder for each content batch so raw files, edited exports, thumbnails, and notes all stay together.
Audio monitoring
Audio is where OBS becomes a real upgrade. Even without going deep into advanced routing, it gives you more visibility than basic recorders. You can mute sources, check levels live, and avoid guessing whether your mic recorded.
Record a ten-second test before any serious session. Check voice level, system sound, and whether notifications or background apps leaked into the mix.
A practical OBS setup for tutorials
For tutorial work, I usually recommend a very plain setup first. Full display capture, one good mic input, no fancy transitions, no moving overlays. Once that works reliably, add complexity only if it helps the viewer.
A strong beginner workflow looks like this:
| Need | OBS choice |
|---|---|
| Show the full desktop | Display Capture |
| Show one software app only | Window Capture |
| Add narration | Audio Input Capture |
| Add face cam | Video Capture Device |
| Record repeatable branded tutorials | Save reusable scenes |
That's why OBS earns its place. It doesn't just capture. It lets you build a repeatable recording environment.
Where OBS wins over built-in tools
OBS is the better choice when your footage needs to survive the full production cycle. That includes training videos, software demos, educational content, reaction formats, creator explainers, and any workflow where you'll edit after recording.
It also solves a core Windows 10 problem that frustrates a lot of people. If your job requires the desktop, File Explorer, or multiple windows, OBS handles that cleanly while built-in options often don't.
The trade-off is obvious. OBS asks for setup. But once you save your scenes and inputs, that setup becomes a template. For recurring production, that's a feature, not a burden.
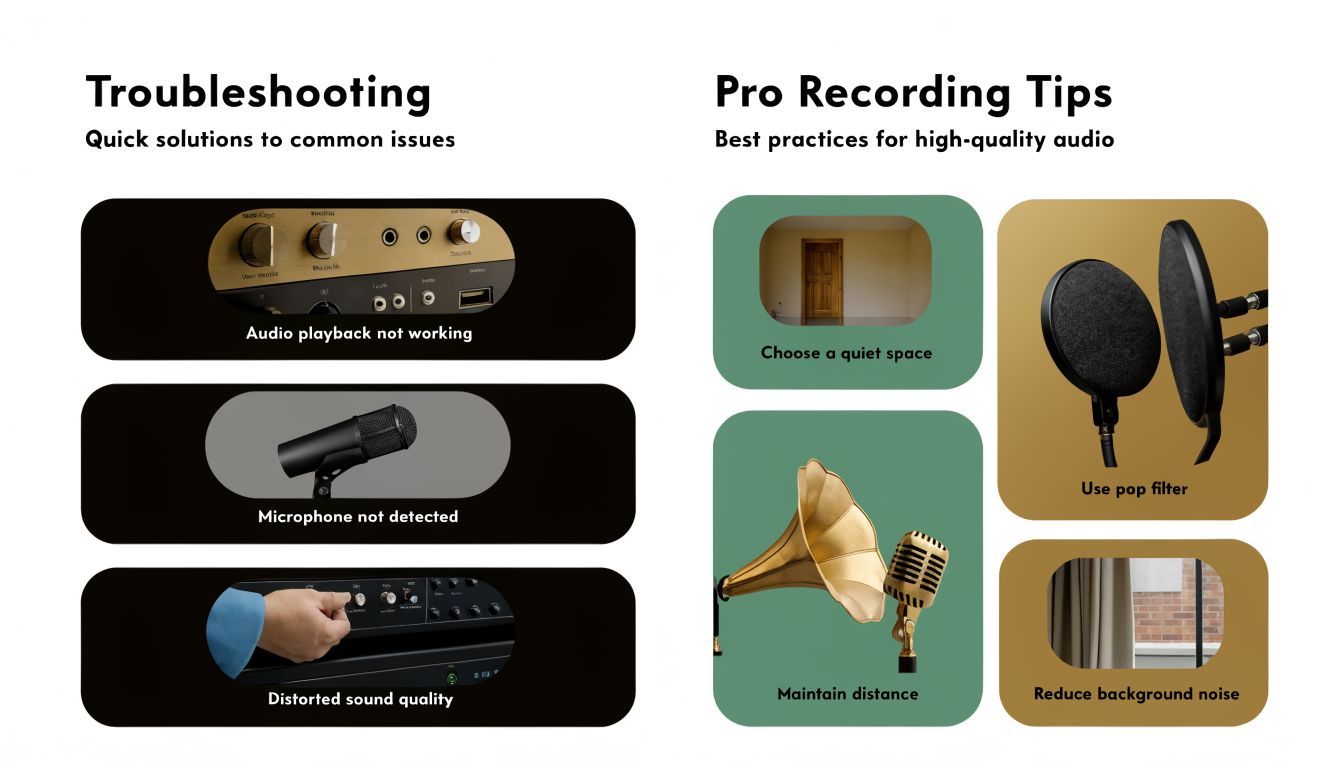
Troubleshooting and Pro Recording Tips
The most common screen recording problem on Windows 10 isn't poor video quality. It's using the wrong tool for the footage you're trying to make.
A lot of frustration comes from trying to record the desktop or File Explorer with Xbox Game Bar. That doesn't work the way many people expect. Game Bar is limited to active apps and cannot capture the desktop or File Explorer, which is why so many tutorial creators end up using third-party tools instead, as noted in Tom's Hardware's Windows recording guide.
Why your desktop won't record
This catches people because the recorder appears to be a general screen tool. It isn't. Game Bar is much closer to an app or game capture utility.
If your tutorial includes:
- File Explorer navigation
- Desktop icons or drag-and-drop actions
- Switching across multiple windows
- Precise cropped areas of the screen
you're better off using OBS or another dedicated recorder from the start.
Don't spend half an hour trying to force Game Bar into a desktop recorder. If the desktop is the lesson, change tools.
Audio problems that waste good footage
Audio failures are more damaging than slightly soft video. You can often live with a minor visual imperfection. You usually can't salvage a clip with bad echo, delayed narration, or a dead microphone track.
Common causes include privacy settings blocking mic access, the wrong input device being selected, or trying to record in a noisy machine state with too many apps running.
Before you hit record, check these:
- Microphone permissions: Windows privacy settings can block the app from accessing your mic.
- Input selection: Confirm the intended mic is active, not a webcam mic or laptop array.
- System noise: Close unnecessary apps, browser tabs, and alerts.
- Test playback: Record a short sample and listen back on headphones.
Small habits that make recordings look professional
A polished recording usually comes from prep, not rescue editing. The best creators reduce cleanup before the recording starts.
Prepare the screen
Set your display resolution before recording. Close clutter, clear distracting tabs, mute notifications, and enlarge UI elements if your audience needs to follow menus or text.
Prepare the script
Even a short bullet outline helps. It keeps your pacing clean and avoids long pauses, false starts, and wandering explanations.
Prepare the machine
Close what you don't need. Recording is lighter when your browser isn't carrying a pile of tabs, sync tools, and background apps you forgot were open.
Those aren't glamorous tips. They're the difference between footage that needs a quick trim and footage that needs repair.
From Raw Clip to Social-Ready Video
You finish a clean screen recording, watch it back, and realize it still is not ready to post. The capture did its job. The video still needs editing choices that fit the platform and the viewer.
That gap matters most when the goal is not just saving a file, but turning a Windows 10 recording into a tutorial, demo, or short social clip people will finish. Built-in tools make capture accessible. They do not handle pacing, framing, captions, or repackaging for different channels.
The post-production moves that matter most
For social video, four steps usually make the difference between a raw recording and something publishable:
- Trim the setup and exit: Cut the few seconds where you are getting into position or stopping the recording.
- Tighten the teaching: Remove wrong turns, repeated lines, and slow menu navigation.
- Add captions: Many viewers watch with sound off, especially on short-form platforms.
- Reframe for the destination: A full desktop capture often needs a vertical or square version to work well on social feeds.
These are production decisions, not recording settings. A good capture gives you usable material. A good edit gives that material shape.
I treat this as a workflow, not a final cleanup pass. If I know the clip is headed to TikTok, Reels, Shorts, or a product tutorial library, I plan the capture around the edit. That means leaving cleaner pauses for cuts, keeping the cursor movement intentional, and recording with the final crop in mind.
A workflow that scales past one-off clips
For occasional recordings, a basic editor may be enough. For recurring content, manual trimming and resizing gets expensive fast in both time and consistency.
That is usually the point where creators move from screen recording tools into production systems built for publishing. A platform like ShortGenius for turning recorded clips into social-ready videos fits after capture, when the core job is clipping, captioning, reframing, and preparing content for distribution.
The practical trade-off is simple. Windows 10 tools help you get the footage. A stronger post-production workflow helps you turn that footage into repeatable output. If you are creating content regularly, that second part is what saves the most time.
Frequently Asked Questions
Can I record system audio and my microphone at the same time
Yes, but check it before the final take. Built-in tools can capture both, but audio setup is where many recordings go wrong. Some guides just say to turn audio on and stop there, even though creators often run into echo, lag, or no clean separation between tracks, which is a major issue for voiceover-heavy work according to this discussion of Windows 10 recording audio gaps.
Why are my screen recording files so large
Large files usually come from high resolution, long recording times, or quality settings that are higher than your final use case requires. If the clip is for social media, you usually don't need to record at the most demanding settings available.
Can Windows 10 record only part of my screen
Not well with the built-in tools. Xbox Game Bar is fine for full app capture, but it isn't the right choice for a custom selected region. If you need a specific area, use OBS or another dedicated recorder.
Where did my recording save
Game Bar saves recordings in your Captures folder under Videos by default. OBS saves wherever you tell it to, which is worth setting up before you start a serious session.
If you're tired of turning raw recordings into finished videos by hand, ShortGenius (AI Video / AI Ad Generator) gives you a faster path from captured footage to publish-ready content. It helps creators and teams trim clips, add captions, resize for vertical platforms, swap scenes and voiceovers, organize projects, and schedule output across major channels without stitching together a stack of separate tools.