Real Estate Video Editing: A High-Converting Workflow
Learn a practical real estate video editing workflow. From shot selection to AI shortcuts and platform optimization, create property videos that convert.
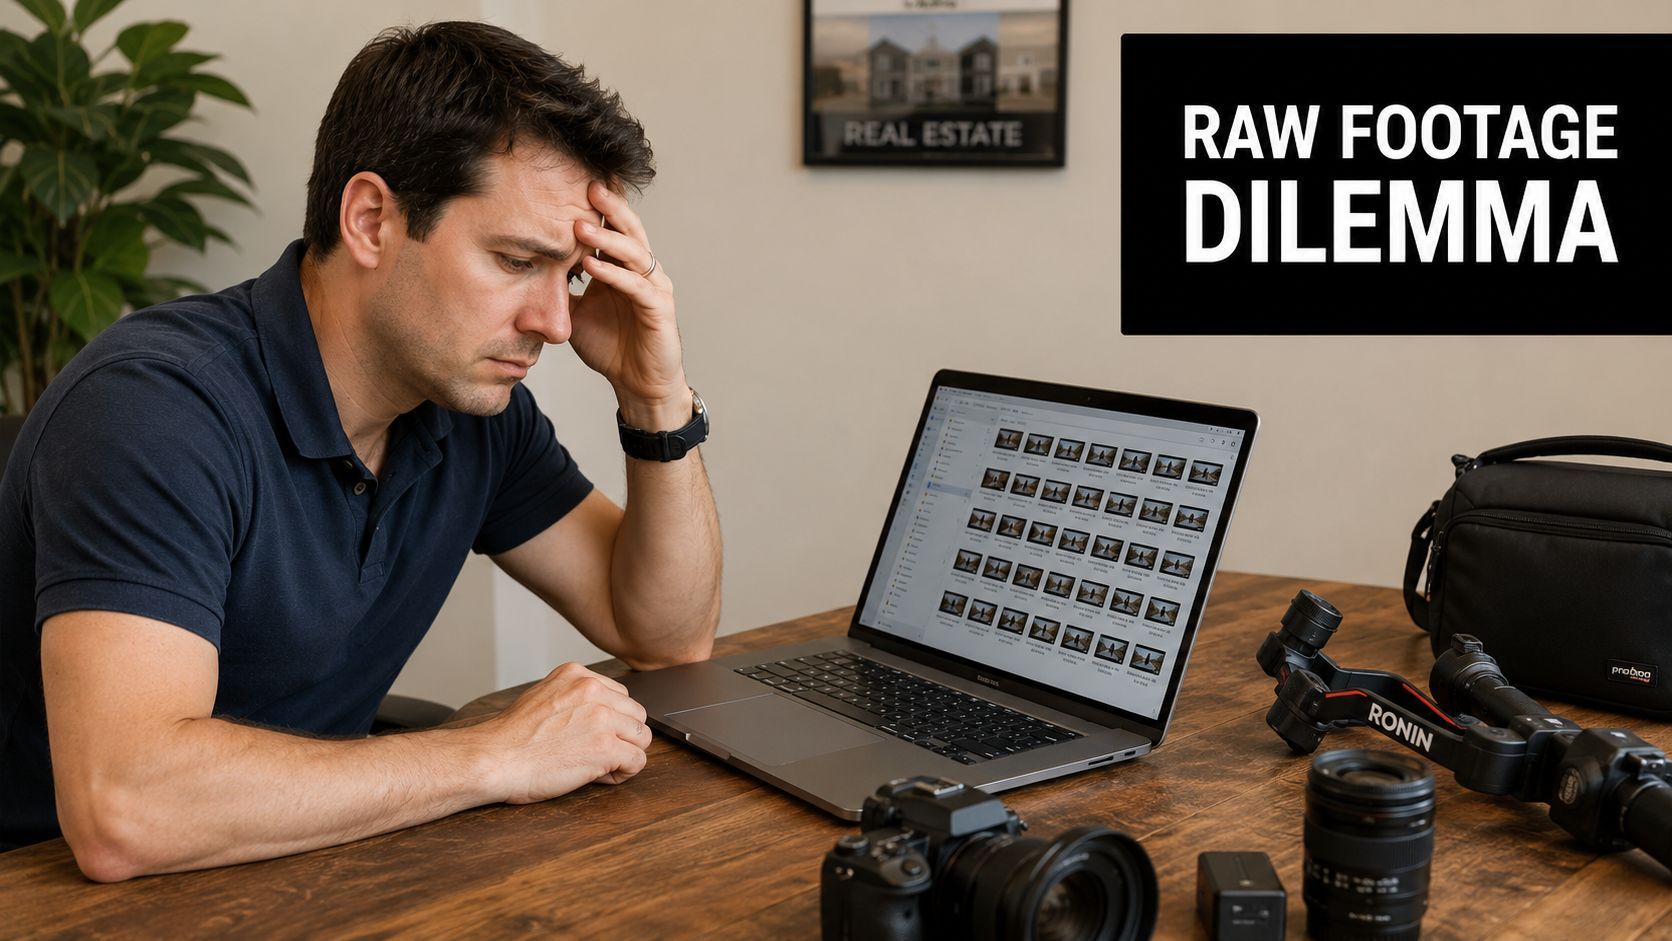
You've got a folder full of clips. The drone pass looks good. The kitchen glide is usable. One bedroom is too warm, another is too dark, and the bathroom shot somehow makes the room look twice as wide as it really is. The listing goes live soon, and the footage still isn't a marketing asset.
That's the point where most real estate video projects either become persuasive or forgettable.
Good real estate video editing isn't just trimming clips and dropping in music. It's deciding what the property should feel like, what the buyer should trust, and how one shoot becomes more than a single walkthrough. A polished listing film matters, but so do the vertical clips, branded snippets, and silent-friendly social edits that help the property circulate where buyers spend time.
Why Great Video Editing Sells Homes Faster
Raw footage almost never looks like the final product agents imagine when they book the shoot. It looks flat, inconsistent, and slightly chaotic. That's normal. What matters is whether the edit turns that mess into something clear, attractive, and believable.
The opportunity is bigger than most agents think
Video still isn't standard practice everywhere, even though clients clearly respond to it. A widely cited National Association of REALTORS® survey found that only 38% of agents use video, while 73% of homeowners say they're more likely to list with an agent who uses video to market a property, as summarized by PhotoUp's roundup of real estate video statistics.
That gap is where strong editing becomes commercially useful. If sellers want video and many agents still aren't using it well, then the agents who present polished, fast, branded videos have a visible advantage in listing presentations.
For agents trying to build that broader system, this guide on how to learn video marketing for agents is useful because it connects the edit to the bigger client acquisition process.
Practical rule: A listing video has two jobs. Sell the property to buyers, and sell the agent to the next seller.
Flashy isn't the same as convincing
A lot of tutorials treat real estate editing like a mini music video. Fast transitions, heavy zooms, dramatic motion, aggressive color. Those techniques can work in small doses, but they often weaken the actual goal.
Buyers don't need a property to feel overproduced. They need it to feel desirable and honest. Sellers don't just want “cinematic.” They want something that makes the home look cared for, accurately represented, and professionally marketed.
That's why the strongest workflow today does two things well:
- Builds trust: Rooms should look clean and balanced, not fake.
- Extends distribution: One shoot should create a listing tour, short clips, social cuts, and branded assets.
Editing is where the listing strategy becomes visible
A camera captures rooms. The edit creates emphasis.
You decide whether the viewer understands the layout. You decide whether the lighting looks natural. You decide whether the pacing feels premium or amateur. You also decide whether that footage stays trapped in one long video or gets repurposed into a full content package.
That's the difference between basic real estate video editing and a workflow that helps win business.
The Pre-Edit Sanity Check and Organization
The fastest editors aren't always the ones who click fastest in Premiere Pro, Final Cut Pro, or DaVinci Resolve. They're the ones who don't start with chaos.
A clean pre-edit process saves hours later. Beyond that, it helps you make better choices about what footage should and shouldn't be in the final cut.
Build a folder structure you can trust
Don't dump everything into one timeline and “sort it out later.” That's how editors miss the strongest shots and keep weak ones because they're already halfway through the sequence.
A simple structure works:
- Drone: Exterior reveals, overheads, approach shots
- Interiors: Room-by-room main takes
- Details: Fixtures, finishes, texture shots, lifestyle inserts
- Neighborhood: Streets, parks, storefronts, exterior context
- Audio: Voiceover, room tone, music selects
- Exports: Listing film, vertical versions, review copies, finals
Batch-renaming clips also helps more than people expect. “Kitchen_gimbal_take2” is useful. “C0048.MP4” isn't.
Cull with honesty, not attachment
Most shoots include footage you want to save because it was hard to capture. That's not a reason to use it.
Delete or reject clips with these problems early:
- Bad motion: Micro-jitters, uneven gimbal correction, rushed pans
- Poor representation: Ultra-wide angles that distort size or shape
- Exposure problems: Blown windows, muddy corners, mixed lighting that distracts
- Redundant coverage: Three nearly identical passes through the same room
If a shot makes the room look impressive but inaccurate, it hurts more than it helps.
That matters because editing for trust and realism is still an underserved part of real estate video editing. Practical guidance tends to focus on correcting exposure and color cast room by room because footage on location is “never perfect,” while many public tutorials still lean too hard on style over accuracy, as discussed in this practical editing discussion on color and realism.
Choose clips that preserve spatial truth
A property video should feel like a walkthrough, not a magic trick. That starts before the timeline.
When reviewing footage, ask:
- Does this angle accurately reflect the room?
- Does the lighting feel believable for the time of day?
- Would a buyer feel misled after seeing the property in person?
Those questions stop a lot of bad editing decisions before they start.
Sketch the path before you cut
I usually decide the property path before I touch the music. Not because music doesn't matter, but because flow matters more.
A useful mental order looks like this:
| Edit Stage | What you're deciding |
|---|---|
| Exterior first pass | What earns the click and introduces the home |
| Entry and main living flow | How the viewer “arrives” inside |
| Private spaces | How bedrooms and baths are grouped logically |
| Feature highlights | Which premium details deserve extra emphasis |
| Closing sequence | What shot leaves the property feeling memorable |
This planning stage is where storytelling starts. Not dramatic storytelling. Spatial storytelling. Buyers should never feel lost, and sellers should never feel like the edit exaggerated what the house itself is.
Assembling Your Timeline for Narrative Flow
Once the footage is organized, the rough cut becomes much easier. The goal isn't polish yet. The goal is to create a sequence that feels like a confident tour.
Start with the shot that earns attention
Your opener should do one of three things well:
- Establish the setting: A strong exterior or approach shot
- Show the wow factor: The living room, view, pool, or kitchen if that's the property's anchor
- Create orientation: A shot that tells the viewer what kind of home they're about to see
Weak opening shots create drag immediately. If the first clip feels accidental, the whole video feels amateur.
A hero shot should feel intentional. Not random. Not just the first usable clip in the folder.
Build the sequence like a real walk-through
Most viewers won't consciously analyze the order, but they feel when it's wrong. Jumping from kitchen to upstairs bath to backyard to primary bedroom makes the property harder to understand.
A better rough-cut rhythm is usually:
- Exterior arrival
- Entry
- Main living spaces
- Kitchen and dining
- Secondary spaces
- Primary suite
- Outdoor features
- Closing exterior or signature interior
This isn't rigid. Some homes need a different emphasis. A condo with a skyline view might open inside. A luxury property might start on the outdoor amenity that defines the listing. But the flow still needs logic.
Keep asking one question: if someone walked this home in person, would this sequence feel natural?
Pace it tightly
Real estate video editing works best when clips move with purpose. A practical benchmark is to keep individual shots under 3 seconds and final listing videos around 2–3 minutes, with exports commonly delivered as MP4 at 1920×1080 and under 200 MB for easier sharing and platform upload, according to Styldod's practical guide to editing real estate videos.
That benchmark helps because many editors hold shots too long. They fall in love with camera movement and forget that buyers absorb rooms quickly. The moment a shot stops revealing new information, it starts feeling slow.
Rough cut first, finesse later
Don't start color grading mid-assembly. Don't tweak every transition while you're still figuring out the room order.
Use a simple assembly pass:
- Trim in and out points so movement starts clean and ends before it drifts
- Place only your best angle per moment unless the second angle adds real value
- Flag gaps in coverage where the tour feels abrupt or spatially confusing
- Mark upgrade shots that may deserve slower treatment, text, or a detail insert later
A rough cut should feel coherent even without music, graphics, or branding. If it doesn't, no amount of polish will fix the underlying problem.
Adding Polish with Color Stabilization and Audio
Many editors overdo it. They mistake visible effort for quality.
The best polish usually feels invisible. The viewer notices that the home looks clean, bright, and refined. They shouldn't notice that the editor was trying to impress them.
Correct first, grade second
Color correction fixes problems. Color grading adds style. Get that order wrong and the whole video starts to look artificial.
Correction is room by room work:
- Neutralize orange interior lighting when it muddies walls and cabinets
- Bring back shadow detail without flattening the image
- Tame blown highlights around windows
- Match adjoining rooms so the house feels consistent
Grading comes after that. Even then, keep it restrained. If the hardwood turns too rich, the grass too electric, or the walls too creamy, trust drops fast.
Stabilize only what deserves saving
Not every shaky clip is worth rescuing.
Warp Stabilizer in Premiere Pro or stabilization tools in DaVinci Resolve can clean up mild motion issues. But if the shot has major wobble, edge warping, or inconsistent horizon drift, replacing it is usually better than forcing it into the edit.
A stabilized shot should still feel like camera movement, not software intervention.
Over-stabilized footage can make walls bend and door frames warp. Buyers may not know why it looks odd, but they'll feel it.
Use motion effects sparingly
Cinematic techniques have a place in real estate video editing. They just shouldn't become the main event.
A common workflow for movement transitions uses speed ramps with the acceleration isolated to only the faster segment, paired with motion blur to preserve smoothness. One workflow backs up the clip by 5 frames, inserts a speed break, and can ramp the ending segment up to 20×. Another recommends keeping zoom-ins modest at about 4–10% so interiors don't feel overpunched, as shown in this property tour speed-ramping workflow.
That's useful technique. It's not a universal instruction.
Here's where it works well:
| Technique | Good use | Bad use |
|---|---|---|
| Speed ramp | Transitioning through hallways or doorway movement | Every other shot |
| Motion blur | Smoothing accelerated movement | Hiding poor camera operation |
| Digital zoom | Emphasizing a detail shot subtly | Simulating fake camera variety in wide room shots |
Audio does more than fill silence
A weak audio bed can make a good edit feel cheap. A good one supports pacing without competing with the visuals.
For most listing films:
- Choose licensed music that fits the home's style
- Keep levels conservative so the soundtrack doesn't dominate
- Use voiceover only when it adds context, not because the video feels empty
- Clean dialogue aggressively if an agent intro is included
Music should reinforce the property's tone. Crisp and modern for a contemporary condo. Softer and warmer for a family home. Refined and restrained for luxury.
A final polish pass should ask three things. Does the home look natural? Does movement feel intentional? Does the soundtrack support the property instead of calling attention to itself?
If yes, you're close.
AI-Accelerated Editing for Speed and Scale
Manual editing still matters. Taste still matters. But a lot of production time gets wasted on repetitive work that doesn't require artistic judgment.
That's where AI tools are useful.
Where AI helps immediately
The biggest gains usually come from tasks editors repeat for every property:
- Captions: Auto-generating subtitles for agent intros, voiceovers, and short-form clips
- Scene selection: Surfacing stable, well-composed moments from longer takes
- Resizing: Turning horizontal footage into vertical and square variants faster
- Brand consistency: Reapplying logos, fonts, lower-thirds, and color treatments without rebuilding each time
That's useful whether you're a solo videographer or an in-house marketing team handling multiple listings.
Agents exploring broader workflow automation often benefit from reading RealEstateCRM on AI for agents, especially if they're trying to connect content production with the rest of their marketing stack.
AI should remove busywork, not judgment
The mistake is letting AI decide the whole edit.
An AI tool can suggest the cleanest portion of a hallway glide. It can't always tell whether that clip misrepresents the room. It can generate captions quickly. It can't decide whether the sentence itself builds trust. It can resize a video for Reels. It can't choose the right opening hook for a luxury buyer versus a first-time buyer.
That's still editor territory.
This matters even more in real estate because the strongest edits depend on context. A tool may identify the sharpest frame. A practitioner identifies the most honest frame.
A quick visual walkthrough helps if you want to see what modern AI-assisted production looks like in practice.
The practical standard
The best AI workflow is simple:
- Let software handle repetitive setup work.
- Make the structural edit yourself.
- Review every automated output for accuracy.
- Keep final creative decisions human.
That combination gives you speed without turning the video into generic template content.
Branding Templates and Multi-Platform Export
A clean final cut is only half the job. Clients hire one shoot, but they need a package that can live on the MLS, Instagram, TikTok, YouTube Shorts, Facebook, email, and paid ads without looking chopped up or off-brand.
That starts with templates.
Good branding templates save time, but the bigger benefit is consistency. The address appears in the same position every time. Agent lower-thirds match from one listing to the next. Captions stay readable on a phone. End cards carry the same contact details and visual identity, so buyers and sellers remember who produced the video.
I keep a reusable set for four elements:
- Intro and outro cards with agent or brokerage branding
- Lower-thirds for names, addresses, and feature callouts
- Caption presets sized for mobile viewing
- End screens with contact details and website prompts
Without templates, editors waste time rebuilding the same assets and small inconsistencies start to stack up. One listing uses a serif font, the next uses a bold sans, the third has captions too low for Reels UI. That kind of drift makes a team look disorganized.
The export plan matters just as much. Real estate video editing is no longer about delivering one polished walkthrough and calling the job done. The better approach is to cut a master listing film, then turn the same footage into a content set that builds buyer trust at every touchpoint.
That means each version needs its own job.
A horizontal listing video should explain the home clearly and accurately. A vertical Reel should open with the strongest visual or most buyer-relevant feature in the first seconds. A neighborhood cut should sell the surrounding lifestyle without pretending the coffee shop across town is next door. An agent brand clip should reinforce expertise and familiarity, not interrupt the property story.
A practical content package usually includes:
- Main horizontal listing film: Full property story and layout flow
- Vertical feature clip: One standout space such as the kitchen, backyard, or primary suite
- Neighborhood cut: Exterior context and local lifestyle footage
- Agent brand clip: On-camera intro, market update, or listing teaser
- Ad variants: Multiple openings and captions built from the same core footage
If you want a faster way to manage those versions, a real estate video repurposing workflow can help organize the output without rebuilding every deliverable from scratch.
Cut for the platform, not just the property
One of the biggest editing mistakes is exporting the same timeline in different aspect ratios and calling it multi-platform distribution. That creates awkward crops, slow openings, and text that feels copied over from the listing video.
Platform-native edits perform better because viewer behavior changes by placement. MLS and Zillow viewers want clarity. Reels and Shorts viewers need a fast hook. Facebook often works better with square or vertical framing and larger text overlays. Each version should have its own pacing, opening shot, and on-screen copy.
I often reorder the same footage three or four different ways. The wide front exterior that works as a calm opener in the listing film may be the second or third shot in a Reel, replaced by the best kitchen angle or backyard reveal. That is how one shoot becomes a full campaign instead of a single asset stretched too far.
Platform-Specific Video Export Settings for Real Estate
| Platform | Aspect Ratio | Resolution | Max Length | Recommended Format |
|---|---|---|---|---|
| Instagram Reels | 9:16 | 1080 × 1920 | Keep it short and platform-native | MP4 |
| TikTok | 9:16 | 1080 × 1920 | Keep it short and hook-driven | MP4 |
| YouTube Shorts | 9:16 | 1080 × 1920 | Keep it concise and mobile-friendly | MP4 |
| 1:1 or 9:16 | 1080 × 1080 or 1080 × 1920 | Match placement and viewing context | MP4 | |
| Zillow or MLS listing | 16:9 | 1920 × 1080 | Full listing tour length | MP4 |
Length depends on the property and the hook, but the rule stays the same. Every export should feel native to the platform where it appears.
The easiest repurposing mistake is exporting one master file in different sizes and calling that a strategy. Real repurposing changes the shot order, text, pacing, and opening scene.
Your One-Page Real Estate Video Editing Checklist
A repeatable workflow beats inspiration every time. When deadlines stack up, a checklist protects quality.
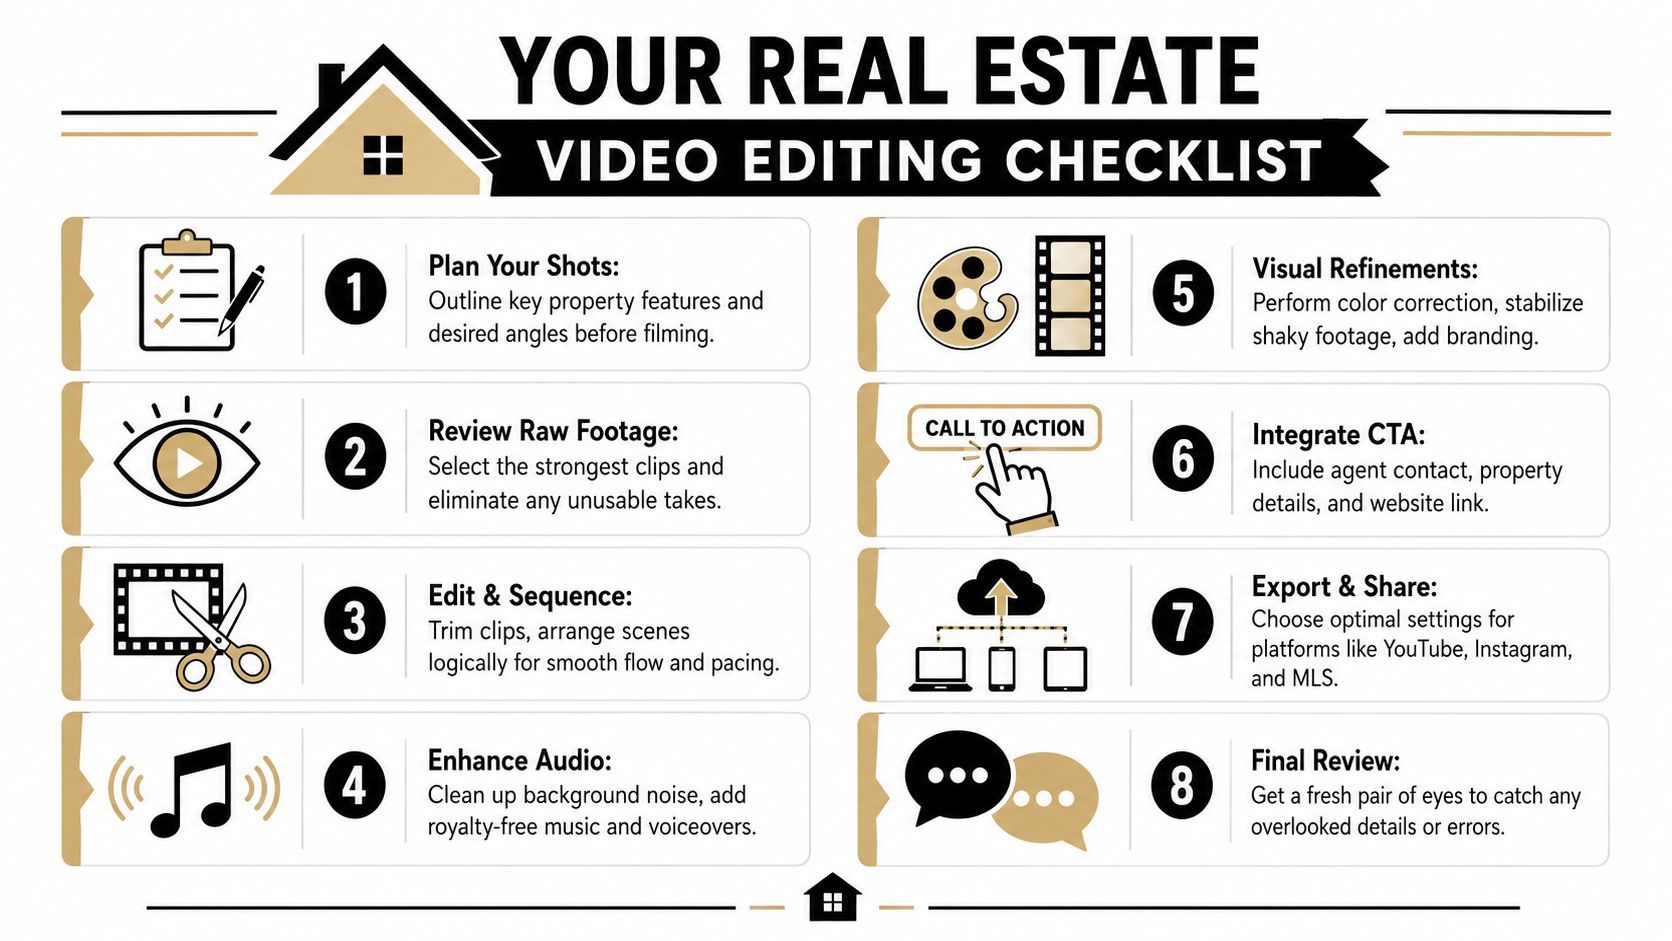
Print this and use it on every project
- Organize the shoot: Sort footage into drone, interiors, details, neighborhood, audio, and exports.
- Cull aggressively: Remove shaky, redundant, distorted, or misleading clips before editing.
- Map the walkthrough: Decide the natural property path so the home feels easy to understand.
- Build a rough cut: Start with the strongest opener and keep the sequence logical.
- Trim for pace: Keep shots moving and remove any clip that stops adding information.
- Correct the image: Balance exposure, white balance, shadows, and room-to-room consistency.
- Polish with restraint: Add stabilization, music, captions, and transitions only where they help.
- Export as a package: Deliver the main listing video plus platform-specific versions for social.
Final review questions
Before sending the video to a client, run one last pass:
| Check | What to ask |
|---|---|
| Accuracy | Does the home still look like itself? |
| Flow | Can a buyer understand the layout easily? |
| Branding | Are graphics clean, consistent, and unobtrusive? |
| Platform fit | Does each export feel native to where it will be posted? |
A polished edit should make the property look desirable without crossing into exaggeration. That's the line experienced editors learn to protect.
If you want to turn one property shoot into multiple polished videos without rebuilding everything by hand, ShortGenius (AI Video / AI Ad Generator) helps speed up scripting, captions, resizing, branding, and multi-channel publishing so your real estate video editing workflow stays fast, consistent, and easier to scale.