How to Make Green Screen Video Like a Pro
Learn how to make green screen video with our complete guide. Get actionable tips on lighting, shooting, and editing for professional results in 2026.
You’ve seen it a thousand times—a weather forecaster standing in front of a swirling storm map, or a YouTuber appearing to be on a tropical beach while sitting in their bedroom. That’s the magic of green screen, a technique that lets you swap out your real-world background for any image or video you can imagine.
This process is technically called chroma keying, but don't let the fancy name fool you. The concept is surprisingly simple: you film yourself against a solid-colored background (usually a specific shade of green) and then use software to make that exact color transparent. This reveals whatever you've placed on the video layer underneath, creating a seamless new scene.
Your Guide to Professional Green Screen Video
What was once a high-budget Hollywood trick is now a go-to tool for content creators everywhere. But getting it right takes more than just a green sheet. The secret isn't the screen itself, but how you use it.
There are really only three core ingredients to a great green screen shot:
- A Solid Background: This could be a professional pop-up screen, a freshly painted wall, or even a large piece of bright green poster board. The key is an even, consistent color with no wrinkles or sheen.
- Clean, Even Lighting: This is, without a doubt, the most critical part. You have to light your background and your subject separately. Getting this wrong is the number one reason for messy, amateur-looking results filled with weird shadows and flickering edges.
- The Right Software: This is where the magic happens. Your editing tool, whether it’s a desktop program, a mobile app, or a modern AI platform, does the heavy lifting of removing the green.
The rise of accessible green screen tools has been incredible to watch. By 2023, creators on platforms like TikTok and Instagram were using green screen effects more than 2.5 billion times every month. For brands, this isn't just a gimmick; green screen videos have been shown to increase viewer engagement by an average of 35% by allowing for more dynamic and visually interesting content. You can explore more about these trends and their impact on content strategy.
New AI-powered tools like ShortGenius are taking this even further by automating the entire keying process. What used to be a tedious, frame-by-frame task can now be done in just a few clicks. In this guide, we'll walk you through every step to get that professional look, from setup to final export.
Want to know the secret to a professional-looking green screen video? It has nothing to do with fancy editing plugins or expensive software. The real magic happens before you ever press record.
If you skimp on your setup, you’re just creating a massive headache for yourself in the editing room. Trust me, spending an extra 20 minutes getting things right on set will save you hours of frustrating cleanup later.
Choosing Your Green Screen
First things first, let's talk about the actual screen. You've got a few solid options, and what you choose really just depends on your space and how often you'll be using it.
- Collapsible Screens: These are fantastic for portability. If you're shooting in different locations or have a small space, a pop-up fabric screen is a lifesaver.
- Seamless Paper: For a super smooth, crease-free surface, a big roll of chroma key green paper is tough to beat. Just be careful not to tear it.
- Chroma Key Paint: If you have a dedicated studio space, painting a wall is the most permanent and reliable solution. No wrinkles, ever.
No matter which you pick, the single most important thing is making sure the surface is as smooth and wrinkle-free as possible. Creases and shadows are the enemies of a clean key.
Before you even think about pointing a camera, you need a plan. This checklist covers the absolute essentials for a solid green screen setup.
Essential Green Screen Setup Checklist
Here's a quick-reference guide to the key materials and settings you'll want to lock in before you start shooting.
| Component | Recommendation | Why It's Important |
|---|---|---|
| Green Screen | Smooth, non-reflective material (fabric, paper, or paint) | A consistent, even color is the foundation for a clean key. |
| Background Lights | At least 2 soft, diffused lights | Creates an even field of light across the screen, eliminating shadows. |
| Subject Lights | Standard 3-point setup (Key, Fill, Backlight) | Properly lights your subject while separating them from the background. |
| Subject Distance | At least 6 feet from the screen | The best way to prevent green "spill" from bouncing onto your subject. |
| Camera Settings | Low ISO, shutter speed 1/100s or faster, high-quality codec | Reduces digital noise and motion blur, giving the software more data to work with. |
Getting these elements right from the start is genuinely half the battle won. It's the difference between a 10-minute key and a 3-hour nightmare.
The Make-or-Break Role of Lighting
If I could only give one piece of advice for green screen work, it would be this: light your background and your subject separately. This is not optional. It's the core principle of good chroma keying.
Your goal for the green screen is a flat, even blanket of light. Shadows are your worst enemy because they create different shades of green, which confuses the keying software and leads to splotchy, amateur results. Place at least two lights, one on each side, dedicated solely to lighting the screen. Look at your camera's monitor—the background should look like one solid, vibrant block of green with no hot spots or dark patches.
This simple workflow breaks down the entire process, from what we're doing now all the way to the finished product.
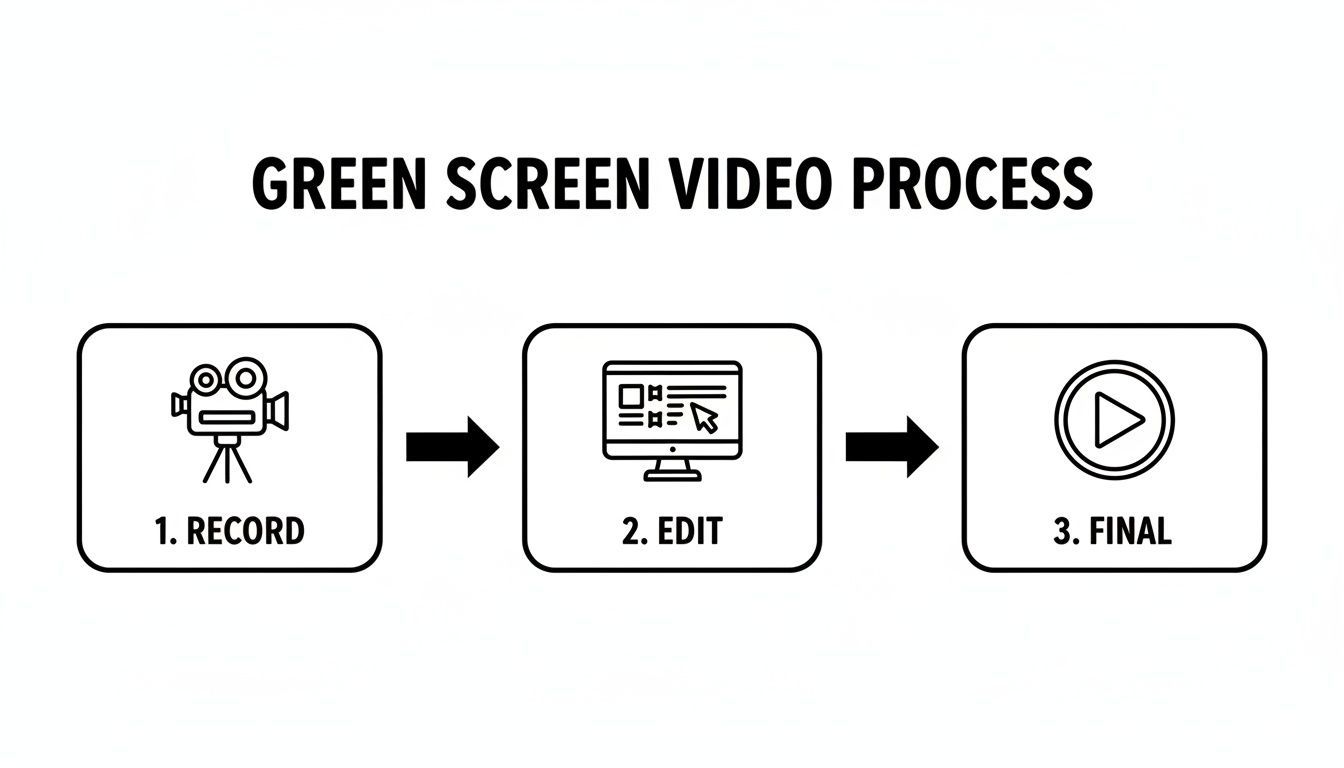
As you can see, a successful final video is built on distinct recording and editing phases. Nail the first one, and the second becomes infinitely easier.
Dialing in Your Subject and Camera
Once your background is perfectly lit, then you can light your subject. The classic three-point lighting setup (a key light, a fill light, and a backlight) is the industry standard for a good reason. The backlight, in particular, is critical here. It hits your subject's hair and shoulders, creating a subtle rim of light that cleanly separates them from the green screen and prevents that nasty green halo effect.
I’m not exaggerating when I say that bad lighting is behind an estimated 80% of chroma key failures. A simple three-point setup can cut down on problematic shadows by as much as 70%. You don't need a Hollywood budget, either. For short-form content, even a few well-placed household lamps can boost video quality scores on platforms by up to 40%. If you need a visual guide, you should watch this tutorial on effective green screen lighting techniques.
Pro Tip: Always keep your subject at least six feet away from the green screen. This distance is your best defense against color spill and also stops your subject's shadow from being cast onto the background.
Finally, a quick word on camera settings. Set your ISO as low as it will go to avoid grainy footage. A noisy video is a nightmare to key. Use a faster shutter speed—think 1/100 or higher—to minimize motion blur, because blurry edges are nearly impossible for the software to track cleanly.
Always shoot in the highest resolution and quality your camera can handle. Yes, the files will be bigger, but that extra data gives you far more flexibility in post and makes the final result look much more professional.
On-Set Techniques for Flawless Footage
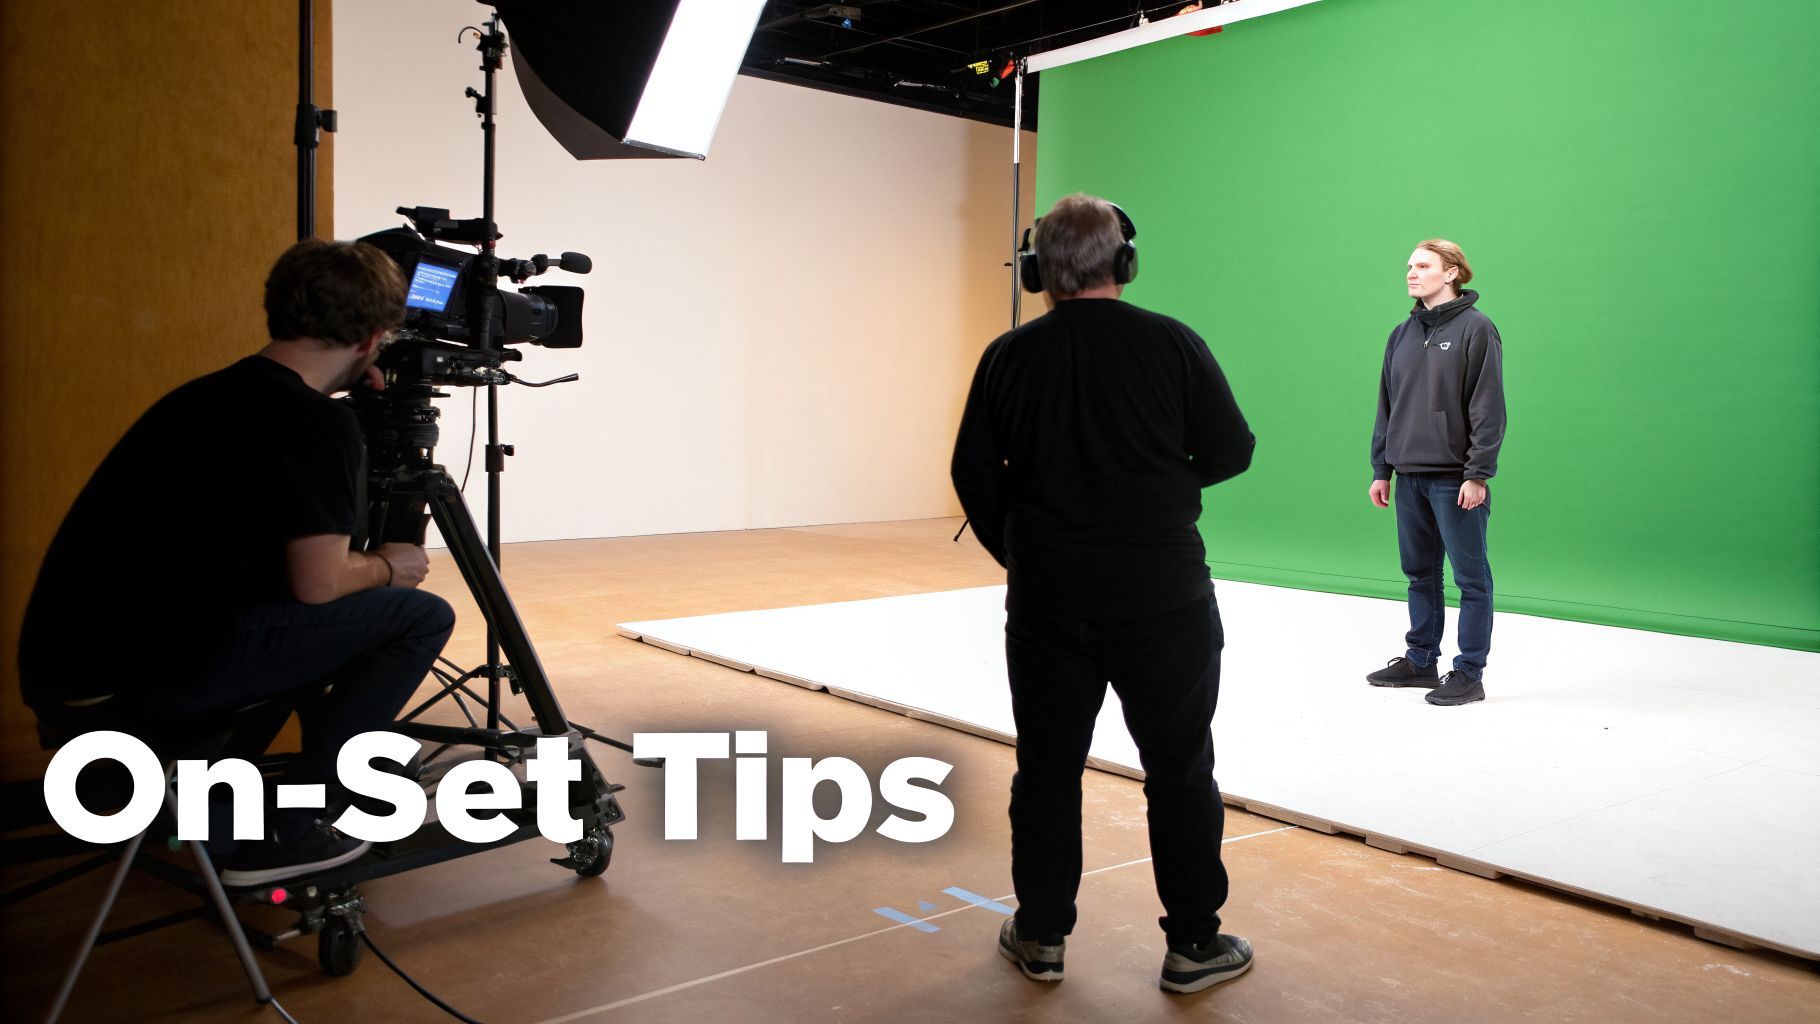 Once your lights are perfect and the screen is smooth, you’re ready to shoot. This is where the real magic happens, and a little discipline on set can save you hours of frustration in the edit. Every choice you make now directly impacts how easily your software can pull a clean key.
The single most important factor? Distance. You absolutely must place your subject at least six feet away from the green screen. This isn't just a suggestion; it's the key to avoiding color spill.
Spill is that nasty, amateur-looking green halo that bounces off the screen and contaminates the edges of your subject. It clings to hair and the shoulders of clothing, and it's a nightmare to clean up later. That six-foot buffer also prevents your subject's shadow from falling on the screen, which creates dark spots that the software can't key out.
Framing for Post-Production Success
When you're lining up your shot, fight the instinct to frame it perfectly in-camera. Instead, pull back. Leave more green space around your subject than you think you need. This is your get-out-of-jail-free card during post-production.
This extra room gives you the freedom to reframe, crop, or even create artificial camera moves like a slow push-in or pan. A tight shot is a permanent decision, but a wider shot is full of possibilities.
If you’re planning a shot with camera movement, you’ll want to add tracking markers to your screen. These are just small, non-green shapes—think black tape 'X's—stuck to the background. They give your software reference points to track the motion, ensuring your new background moves realistically with the camera.
One Simple Trick The Pros Use Before you even call "action" on your first take, record a "clean plate." This is a quick, five-second shot of just the empty, perfectly lit green screen. Handing this reference clip to your editing software tells it exactly what shade of green to remove, making your chroma key incredibly accurate.
Maintaining a Clean Shot
Beyond the big stuff, it's the small details that elevate your footage. Consistency is everything.
- Ditch the Bling: Have your subject remove reflective jewelry, glasses, or anything shiny. These surfaces will pick up green reflections that are almost impossible to fix.
- Mind the Motion: Fast movements cause motion blur, creating fuzzy edges that are a headache to key. If the action allows, encourage your subject to move a bit more deliberately.
- Lock It Down: Once your camera, tripod, and lights are set, they are set in stone. Don't touch them. Even a tiny nudge can alter the lighting on the screen and make keying much harder.
Mastering these on-set habits will make your life in the editing bay infinitely easier, letting you concentrate on being creative instead of fixing technical problems. While these fundamentals apply everywhere, it's worth noting how AI is transforming specialized workflows, like creating compelling AI-powered UGC ads using virtual sets and backgrounds.
Alright, you've nailed the shoot. Now for the fun part: making that green screen disappear in post-production. This is the chroma keying stage, where you tell your software to remove every last pixel of that specific green hue, swapping it out for whatever background you have in mind.
Every editing program has its own way of doing this, but the goal is always the same: get a clean separation between your subject and the background without chewing into the edges. Honestly, the better your on-set lighting was, the less work you'll have to do here. A one-click key is the dream, but most of the time, you’ll need to do some fine-tuning to get a professional result.
Keying in Desktop Software
If you're after maximum control, you'll want to use professional desktop editors. Tools like Adobe Premiere Pro and After Effects are the gold standard for a reason—they offer incredibly powerful tools for pulling a clean, precise key.
In Premiere Pro, your workhorse is the Ultra Key effect. Just drag it onto your green screen clip, grab the eyedropper, click on the green background, and poof—it's gone. The real magic, though, is in the settings panel. This is where you can tweak how the key handles transparency, shadows, and pesky light spill.
After Effects takes things up a notch with its Keylight effect. It’s legendary for how well it handles the tough stuff, like fine hair detail and motion blur. You start the same way—by selecting the screen color—but Keylight gives you advanced controls like "Screen Gain" and "Screen Balance" to really dial in the matte, which is a lifesaver if your lighting wasn't perfectly even.
A pro tip I give everyone: always check your "Alpha Channel" or "Matte" view. This black-and-white view is the source of truth. It shows you exactly what's transparent (black) and what's opaque (white). You're aiming for a solid white subject on a solid black background. If you see gray, noisy spots, you've got more work to do.
Mobile and AI-Powered Alternatives
You definitely don't need a beast of a computer to pull off a great green screen effect these days. Mobile apps have made chroma keying surprisingly accessible and effective.
A great example is CapCut. Its "Chroma Key" feature is dead simple: tap the green background, use the color picker, and then adjust the intensity and shadow with a couple of sliders. It's incredibly fast, intuitive, and more than good enough for most social media content.
The biggest game-changer in recent years, though, is AI. Tools like ShortGenius are completely rethinking the workflow. Instead of you manually selecting a color to key out, these platforms often use sophisticated AI models for automatic background removal.
You just upload your video, and the AI does the hard work of identifying and isolating the person from their surroundings—no green screen necessary. This is a massive time-saver, but it also opens up creative doors you might not have considered. If you want to see just how far this tech has come, check out our deep dive on https://shortgenius.com/models/text-to-video.
Green Screen Editing Tool Comparison
The right tool for you really comes down to your project's complexity, your own skill level, and frankly, how much time you're willing to spend in the edit.
To make it easier, here's a quick comparison of the options we've covered.
| Tool | Best For | Keying Method | Ease of Use |
|---|---|---|---|
| Premiere Pro (Ultra Key) | All-around video editing | Manual chroma key | Intermediate |
| After Effects (Keylight) | Complex shots with fine details | Advanced manual chroma key | Advanced |
| CapCut | Quick social media videos | Simple chroma key | Beginner |
| AI Tools (ShortGenius) | Speed and automated workflows | AI background removal | Beginner |
Ultimately, choosing the right software is about matching its capabilities to your creative vision and workflow.
Once your key is looking perfect, don't forget the final touches that make your content accessible to everyone. Following a good guide to subtitles and closed captions is a crucial next step. It ensures your video can be enjoyed by a wider audience, which is key to maximizing its impact and engagement online.
Fixing Common Green Screen Problems
Let's be honest: even when you think you've nailed the setup, post-production can throw you a curveball. Knowing how to fix the inevitable green screen hiccups is what really separates clean, professional footage from something that just looks... off.
But a tricky key doesn't mean you have to scrap the take and start over. It just means it's time to roll up your sleeves and do a little finessing in the edit.
One of the most common issues I see is a noisy or "fizzy" key. This is when the edges around your subject seem to crawl and sparkle, and it's almost always a result of shooting with a high ISO. That high ISO introduces digital grain, and your keying software gets confused, unable to tell the difference between the grain and the actual edge of your subject.
The fix is surprisingly simple. Most editing software comes with a denoiser effect. The trick is to apply it to your clip before you add your chroma keyer. This cleans up the image first, giving the keyer a smooth, clean signal to work with and practically eliminating that distracting edge fizz.
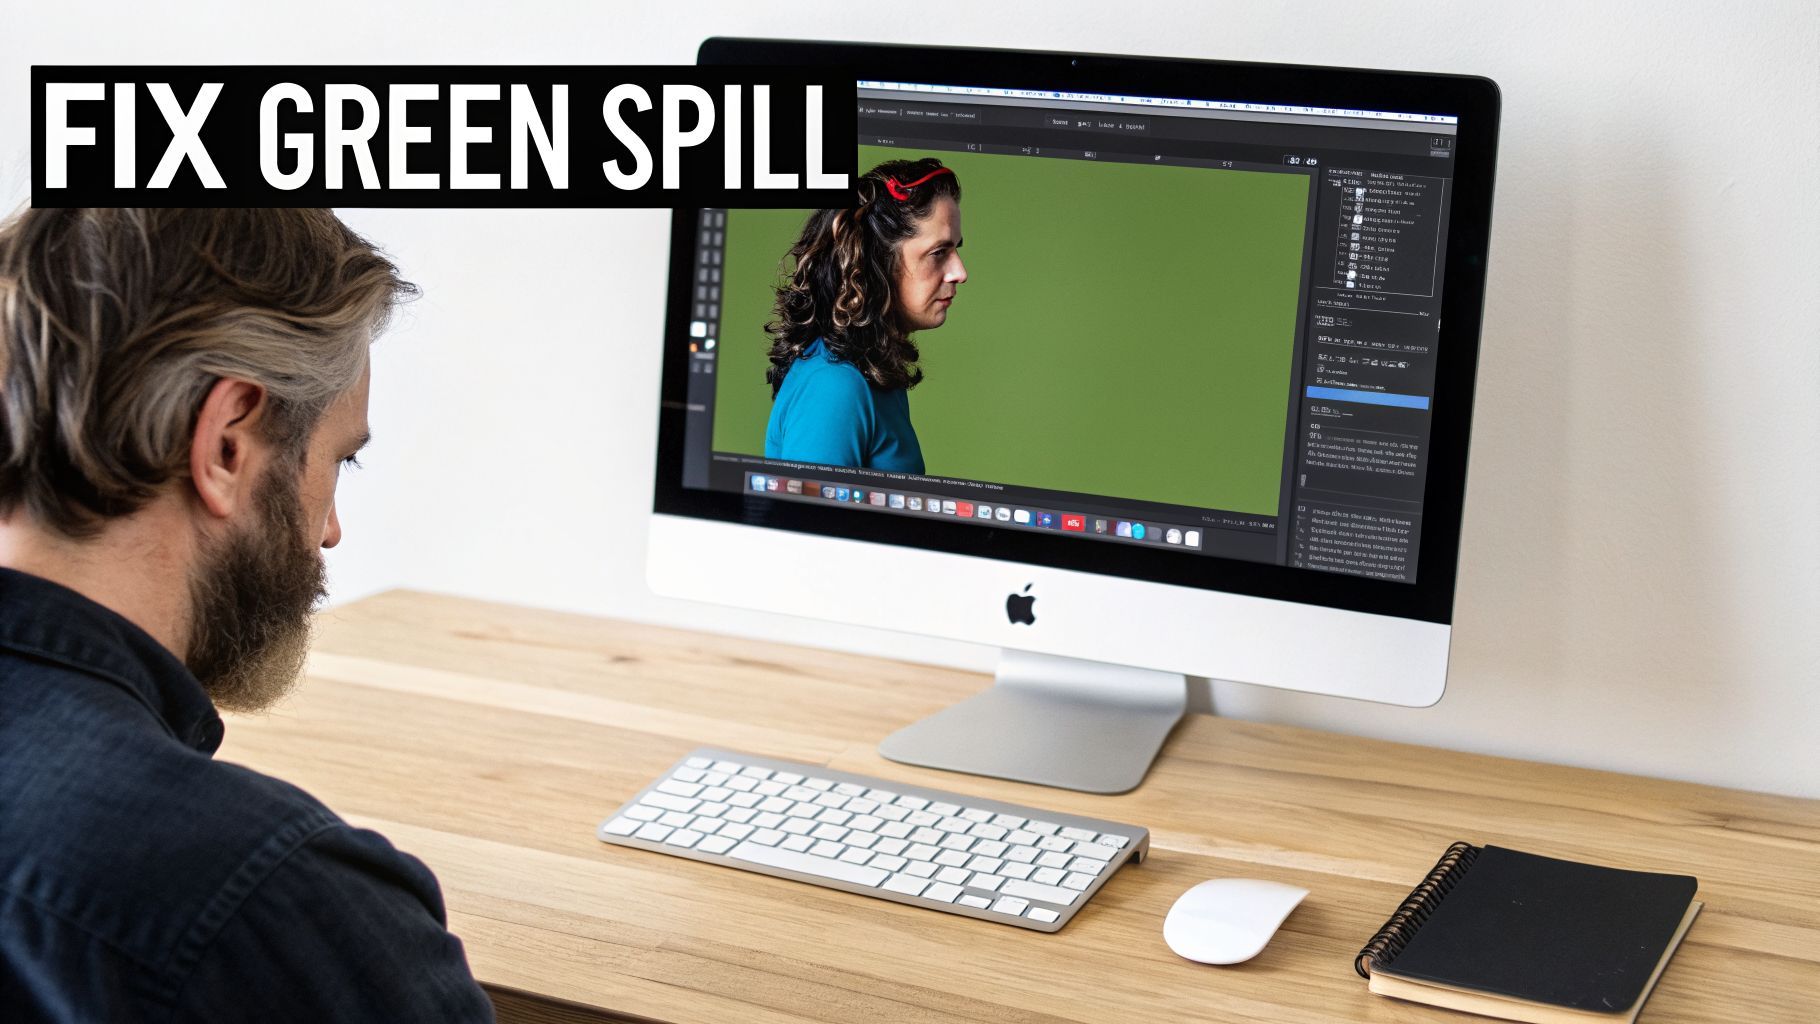
Battling Unwanted Green Spill
Another dead giveaway of a beginner's green screen video is color spill. That’s the nasty green halo you see bleeding onto your subject’s hair, shoulders, or even a white shirt. It’s caused by light bouncing off your green screen and reflecting back onto your talent.
Thankfully, nearly every keying tool worth its salt has a built-in spill suppression feature to combat this. This tool zeroes in on that specific shade of green around your subject's edges and desaturates it without messing up the other colors.
- Find the spill tool: In Adobe Premiere Pro's Ultra Key or After Effects' Keylight, this is usually a dedicated slider or dropdown menu.
- A little goes a long way: Be gentle with this effect. You want to dial it up just enough to cancel out the green tint. If you push it too far, your subject's edges will turn a lifeless gray.
- Check your work: Always scrub through the timeline to make sure the suppression looks good throughout the clip, especially as your subject moves.
Fixing Blotchy Keys and Preserving Detail
What if your key is splotchy, leaving behind stubborn green patches or, worse, making parts of your subject transparent? That's a classic sign that your green screen wasn't lit evenly. Your software is only pulling the exact shade of green you selected, leaving all the others behind.
The Power of Garbage Mattes Instead of fighting to get a perfect key across the entire frame, just focus on what matters: the area immediately around your subject. Use a "garbage matte"—a quick, rough mask you draw—to crop out the badly lit corners and edges of your screen. This tells the software to ignore those problem areas and concentrate its keying power where it counts.
The final hurdle is often saving those fine details, especially hair. It’s easy to crush a key too hard and watch all those delicate strands disappear. The key (pun intended) is to refine your matte's edges. Look for settings like "Matte Finesse," "Soften," or "Feather" in your effects panel. Adding just a tiny bit of softening can help blend the hair more naturally into your new background, bringing back details you thought were lost for good.
For the really tough spots, you can pair these traditional tools with AI. If a small section just refuses to key properly, you might be able to use a modern AI editor to repair or paint out that specific area. We dive deeper into how AI can handle these tough jobs in our guide on advanced image editing with AI.
Got Green Screen Questions? Let's Answer Them.
Once you start setting up your screen and hitting record, the real-world questions always begin to surface. Getting that perfect green screen shot is all about learning to adapt to your specific room, your gear, and what you’re trying to create. Let's tackle some of the most common hurdles creators face.
Green Screen or Blue Screen?
This is a classic. For most people, green is the go-to standard, and there's a good technical reason for it. Modern digital camera sensors are built to be most sensitive to green light, meaning they capture more detail in that specific color channel. All that extra data gives your editing software more to work with, which almost always means a cleaner, easier key.
So, when would you ever use blue? A blue screen is the only logical choice if your subject has anything green on them. Think about it—a green polo shirt, a tie with a green pattern, or even a logo on a hat will vanish right along with your background. Blue screens also have a slight edge for creating darker, moodier scenes, as any color spill can look a bit more natural than the vibrant green glow.
Can I Actually Make a Green Screen Video on My Phone?
You absolutely can. Gone are the days when you needed a powerful computer to pull this off. Mobile apps like CapCut have made chroma keying incredibly simple and accessible. The workflow is surprisingly smooth: you just import your green screen clip, drop your new background on the track below it, and use the chroma key effect to make the green disappear.
The real secret to success on mobile is lighting. Your smartphone's camera has a tiny sensor that already struggles in dim conditions. Give it a fighting chance by filming near a big, bright window. That soft, natural light will make your green screen much more even, reduce that grainy video noise, and make the whole keying process ten times easier.
Is It Possible to Do This Without Special Lights?
Yes, you can definitely get by without a pro lighting kit, but you have to be realistic about the results. As I mentioned, a large window on an overcast day is your best friend here. It acts like a giant, free softbox, giving you diffused light that helps illuminate your screen and get rid of those harsh, ugly shadows.
The main catch is that natural light is unpredictable. A cloud rolling by can change the brightness and color of the light hitting your screen, which can lead to a flickering effect in your final video. Your key might not be as flawless as it would be with a controlled three-point lighting setup, but for most social media videos, it's often more than good enough.
How AI Is Changing the Game
AI tools are a massive shortcut, completely changing how we approach background removal. Instead of painstakingly tweaking settings to isolate a specific shade of green, many AI platforms can now automatically detect the person in the frame and cut them out from the background—green screen or not. This saves a ton of time and makes the process accessible to everyone, regardless of their technical skill.
But it doesn't stop there. AI-powered editors often come loaded with huge libraries of virtual backgrounds, from sleek office sets to wild fantasy landscapes. Some can even generate brand-new scenes from a simple text prompt. What used to be a complex, multi-step editing task is now often a one-click affair, letting you pour your energy into the creative side of things instead of the cleanup.
Ready to skip the tedious editing and jump straight to the creative part? With ShortGenius, you can use AI to automatically remove your background and place yourself in thousands of virtual scenes in minutes. Create professional-looking green screen videos faster than ever by visiting https://shortgenius.com.