How to Make a Movie of Pictures: A Creator's Guide

Learn how to make a movie of pictures with our step-by-step guide. Transform your photos into a polished video with narrative planning, music, and export tips.
You've probably done this before. You gather a folder of great photos, drop them into an editor, add a song, click a theme, and end up with something that feels more like a screensaver than a movie.
That gap matters. A movie made from pictures doesn't fail because the software was weak. It usually fails because the images were never given a job to do. If every photo is “nice,” but none of them moves the story forward, the result feels flat no matter how polished the transitions look.
That's the essential answer to how to make a movie of pictures. Start by deciding what the viewer should feel, understand, and remember. The editing comes after that.
Crafting Your Story Before You Edit
The fastest way to make a dull photo movie is to open your editor too early. Software makes arranging images easy. It does not make them meaningful.
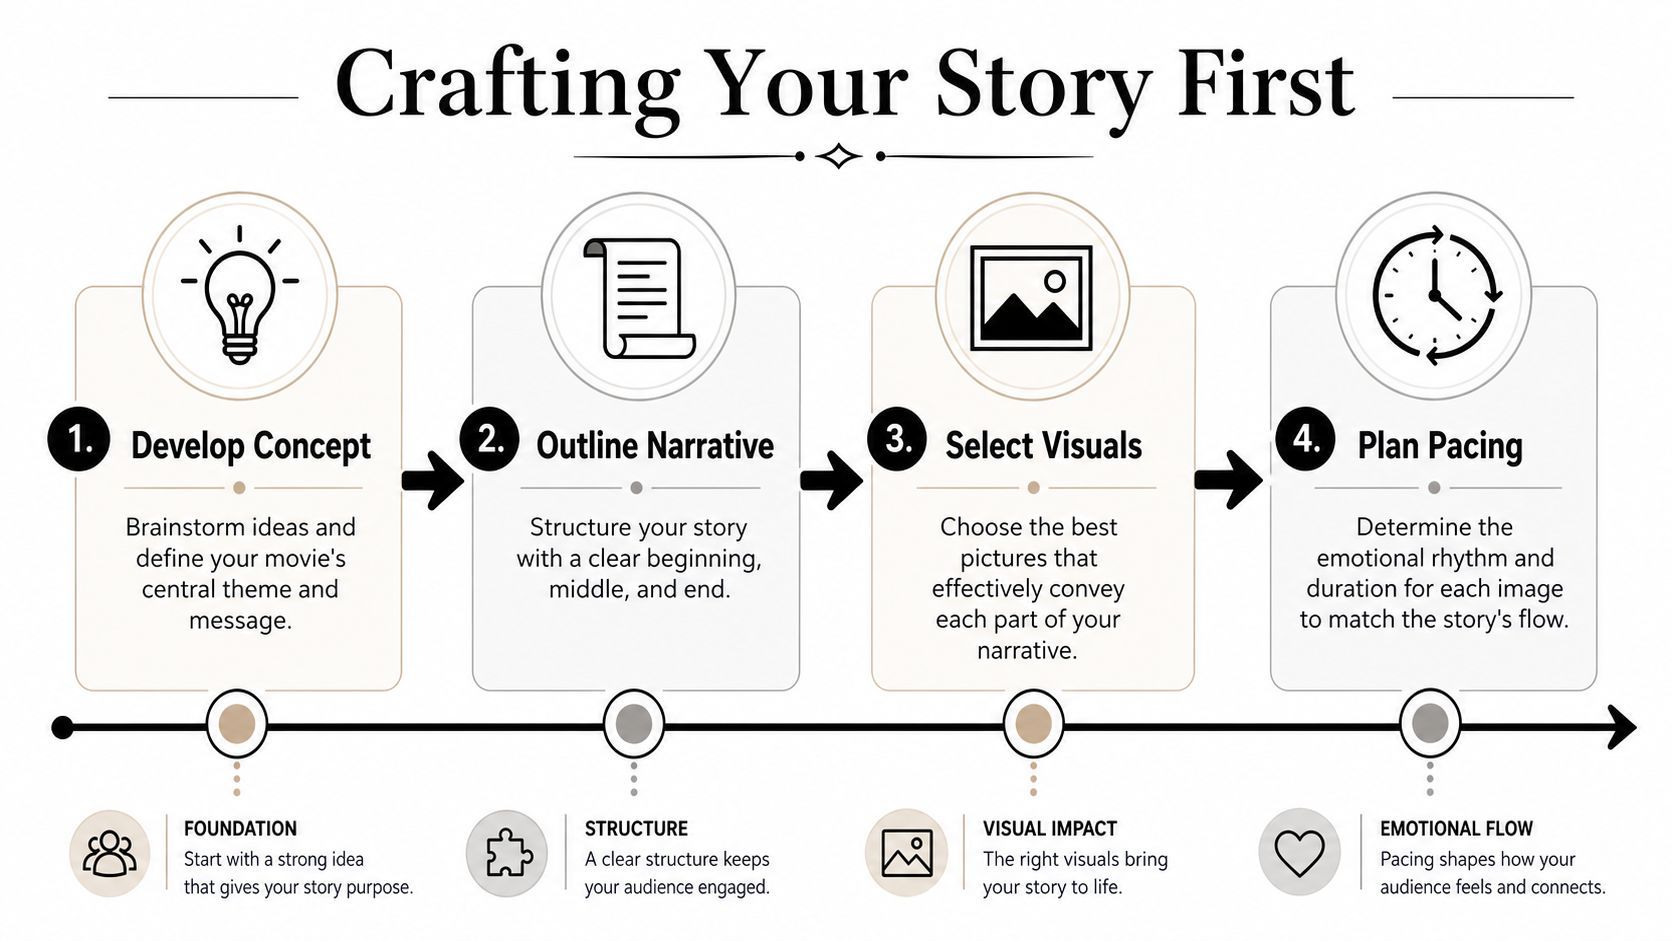
Most guides miss this narrative architecture step. One source notes that a 2 to 3 minute video often works best with 20 to 40 photos, but the bigger issue is arranging those photos into an emotional or thematic arc rather than relying on default themes from the app (research on narrative planning for photo videos). That tracks with what editors see every day. Curation beats accumulation.
Use a simple three-part arc
You don't need a screenplay. You need shape.
A photo movie works well when it has three clear movements:
-
Beginning
Open with context. Show where we are, who this is about, or what kind of mood we're entering. For a travel piece, that might be departure, arrival, or first impressions. For a memorial, it might be the strongest portrait that establishes the person immediately. -
Middle
This is where variety and progression matter. Don't stack ten similar smiling group shots. Build contrast. Mix wide images with details, quiet moments with active ones, posed photos with candid frames. -
End
End with closure, not leftovers. Choose a final image that resolves the feeling. That could be the last sunset of a trip, a family photo that ties generations together, or a single image that feels calm after a busier run.
Practical rule: If you can shuffle your photos randomly and the movie still “works,” you don't have a story yet.
Cut photos that are only decorative
A common mistake is keeping images because they're good photos, even when they're bad story beats. Those are different things.
When I sort a photo set for video, I ask each image one question: what role does this play? If it doesn't introduce, develop, contrast, or conclude, it usually goes. Decorative fillers slow the piece down and weaken the stronger frames around them.
Try this quick filter before you edit:
- Keep the anchors: Photos that define place, people, or emotion.
- Keep the transitions: Images that help the viewer move from one moment to the next.
- Cut duplicates: If two images do the same job, pick the one with clearer composition or better expression.
- Cut private-but-confusing photos: An image may mean a lot to you and nothing to a viewer. If it needs explanation, pair it with narration or remove it.
For photographers delivering work to clients, this same discipline helps enhance client delivery with engaging slideshows that feel intentional instead of auto-generated.
Build the sequence on paper first
Before opening Premiere Pro, Final Cut Pro, CapCut, Canva, Google Photos, or any other editor, make a rough shot list in plain language.
A simple version looks like this:
| Story beat | Photo choice | Why it stays |
|---|---|---|
| Opening | Arrival image | Establishes location |
| Build | Mixed candid moments | Adds energy and progression |
| Emotional peak | Best close-up or key event image | Gives the piece a center |
| Resolution | Closing portrait or quiet detail | Leaves a final feeling |
That tiny step changes everything. It gives every image a purpose, and purpose is what turns a slideshow into a movie.
Selecting and Preparing Your Photos
Once the story exists, the photo selection gets easier. You're no longer asking, “Which pictures do I like?” You're asking, “Which pictures tell this story cleanly?”
That shift usually leads to a smaller set. Good. Restraint makes the final cut stronger.
Curate like an editor, not an archivist
Consumer tools can force that discipline anyway. Google Photos limits user-generated movies to a maximum of 50 photos or videos per file, which is a useful reminder that concise stories often play better than sprawling timelines packed with every usable image. That cap pushes you to make choices instead of outsourcing taste to software.
A useful approach is to sort in passes:
- First pass: Remove obvious rejects. Blinks, accidental duplicates, soft images, awkward crops.
- Second pass: Remove near-duplicates. Keep only the frame with the clearest subject or strongest expression.
- Third pass: Match the set to your outline. If a photo doesn't support a story beat, cut it.
- Fourth pass: Check balance. Too many portraits in a row can feel static. Too many wide shots can feel emotionally distant.
The strongest photo in your folder isn't always the strongest photo for your sequence.
Fix consistency before you animate anything
A movie made of pictures feels more polished when the images belong to the same visual world. You don't need heavy grading. You do need consistency.
Focus on a few practical fixes:
- Crop with motion in mind: Leave room for subtle pans and zooms. A crop that's too tight gives you nowhere to move.
- Normalize exposure: If one photo is much darker or warmer than the next, the cut feels accidental.
- Settle on a style: Clean and natural, nostalgic and soft, bold and contrasty. Pick one lane.
- Rename in sequence: Number images in story order so you're not dragging random filenames onto the timeline.
If you're working from mixed sources, like phone photos, scanned prints, and DSLR images, don't chase perfect technical uniformity. Chase visual harmony. The viewer forgives format differences more easily than chaotic sequencing.
Prepare files for the timeline
This part saves frustration later. Export your final selects into a dedicated folder so your editor only sees approved images. Keep the folder clean and ordered.
A practical prep checklist:
| Task | Why it matters |
|---|---|
| Final cull | Prevents timeline clutter |
| Consistent crop direction | Makes movement feel intentional |
| Basic color correction | Reduces jarring jumps between images |
| Ordered filenames | Speeds up assembly |
Editors lose time when they treat the timeline like a sorting bin. The timeline should be for pacing and emotion, not cleanup.
Pacing Your Movie and Creating Movement
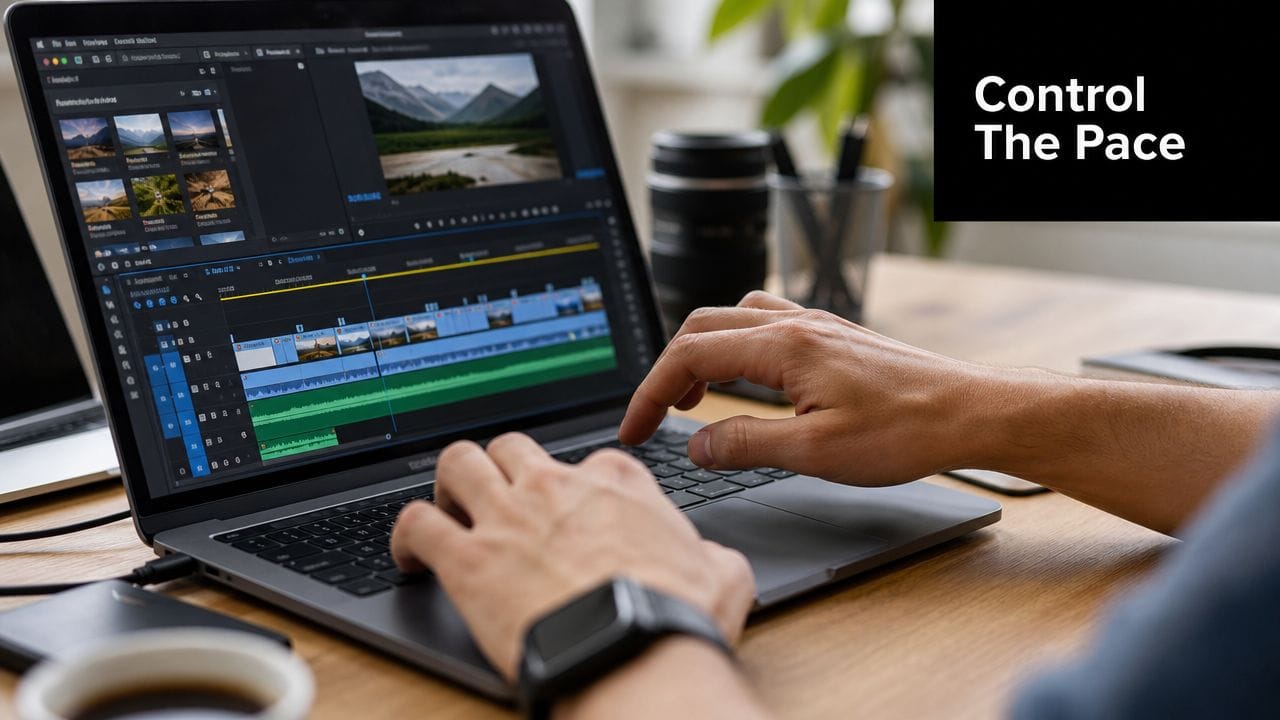
The success or failure of most picture movies often hinges on pacing and visual flow. The images may be good, but if every shot stays on screen for the same length and nothing moves, the viewer feels the machinery. They stop experiencing the story and start noticing the slideshow.
That problem shows up fast. One source reports that 68% of amateur photo-videos are abandoned within the first 15 seconds due to static pacing, and that using beat-matched timing plus dynamic moves like Ken Burns zooms can raise average view duration by up to 40% (video pacing analysis). The lesson isn't “add more effects.” It's “give still images rhythm.”
Vary duration on purpose
Equal timing is one of the easiest ways to flatten a piece. Not every image deserves the same amount of attention.
A useful range is:
- 3 to 5 seconds per image for reflective, emotional, or information-heavy moments
- 0.5 to 1 second per image for fast, energetic sections with strong music and simpler visuals
That doesn't mean you should alternate mechanically. It means the duration should reflect the job of the image. A powerful portrait often needs space. A quick sequence of travel details can move faster and build momentum.
Match the cut to the sound
If you change images without listening to the music, the video feels arbitrary. Even subtle beat awareness makes a picture sequence feel edited rather than assembled.
Look for these moments in the track:
- Beat drops or drum hits for cleaner cut points
- Chord changes for section shifts
- Vocal entrances for emotional pivots
- Breakdowns or pauses for slower, lingering images
A viewer may not consciously hear why a cut feels right, but they feel when it lands with the music.
Add movement without showing off
The Ken Burns effect still works because it mimics camera intention. A slow push-in creates intimacy. A slight pan across a wide image reveals information. A pull-back can create distance or closure.
Use it with restraint:
- Push in on faces, hands, and details that carry emotion.
- Pan across expansive scenes or group shots where multiple points matter.
- Avoid fast digital zooms unless the piece is designed to feel punchy and modern.
- Don't apply the same movement to every image. Repetition makes the effect visible.
A good rule is to decide what the viewer should notice first, then move toward it or across it. Motion should guide attention, not announce itself.
Keep transitions simple
Most photo movies need fewer transitions than people think. Straight cuts, dissolves, and occasional fades do the job.
Fancy transitions often create two problems. First, they pull attention away from the image. Second, they break tone. A memorial piece with constant spins and wipes feels careless. A fashion montage with nothing but dissolves may feel sleepy. Match transition style to subject.
Here's a quick decision guide:
| Situation | What usually works |
|---|---|
| Emotional tribute | Dissolves, slow fades |
| Travel recap | Mostly cuts, occasional gentle dissolve |
| Portfolio montage | Clean cuts, minimal effects |
| Fast social short | Sharp cuts with selective punch-ins |
Movement is what separates a static sequence from a watchable one. It doesn't require complexity. It requires intent.
Adding a Professional Audio Layer
A picture movie without thoughtful audio rarely lands with full force. You can get away with simple visuals. You can't get away with careless sound.
Music gives the viewer emotional instructions. Voiceover gives the viewer context. On-screen text can do some of that work when needed, but if the audio layer is weak, the whole piece feels less finished.
Pick music for structure, not just mood
A common mistake is choosing a song because it sounds nice in isolation. What matters more is whether it supports the shape of your sequence.
Good soundtrack choices usually have:
- A clear opening feel: Something that lets the first image arrive with intention
- A build: So the middle of the movie can gain momentum
- A sense of release or closure: So the ending feels complete
Music without lyrics is often easier to edit around than lyric-heavy tracks, especially if the photos need to carry the emotional detail. If the song does have vocals, make sure the lyrics don't compete with the images or pull the story in a different direction.
Use voiceover when the pictures need help
Some stories are visually obvious. Others need a few words.
A simple voiceover works well when:
- the viewer won't understand the significance of the images on sight
- the sequence covers a long time span and needs connective tissue
- the goal is personal, reflective, or documentary in tone
Keep the script plain. Write how you'd speak to one person. Don't narrate every image. Add meaning where the visual alone can't carry it.
If a line of narration repeats what the viewer can already see, cut the line.
Don't ignore silent viewing
Many social videos are watched with sound low or off. That doesn't make audio less important. It means your movie needs a second layer of clarity.
Use on-screen text sparingly:
- title cards for place or date
- short context lines
- one closing sentence that leaves a final idea
Text should support the movie, not turn it into a presentation deck. If every photo needs a caption, the structure likely needs work.
The strongest photo movies use music, narration, and text as a single system. Each element fills a different gap. Music carries feeling. Voiceover carries meaning. Text carries clarity when sound isn't available.
Exporting for Social Media and Beyond
A strong edit can still look weak after export. Usually the problem isn't the storytelling. It's mismatched settings, over-compression, or formatting that doesn't suit the platform.
For social delivery, a practical benchmark is to export in H.264 at 1080p with a bitrate of 8 to 12 Mbps. The same source also recommends limiting transitions to one per 3 to 5 seconds, noting that heavier transition use can lead to a 25% drop in engagement through viewer fatigue (social export guidance). That's a useful constraint because export choices and editing choices affect each other.
Keep the export simple
You do not need a complicated preset library for a picture-based movie. You need reliable settings that preserve detail and upload cleanly.
Use this as your default checklist:
- Codec: H.264
- Resolution: 1080p
- Bitrate: 8 to 12 Mbps
- Format: MP4
Those settings work well because they balance image quality and manageable file size. For photo-driven videos, that balance matters. Stills can expose compression issues quickly, especially in gradients, skies, and detailed textures.
Choose the frame for the platform
Different placements want different shapes. Build your sequence with reframing in mind so important faces and details aren't cut off later.
Social Media Video Export Settings (2026)
| Platform | Placement | Aspect Ratio | Resolution (px) | Format |
|---|---|---|---|---|
| Reels / Stories | 9:16 | 1080p | MP4 | |
| TikTok | Feed video | 9:16 | 1080p | MP4 |
| YouTube | Standard video | 16:9 | 1920x1080 | MP4 |
If you need an all-in-one workflow for editing, resizing, and publishing, ShortGenius is one option that combines those steps in a single platform.
Watch transition density
This is one of the easiest export-stage fixes because it really starts in the timeline. If you've packed transitions into every other beat, the finished video often feels busy even when the images are good.
A cleaner rule set looks like this:
| Editing choice | Result |
|---|---|
| Fewer transitions, more deliberate motion | Cleaner and more cinematic |
| Constant transition effects | Distracting and visually tiring |
| Platform-specific reframing | Better composition on mobile |
| Single export master plus resized versions | Easier distribution |
Export should feel like the final polish, not emergency repair. If the movie reads clearly before export, the settings above usually preserve what you built.
Accelerate Your Workflow with AI
Making a movie from pictures by hand teaches good instincts. It also takes time. Sorting images, mapping a sequence, writing narration, adding movement, and assembling everything can turn into a long session even for a short piece.
That workload becomes obvious if you think about stop-motion as the extreme version of the same idea. The standard for fluid stop-motion is 12 frames per second, which means a one-minute short requires 720 unique frames. That's a useful reminder that turning still images into motion has always been labor-intensive. AI tools can reduce that assembly burden when the goal is speed, iteration, or volume.
Use AI for the slow parts
The smart use of AI isn't replacing taste. It's removing repetitive work.
Useful AI help usually falls into a few buckets:
- Story generation: Turning a folder of images into a rough sequence idea
- Voiceover drafting: Creating a first-pass script and narration
- Motion suggestions: Applying pans, zooms, or animated treatments to stills
- Captioning and resizing: Preparing variants for different platforms
If you want to create animated visuals from still images, lightweight image-to-animation tools can help test movement ideas before you commit to a full edit.
One practical example is ShortGenius (AI Video / AI Ad Generator), which combines scriptwriting, image-based video assembly, voiceovers, captions, and resizing in one workflow. That's useful when you already know the story you want, but don't want to spend most of your time rebuilding the same production steps.
A quick product walkthrough helps if you're comparing manual and AI-assisted workflows:
The best results still come from the same core principle that started this article. Decide what the story is first. Then let the tools speed up the parts that don't need your full attention.
If you want a faster way to turn photo collections into polished short videos, ShortGenius (AI Video / AI Ad Generator) can help with scripting, image-to-video assembly, voiceovers, captions, resizing, and publishing from one workflow. It's a practical option for creators, marketers, and teams who need to make more picture-based videos without rebuilding the process every time.