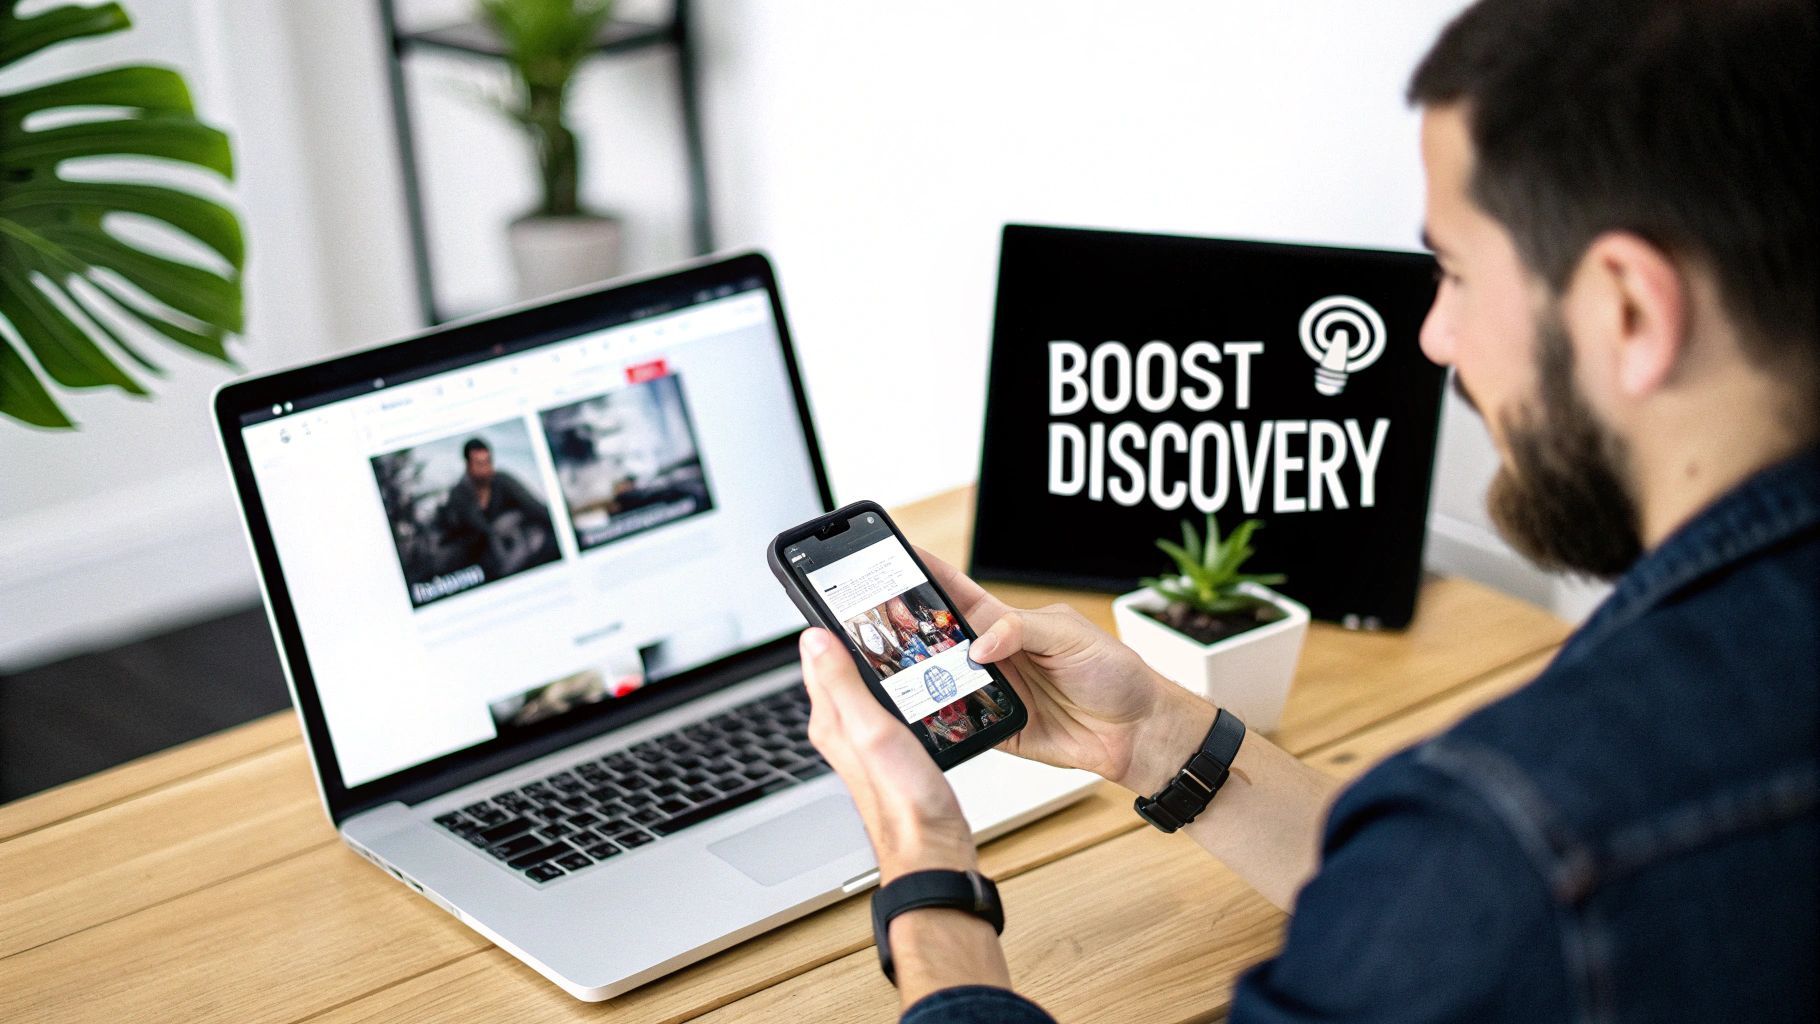
如何将 YouTube 视频发布到 Instagram:像专业人士一样掌握它
了解如何轻松将 YouTube 视频发布到 Instagram,包括简单步骤、专业提示和技巧,帮助最大化覆盖范围和互动。
Thinking about how to post a YouTube video on Instagram? It's a common goal, and the best approach is to treat it as a content repurposing strategy. The general idea is to download your own YouTube video, give it a good re-edit for a vertical format like 9:16, and then upload it as an Instagram Reel or Story. This isn't just a copy-paste job; it's about breathing new life into your hard work and reaching a totally different crowd.
Why Sharing YouTube Videos on Instagram Works
Beyond the how, let's talk about the why. Reformatting your long-form YouTube videos for Instagram is more than a simple time-saving trick; it's a smart strategy for growing your audience and making your brand stronger. You're not just making another post. You're building a bridge between two of the biggest platforms out there, each with its own unique vibe and user habits.
When done right, this approach turns your Instagram profile into a powerful discovery tool for your YouTube channel. A slick, well-edited clip can stop a scroller in their tracks—someone who might have never stumbled upon your content otherwise.
Tap Into a Highly Engaged Audience
Let's look at a real-world example. Imagine you've just posted a detailed, 15-minute product review on YouTube. You could take a punchy 30-second highlight—maybe the unboxing or a quick demo of a key feature—and turn it into an energetic Instagram Reel. Suddenly, you're tapping into a whole new audience.
This bite-sized preview can rack up thousands of views and comments, pushing curious viewers to the link in your bio to watch the full-length video. This creates a fantastic funnel, driving traffic and potential subscribers straight to your main channel.
And the data backs this up. A massive 76.9% of Instagram users are also on YouTube, creating a huge audience overlap you can tap into. Plus, Instagrammers are spending a ton of time on short-form video; Reels now account for over 50% of time spent on the app. This makes cross-posting a no-brainer for maximizing your content's reach. For a deeper dive, you can read more about these Instagram user statistics.
Treat your Instagram content as the promotional trailer for your YouTube "main event." When you do this, you create a cohesive content ecosystem where each platform supports the other. This strengthens your overall brand and builds a more dedicated community.
Maximizing Your Content Lifecycle
Every video you produce is a big investment of time, effort, and creativity. Just letting it sit on YouTube means you're not getting the most out of it. Repurposing your content gives you way more mileage from a single video by adapting it for different viewing habits across platforms.
Before you start chopping up your video, it helps to know where it's going to live on Instagram. Each format has its own strengths, so you'll want to tailor your YouTube clips to fit.
Instagram Video Format Cheat Sheet
Here’s a quick reference guide to Instagram's main video formats. This will help you figure out the best way to adapt your YouTube content for each spot.
| Format | Aspect Ratio | Max Length | Best Use for YouTube Content |
|---|---|---|---|
| Instagram Reels | 9:16 (Vertical) | 90 seconds | High-energy clips, quick tips, or viral-worthy moments from a longer video. Great for reaching new audiences. |
| Instagram Stories | 9:16 (Vertical) | 60 seconds per slide | Behind-the-scenes clips, Q&A segments, or interactive polls related to your YouTube video. Creates urgency. |
| Instagram Feed | 1:1 (Square), 4:5 (Portrait) | 60 minutes | Longer, polished clips that act as mini-tutorials or condensed versions of your main YouTube video. |
By thinking strategically about which pieces of your YouTube video to post where, you can cater to the fast-paced, mobile-first world of Instagram while driving people back to your main channel for deeper content. It's all about making your content work smarter, not harder.
Your Essential YouTube to Instagram Toolkit
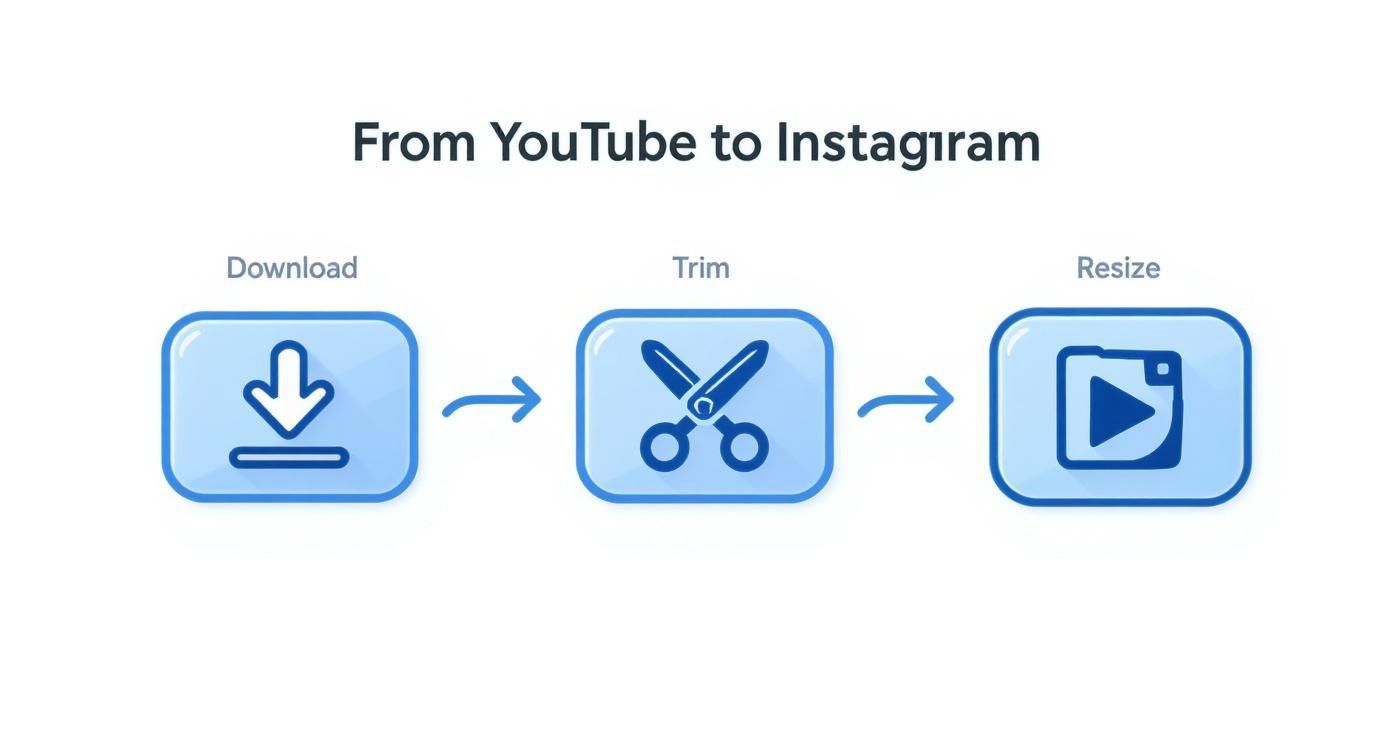
Before you can get your YouTube video onto Instagram, you've got to have the right tools lined up. Think of this as your pre-production setup—the key to turning a landscape video into something that feels right at home in Instagram's vertical world. Getting your workflow sorted out first saves a ton of headaches later and lets you focus on being creative, not fighting with software.
The great news? You don't need a professional editing studio. Most of the heavy lifting can be handled by a handful of powerful, and often free, tools. Your process will break down into three main jobs: grabbing the video file, cutting it down to the best parts, and resizing it for a phone screen.
First up, you'll need a reliable YouTube video downloader to pull a high-quality version of your video. Even if you have the original project file somewhere, sometimes downloading the final version straight from YouTube is just quicker. Just be sure you only download your own content or videos you have permission to use.
Choosing Your Video Editor
With the video file on your computer, it's time to pick an editor. This is where you’ll do most of the work, so finding one that matches your skill level and how you like to work is really important. Luckily, you’ve got plenty of choices, from dead-simple web apps to full-featured mobile editors.
Here are a few of my go-to recommendations:
- Clipchamp: This is a fantastic, free, web-based editor from Microsoft. It’s a great starting point if you just need to quickly resize a video to 9:16, trim the ends, and get a file ready to upload without a steep learning curve.
- CapCut: There's a reason this mobile and desktop app is a favorite among creators. It's loaded with features like auto-captions, cool effects, and super-easy reframing tools that make your video look like it was made for Instagram from the start.
- iMovie/InShot: If you prefer to do everything on your phone, iMovie (for iPhone) and InShot (for Android and iOS) are both solid options for basic cuts and resizing.
The best editor for you really boils down to your personal workflow. If you like to sit down and batch-create a bunch of content at your computer, Clipchamp or the desktop version of CapCut are perfect. But if you're always on the move, a mobile-first powerhouse like CapCut is hard to beat.
Streamlining the Creative Process
The secret to repurposing content without burning out is to make it as easy as possible. Trying to manually pull dozens of short, punchy clips from one long video can quickly become a massive time-drain. This is exactly where AI-powered tools can completely change the game.
Let’s say you just finished a 20-minute YouTube video. The old way involves scrubbing through the entire timeline, trying to spot multiple one-minute gems, identifying the best hooks, trimming them just right, and then formatting each one for Instagram. It’s tedious.
This is the perfect time to bring in a tool built specifically for this job. For creators who want to put this on autopilot, a platform like https://shortgenius.com can find and create the most compelling clips from your long videos automatically. Using AI to do the initial heavy lifting of clip selection and formatting gives you a huge head start. You get to spend your time fine-tuning the best parts instead of building every single clip from scratch. It turns what could be a multi-hour chore into a much faster, more creative process.
Formatting Your Video for a Vertical World
Alright, you've got the video file downloaded. Now for the fun part: turning that horizontal YouTube clip into something that looks like it was made for Instagram. This is more than just a technical step; it’s where you creatively adapt your content to fit a whole different platform and audience. Skipping this can make your video look out of place and, honestly, a bit lazy.
The big shift is reframing for a mobile screen. Most modern video editors handle this easily. I'm a big fan of CapCut for this because it’s free and surprisingly powerful, but these same ideas apply whether you're using Adobe Premiere or another app. The first thing you'll do is change the project's aspect ratio from the classic widescreen 16:9 to Instagram’s vertical 9:16.
This workflow breaks down the core process: grabbing your video, trimming it down, and resizing it for Instagram.
Getting the technical specs right is one thing, but making it genuinely compelling is another.
Reframing Your Shots for Impact
Once you switch to 9:16, you'll probably see your horizontal video floating in the middle with ugly black bars on the top and bottom. This is the number one giveaway that a video was just slapped onto Instagram without any thought. Don't do that.
Instead, you need to reframe. This means zooming in and repositioning the video to fill the entire vertical screen. You might have to get creative and pan across the shot to keep the main action—whether that’s your face, a product demo, or a landscape—in the center of the frame. It's a bit of hands-on work, but it ensures your audience sees what's important.
Pro Tip: What if your original video has crucial text or graphics near the edges? Reframing can cut them off. A great workaround is the "blur fill" effect. Most editors have this feature, and it fills the empty space with a blurred, blown-up version of your video. It looks way more professional than black bars.
Adding Native Instagram Elements
To really make your video pop, you need to add the kind of elements Instagram users are used to seeing. This is how you make recycled content feel fresh and built for the platform.
Here are a few things that make a huge difference:
- Animated Captions: So many people watch videos on their phones with the sound off. Adding dynamic, auto-generated captions is non-negotiable. It makes your content accessible and helps grab attention in a busy feed. CapCut can actually generate these for you with a single tap.
- Trending Audio: Your YouTube video already has sound, but consider adding a trending song or audio clip at a very low volume underneath it. This can give the Instagram algorithm a little nudge to show your Reel to more people who are engaging with that trend.
- Text Overlays: Use bold text to highlight key takeaways, pose a question, or add a clear call-to-action. Something as simple as "Full video link in bio!" can make a real impact on driving traffic.
Vertical video has totally changed the game. Instagram knows this, which is why they keep extending the maximum length for Reels—they want creators to bring their deeper stories over from other platforms. And it works. Reels now have an average engagement rate of 1.22%, which easily beats other post types. If you're a data nerd, you can find more insights in these social media statistics.
By taking these extra steps, you’re not just reposting. You’re being a smart creator who understands that different platforms require different approaches.
Getting Your Video Seen: Uploading and Optimizing
https://www.youtube.com/embed/xuAMtJKGHbc
Okay, so you've got your perfectly edited, vertical-friendly video clip. Now for the fun part: getting it in front of the right audience on Instagram. Just dumping the video onto the platform and hoping for the best isn't a strategy. To really make this work, you need to think like the Instagram algorithm and understand what makes users stop scrolling.
Where you post your video—whether it's a Reel, a Story, or a classic Feed post—completely changes the game. Each format has its own unwritten rules and user expectations. A one-size-fits-all approach just won't fly here.
Crafting a Post That Grabs Attention
For both Reels and Feed videos, the content around your clip is just as critical as the video itself. This is your moment to stop the scroll, add some much-needed context, and ultimately drive people back to your YouTube channel.
Make sure you nail these two elements every single time:
- Create a Custom Cover Image: Never let Instagram choose a random, blurry frame for your thumbnail. A clean, eye-catching cover image with a clear title makes your profile grid look professional and gives people a reason to tap play when they see it on the Explore page.
- Write a Hook-Worthy Caption: Start your caption with a bang. Ask a provocative question or make a bold statement to spark curiosity. Keep that first line short and punchy, then you can add more detail and a clear call-to-action, like "Watch the full breakdown on YouTube! Link in bio."
Choosing the Right Hashtags and Audio
Think of hashtags and audio as Instagram’s built-in discovery tools. Using them strategically is how you break out of your follower bubble and get your content in front of fresh eyes. It’s a simple step, but it makes a massive difference.
You'll want to use a mix of broad, specific, and niche hashtags. For a tech review channel, that might look like #TechReview (broad), #ProductUnboxing (niche), and #NewGadget2025 (very specific). The sweet spot is usually around 5-10 highly relevant tags.
Don't just repurpose content; repurpose with intent. Each platform has a unique culture. Tailoring your YouTube clips with native elements like trending audio and platform-specific captions is what separates a successful strategy from a lazy cross-post.
This tailored approach is non-negotiable. Data shows that Reels have a 2.08% engagement rate for influencer content, blowing away the 0.42% for standard videos. But that success hinges on making the content feel like it was made for Instagram.
If you're looking for a complete walkthrough that covers every single detail, check out this detailed guide on posting YouTube videos to Instagram.
Common Cross-Posting Mistakes to Avoid
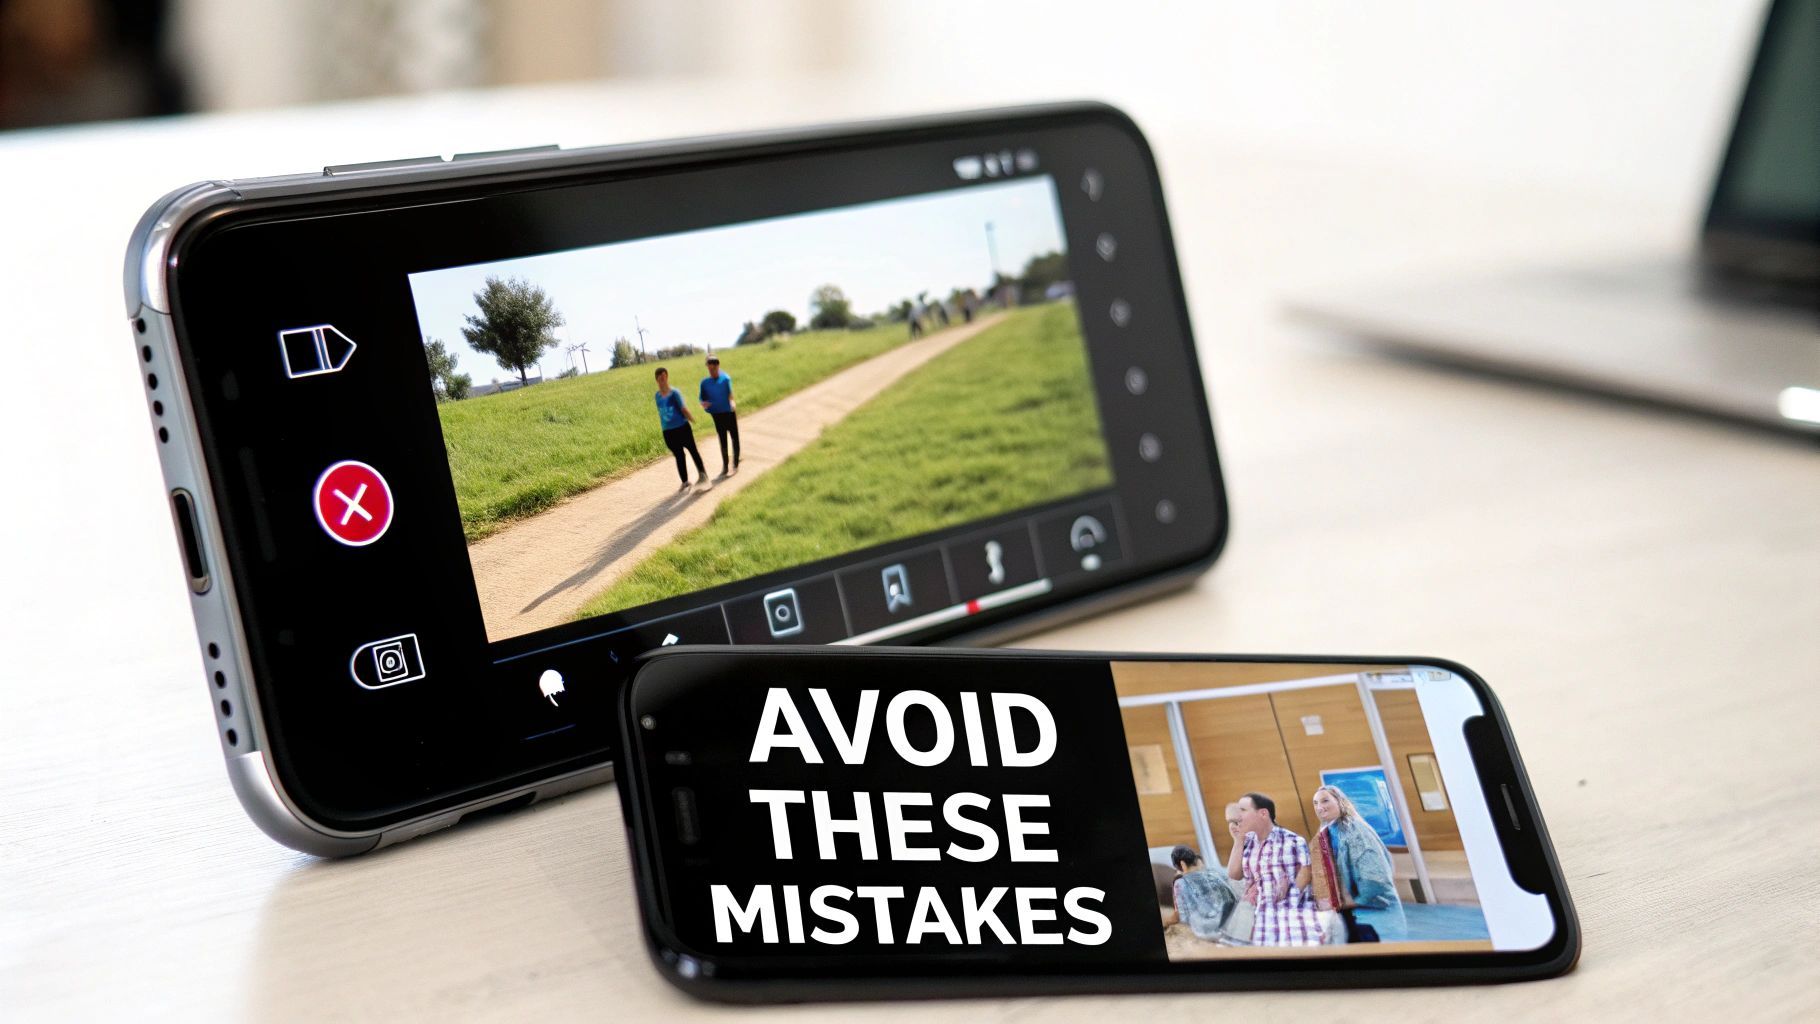
We've all seen it: the classic horizontal YouTube video crammed into a vertical Instagram frame. It’s a dead giveaway that the content wasn't made for the platform, and it’s one of the quickest ways to get your audience to scroll right past.
These small, avoidable errors can tank your reach and engagement. Let's walk through the most common pitfalls I see creators make so your repurposed content looks polished, native, and genuinely effective. The biggest offender is, without a doubt, ignoring the aspect ratio. This creates the infamous "letterbox" effect—a tiny video swimming in huge black bars. It just screams low effort.
Forgetting Instagram Is All About Speed
Another classic mistake is dragging your feet with the intro. On YouTube, you have a bit of time to warm up. On Instagram, you have practically none. The pace is lightning-fast, and if you don't hook someone in the first 2-3 seconds, they're already gone.
This means you can't just chop off the first 60 seconds of your YouTube video and call it a day. You have to dig through your original video to find the single most exciting, surprising, or valuable moment. Lead with your best stuff. Think of your clip as a movie trailer, not just a random scene.
Key Takeaway: Your goal is to create a compelling, standalone piece of content that sparks curiosity. It should make viewers feel like they're missing out if they don't click over to watch the full video. That mental shift from "excerpt" to "trailer" is everything.
Ignoring How People Actually Use Instagram
Just uploading the raw video file is a huge missed opportunity. Instagram has its own culture and its own set of tools that users expect to see. When you ignore them, your content feels like an outsider.
Here are a few simple ways to make your video feel right at home:
- Forgetting Captions: I can't stress this enough: a massive number of people watch videos with the sound off. If you don't have on-screen text or captions, you're essentially showing them a silent film they can't understand. Use Instagram’s auto-caption feature or, even better, burn them into the video yourself.
- Skipping Trending Audio: Even if your original audio is great, adding a popular Reel sound at a very low volume can give the algorithm a signal. It helps categorize your content and can push it to a much bigger audience.
- A Missing Call-to-Action (CTA): You have to tell people what you want them to do next. Don't just assume they'll know. End your caption with a clear, direct instruction like, "Watch the full breakdown on my YouTube channel—link in bio!"
By sidestepping these common mistakes, your efforts to post a YouTube video to Instagram will pay off with way more engagement and, hopefully, a lot more traffic back to your channel.
Got Questions? I’ve Got Answers
When you're first figuring out how to post a YouTube video to Instagram, a few common questions always pop up. I've heard these from countless creators, so let's clear up the confusion right away.
So, Can I Just Post My Entire YouTube Video on Instagram?
Honestly, you can't, and you really shouldn't. Instagram is a different world—it’s all about quick, punchy content.
Reels have a 90-second limit, and even though Feed videos can be longer, people just don't have the attention span for a full-length YouTube video there. The best move? Think of your Instagram clip as a movie trailer for your YouTube video. Pull out the most exciting highlight or a juicy teaser that leaves people wanting more.
Then, hit them with a clear call-to-action to send them over to your YouTube channel. It's the perfect way to use Instagram as a powerful promotion tool without trying to force a square peg into a round hole.
Is This Going to Cannibalize My YouTube Views?
Absolutely not. It's actually the opposite. When you do it right, sharing clips on Instagram can be one of the best things you do for your YouTube channel's growth. You're tapping into a massive audience that might never have found you otherwise.
Think about it: a simple "Full video link in bio!" is your bridge. You're building a direct pipeline of new, interested viewers right to your long-form content. This strategy drives up views, watch time, and subscribers on YouTube. The key is to make the platforms work together.
How Do I Deal With the Weird Aspect Ratios?
This one is non-negotiable: you have to edit for vertical. Specifically, a 9:16 aspect ratio. This is the native format for Reels and Stories, and it’s what gives viewers that full-screen, immersive experience on their phones.
Please, don't be the person who just uploads a horizontal 16:9 video with those ugly black bars at the top and bottom. It looks lazy and screams "repost." Take the extra five minutes to open your project in an editor, set the canvas to 9:16, and reframe your shots. Make sure the action is always centered in that vertical frame. It’s a small step that makes your content look polished and professional, showing you actually understand the platform.
Ready to turn your long-form videos into a library of engaging social media content without the manual effort? ShortGenius uses AI to find the best moments in your videos, automatically reformatting them into ready-to-publish clips. Speed up your workflow and scale your content creation at https://shortgenius.com.