The Ultimate Guide to Instagram Story Size and Dimensions
Master the perfect Instagram Story size with our 2024 guide. Get the exact dimensions, aspect ratio, safe zones, and pro tips for flawless content.
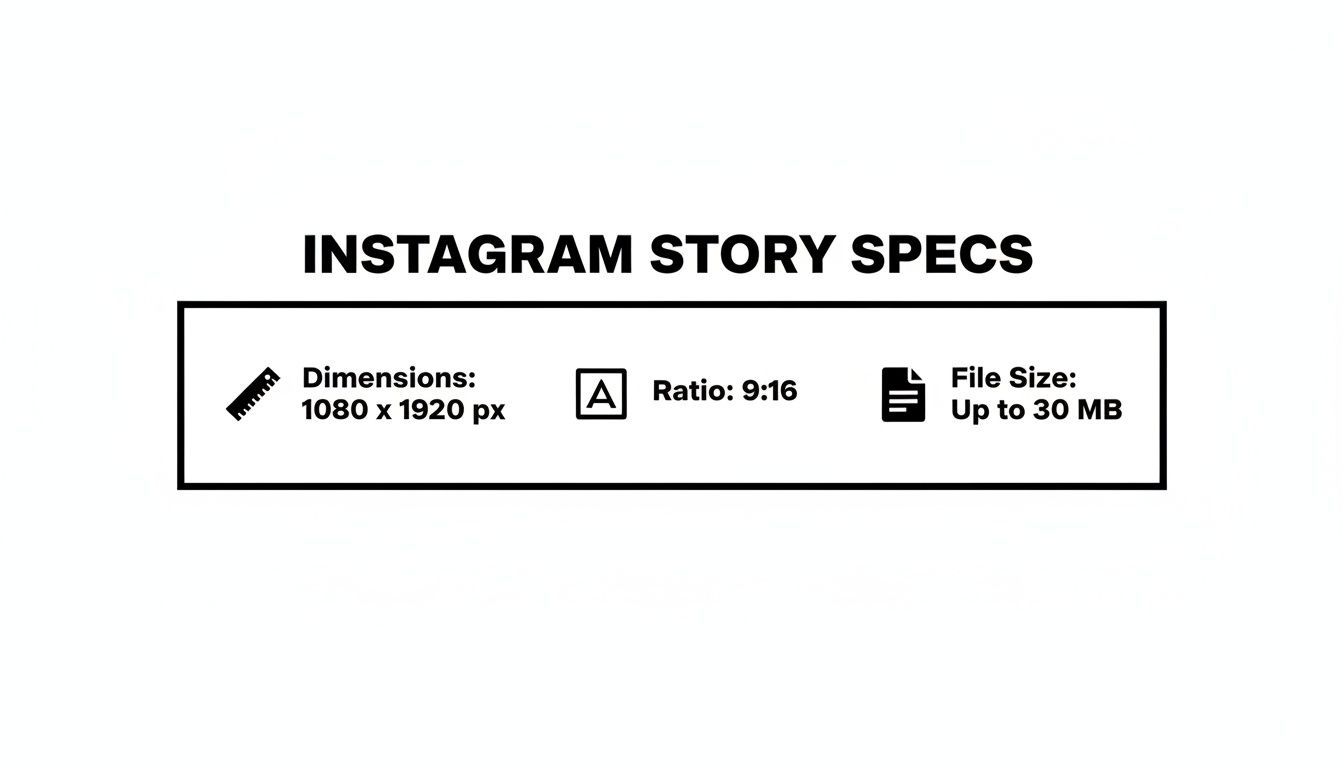
When it comes to Instagram Stories, the magic numbers are 1080 x 1920 pixels. This gives you the perfect 9:16 aspect ratio, designed to fill the entire vertical screen of a smartphone. Getting these dimensions right from the start is the key to creating that immersive, professional look and avoiding any weird black bars or awkward cropping.
Your Quick Guide to Perfect Instagram Story Dimensions
Nailing the correct Instagram Story size is your first and most important step toward creating high-impact content. It doesn't matter if you're uploading a slick video or a stunning photo—sticking to Instagram's technical specs ensures your visuals show up exactly how you planned. Mess it up, and you risk fuzzy images, cut-off videos, and ultimately, a dip in engagement.
Think of the following specs as your go-to cheat sheet. I’ve put together a quick-reference table that breaks down all the essential technical details you'll ever need. For the most current, nitty-gritty details on dimensions and aspect ratios, it’s always a good idea to check the official Instagram Story dimensions.
Instagram Story Specifications Quick-Reference
This table is your one-stop-shop for the most critical specs you need to remember for both photos and videos.
Here's a more detailed breakdown of everything you need to know.
| Specification | Recommendation |
|---|---|
| Recommended Dimensions | 1080 x 1920 pixels |
| Aspect Ratio | 9:16 |
| Maximum Photo File Size | 30 MB |
| Maximum Video File Size | 4 GB |
| Accepted Photo Formats | .JPG, .PNG |
| Accepted Video Formats | .MP4, .MOV |
Getting comfortable with these numbers—especially the 1080x1920 pixels, the 9:16 ratio, and the file size limits—is fundamental. It's the technical foundation for creating Stories that look polished and perform well every single time.
Why Getting Your Instagram Story Size Right is a Game-Changer
Nailing your Instagram Story dimensions isn't just a technical box to check—it's one of the most important things you can do to make your content look professional and keep your audience hooked. Think about it: the whole point of a Story is to create a seamless, full-screen experience. That's why the magic numbers are 1080 x 1920 pixels with a 9:16 aspect ratio.
These specs are designed specifically for the way people hold their phones. When your content doesn't fit, Instagram tries its best to adjust it, but the result is almost always a letdown. A landscape photo gets butchered with awkward crops, or a square video ends up floating between huge, distracting black bars. Even worse, a low-res image looks blurry and unprofessional. These tiny mistakes can make viewers swipe away in a second, killing your engagement.
It's a Vertical World Now
The vertical format completely changed how we consume content on our phones. Since Instagram Stories first appeared, users have been trained to expect content that fills every inch of their screen. It's an immersive format that grabs attention way more effectively than the old square or horizontal posts ever could.
For creators and brands, learning to work within this vertical canvas is everything. It's the difference between looking like you belong and sticking out for all the wrong reasons. You have to start thinking vertically, placing your most important text and visuals where they'll make the biggest impact without getting cut off.
A Story that's sized correctly just feels right. It looks native to the platform, which goes a long way in boosting how long people watch. In fact, studies have shown that 62% of people said they became more interested in a brand after seeing it in their Stories. That makes getting the size right a non-negotiable part of your strategy.
How Stories Took Over Social Media
When Instagram launched Stories back on August 2, 2016, nobody knew how big it would become. Its short-lived, 24-hour format tapped into our desire for more authentic, in-the-moment content. It exploded in popularity, rocketing to 500 million daily active users by the end of 2017 and cementing vertical video's place as a powerhouse in social media.
Understanding the right Instagram Story size is your direct line to connecting with that massive audience. To see just how fast it grew, you can check out some of Instagram's key milestones and growth on Statista.com.
Navigating the Instagram Story Safe Zone
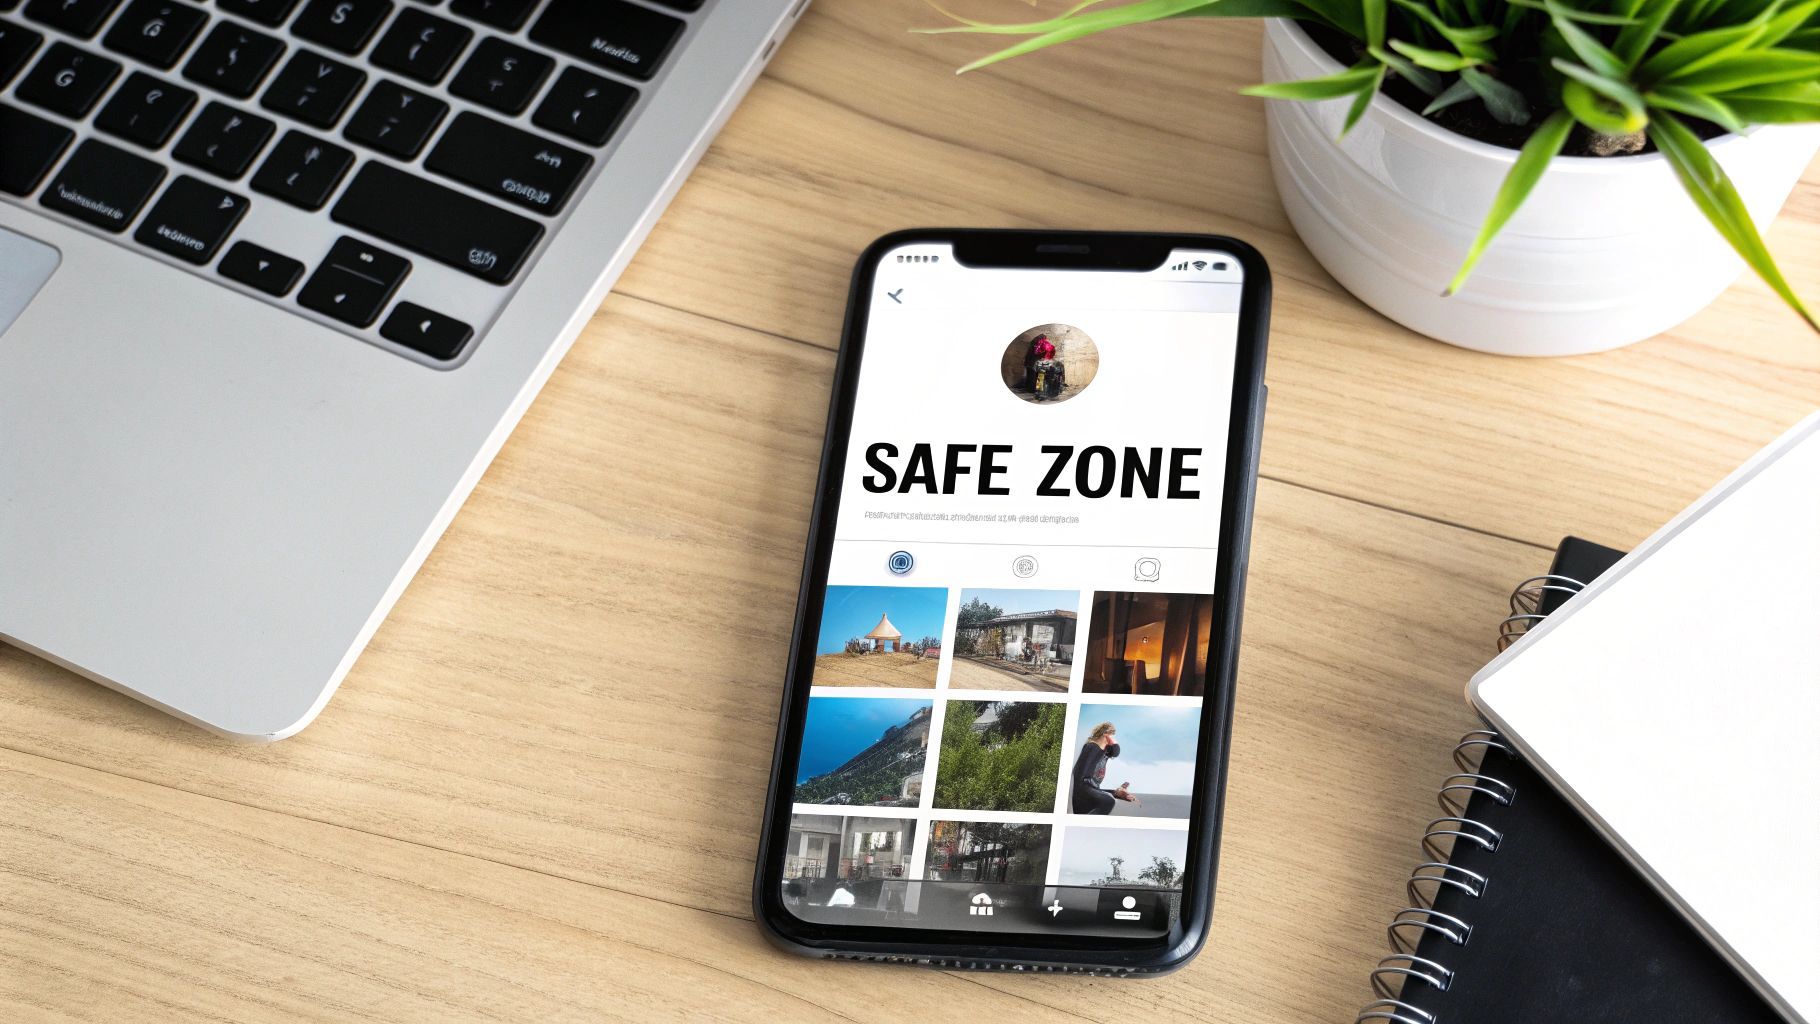
Getting the Instagram Story dimensions right is a great start, but the real secret to pro-looking content is understanding the safe zone. Think of it as the prime real estate on your screen—the central area where your most important content is guaranteed to be seen and not cut off.
Why does this matter so much? Because Instagram overlays its own interface elements on top of your Story. At the very top, you’ve got your profile icon and username. Down at the bottom, there's the reply bar and other interactive buttons. If you place a key call-to-action or a crucial piece of text in those spots, it’s going to get covered up.
Ignoring the safe zone is a classic rookie mistake. It can make your brand look unprofessional and, worse, it can make interactive stickers like polls or question boxes completely untappable.
Defining the No-Go Areas
So, how do you avoid this? It's simple: keep your critical elements away from the extreme top and bottom of the screen. While Instagram doesn't give official pixel counts, the creator community has figured out what works.
A solid rule of thumb is to leave a buffer on both ends:
- Top Margin: Keep about 250 pixels clear from the top edge.
- Bottom Margin: Leave roughly 250 pixels of space from the bottom.
This creates a central viewing area where your logos, text, and stickers can shine without being obstructed. For instance, if you're using auto-generated captions, placing them too low will get them lost behind the "Send message" bar. We've got a whole guide on how to add captions to videos the right way, which touches on placement.
Before you hit publish, always use the preview feature. It's the best way to double-check that every important part of your Story, from the text to the CTA button, sits squarely within that safe zone. It’s a small step that makes a huge difference in how your content performs.
Technical Specifications for Video and Photo Stories
Getting the dimensions right is half the battle. To really nail your Instagram Stories, you need to pay attention to the technical details—the stuff that happens behind the scenes. Think of it like this: Instagram has to process every single photo and video you upload. If you give it a file it likes, you'll get much better results with less of that fuzzy, aggressive compression that can ruin an otherwise great post.
Consider this your go-to reference for all the nitty-gritty specs. Bookmark it, save it, and come back whenever you're exporting content. It’ll help you make sure what you see in your editor is exactly what your followers see in their feed.
To give you a quick at-a-glance reference, here's a detailed breakdown of the exact specifications for both video and photo uploads.
Detailed Video and Photo Upload Requirements
| Attribute | Video Specification | Photo Specification |
|---|---|---|
| File Format | .MP4 or .MOV | .JPG or .PNG |
| Max File Size | 4GB | 30MB |
| Video Codec | H.264 (Advanced Video Coding) | Not Applicable |
| Audio Codec | AAC (Advanced Audio Coding) | Not Applicable |
These settings are the "sweet spot" for Instagram's system, ensuring your content uploads smoothly and retains as much quality as possible.
Video File Requirements
When it comes to video, sticking to Instagram's preferred formats is non-negotiable if you want to avoid frustrating upload errors or weird playback glitches. It's a common problem that's easily solved by getting your export settings right from the start.
Here's exactly what you need to set up:
- File Format: Your best bet is always .MP4, as it's the universal standard for web video. .MOV files also work just fine.
- Maximum File Size: You've got a massive 4GB to play with. For short-form content like Stories, you'll likely never come close to this limit. If you want to dive deeper into how this works with clip length, check out our complete guide on Instagram Stories video length.
- Video Codec: The industry standard here is H.264, sometimes called Advanced Video Coding (AVC). It's the codec Instagram is built to handle, offering a great balance of quality and file size.
- Audio Codec: For sound, stick with AAC (Advanced Audio Coding). To get the cleanest audio, make sure you export with a sample rate of 44.1 kHz and in stereo.
Photo File Requirements
With static images, the specs are a bit simpler, but they're just as critical for keeping your visuals sharp. Instagram's compression can be especially harsh on photos with crisp lines, fine details, or text overlays, so dialing in these settings makes a huge difference.
Here are the ideal settings for your photo Stories:
- File Format: Use .JPG for most photographic images, as its compression is super efficient. For graphics, logos, or any image with transparency, .PNG is the way to go.
- Maximum File Size: The cap for a single photo is 30MB. This is more than enough headroom for a high-resolution image at the recommended 1080x1920 size.
Pro Tip: Don't just upload a massive 4K file and hope for the best. Always export your content at the exact Instagram Story size of 1080x1920 pixels. Forcing Instagram to downscale your file for you is a surefire way to get hit with heavier compression and a noticeable drop in quality.
Common Instagram Story Size Mistakes to Avoid
Knowing the right Instagram Story dimensions is half the battle; actually using them correctly is what separates the pros from the rest. Even experienced creators can fall into a few common traps that tank their content quality and hurt engagement. Let's walk through what they are so you can steer clear.
The single most frequent mistake I see is uploading horizontal or square content and just letting Instagram figure it out. When you do that, the app gets aggressive. It will crop, zoom, and butcher your media to force it into a 9:16 frame. The result? Awkwardly framed shots, people with their heads cut off, and a really jarring experience for your viewers.

Another critical fumble is ignoring the safe zones. It’s so easy to place important text, a logo, or a clickable sticker too close to the edges. But remember, Instagram's interface—your username at the top, the reply bar at the bottom—will cover those areas up. This instantly makes your message unreadable and your CTAs untappable.
Pixelation and Poor Quality
Uploading a low-resolution photo or video is a guaranteed way to make your brand look amateur. Your original file might look sharp on your camera roll, but Instagram’s compression algorithm can be ruthless. It takes files that are already small and makes them look pixelated and blurry, especially on modern, high-definition phone screens. Always start with high-quality source material at the recommended 1080x1920 pixels.
To help you sidestep these issues, here's a quick mental checklist to run through before you hit "post":
- Is my content truly vertical? Plan, shoot, and edit for a 9:16 aspect ratio from the very beginning.
- Are my key elements centered? Keep the good stuff—text, faces, logos—away from the top and bottom 250 pixels.
- Is the resolution high enough? Make sure you're exporting your final file at 1080x1920 to give Instagram's compression algorithm the best possible starting point.
Getting into the habit of running through these checks is a total game-changer. It’s a simple, proactive habit that ensures your content respects the platform's layout, which directly leads to a better viewing experience and keeps your audience watching.
By avoiding these common blunders, you make sure your creative vision comes through exactly as you intended. Your content will look sharp, be fully interactive, and deliver the seamless, professional experience the Instagram Story format was built for.
How to Resize Content for Stories with ShortGenius
Let's be honest: manually resizing every single video clip for the correct Instagram Story size is a massive time sink. It's a technical chore that gets in the way of actually being creative. This is where a tool like ShortGenius really shines, turning that tedious process into a quick, one-click job.
Whether you're trying to repurpose a video you already have or creating something brand new, the platform is built from the ground up to nail the 9:16 aspect ratio. You can pull in a horizontal video from a place like YouTube or even generate a new clip from a simple text prompt. Once you have your video in the editor, the "Resize" tool instantly reformats it to the perfect 1080x1920 pixels. Your content is immediately optimized for that full-screen, vertical view that people expect on Stories.
If you're curious about turning longer videos into great social clips, we have a whole guide on how to post a YouTube video on Instagram.
Intelligent Reframing and AI-Powered Edits
ShortGenius does more than just awkwardly crop the sides off your video. Its AI reframing feature is smart enough to analyze your footage, find the most important thing—like a person talking or a product moving—and keep it perfectly centered in the new vertical frame. This means you don't have to manually pan and scan to avoid cutting off the action, a lifesaver for keeping your key visuals front and center.
And resizing is just the start. You can handle your entire Story edit right inside the platform:
- Generate Auto-Captions: Instantly add accurate, stylized subtitles so your message lands, even when people are watching with the sound off.
- Apply Brand Kits: Keep everything looking consistent and professional by applying your brand's specific fonts, colors, and logos with a single click.
- Add Engaging Effects: Make your Stories stand out with a library of dynamic effects, smooth transitions, and camera movements that grab attention.
From Hours to Minutes
For anyone managing social media, this kind of streamlined workflow is a game-changer. The platform is designed to output at a 1080x1920 pixel resolution and a 9:16 aspect ratio, ensuring every video looks crisp and fills the entire phone screen without any weird black bars or distortion. That's a huge deal, especially since vertical video consistently gets higher completion rates.
By using the AI resize tool to adapt horizontal clips, add some eye-catching effects, and maybe a voiceover, you can see a real lift in engagement. Instead of spending hours fighting with video editing software, you can unify the entire process—from creation and resizing to captioning—and get it all done in just a few minutes. This is how you start producing high-quality Stories consistently and at scale.
Nailing Your Export Settings for Maximum Quality
You’ve poured hours into creating the perfect Story, but your job isn’t done yet. The final, critical step is exporting it in a way that survives Instagram’s tough compression algorithm.
If you don’t give Instagram a file it likes, it will aggressively re-compress your work, often turning a sharp video into a blurry, pixelated mess. Think of your export settings as your last line of defense, ensuring what you see in your editor is exactly what your followers see on their phones. Getting this right means telling your editing software—whether it's Adobe Premiere Pro, Final Cut Pro, or CapCut—to package your video perfectly for the platform.
Premiere Pro Export Settings for Stories
For anyone editing in Premiere Pro, these are the settings I’ve found give the best results, balancing stunning quality with a manageable file size.
- Format: Go with H.264. It's the universal standard for web video and what Instagram expects.
- Preset: A great starting point is the Match Source - High bitrate preset, which you can then fine-tune.
- Resolution & Frame Rate: Make absolutely sure your resolution is 1080x1920. Your frame rate should be set to 30 fps (frames per second).
- Bitrate Settings: This is where the magic happens. Under Bitrate Settings, select VBR, 2 pass. Set your Target Bitrate to 8 Mbps and the Maximum Bitrate to 10 Mbps. Using a two-pass variable bitrate (VBR) is a pro move; it analyzes your video twice to produce much higher quality without bloating the file size.
CapCut and Final Cut Pro Settings
The core ideas are the same on other popular platforms, even if the interface looks a little different.
-
For CapCut: The beauty of CapCut is its simplicity. When you hit export, just dial in your resolution to 1080p, frame rate to 30fps, and leave the bitrate on Recommended. CapCut is built for social media, so its default optimization is usually spot-on.
-
For Final Cut Pro: When you’re ready to export, choose Master File. In the Settings tab, set the Format to Computer and the Video Codec to H.264 Better Quality. Double-check that the resolution is the vertical 1920 x 1080.
A Quick Word on Photos: While videos have a lot of knobs to turn, photos are much simpler but no less important. The key is choosing the right file type for the job. For a great breakdown of when to use which format, check out this guide on PNG vs JPG image formats to decide what’s best for your specific graphic.
Got Questions? Here Are the Answers on Instagram Story Sizing
Even with all the specs laid out, you're bound to run into some specific questions when you're in the thick of creating. Getting those nagging little issues sorted out is the fastest way to build solid habits and stop second-guessing yourself. I've gathered the most common questions creators ask right here.
Think of this as your go-to troubleshooting guide. Once you nail these details, you'll be able to post with total confidence, knowing your content will land exactly how you envisioned it.
What’s the Real Best Resolution for My Stories?
Stick to 1080 x 1920 pixels. That’s the magic number. It might be tempting to export your fancy 4K footage and upload that, but trust me, it’s a bad move. Instagram will take one look at that huge file and compress it aggressively, which can paradoxically make it look worse than a properly sized HD file.
When you export your content at the native 1080x1920 resolution, you’re handing Instagram’s algorithm a file it knows exactly how to handle. This means less destructive compression and a much cleaner, sharper result for your audience.
How Do I Deal With Horizontal Videos for Stories?
Just uploading a horizontal video (shot in 16:9) and hoping for the best is probably the most common mistake I see. If you do that, Instagram takes over. It’ll either crop your video in bizarre ways—cutting off the most important action—or just slap it in the middle with giant, ugly black bars above and below. Neither looks great.
The only professional way to handle this is to reframe your horizontal video for the vertical 9:16 aspect ratio before you upload.
- Doing it Manually: You can pull the video into an editor, crop it to 9:16, and then manually adjust the frame shot-by-shot to keep your subject in the picture. It takes time, but it works.
- Using Smart Tools: An AI-powered tool like ShortGenius is a game-changer here. It can analyze the video and intelligently reframe it for you, automatically keeping the main subject perfectly centered in the new vertical layout.
Can't I Just Let Instagram Resize Everything for Me?
You can, but you absolutely shouldn't. Letting Instagram handle the resizing is like handing over the keys to your creative vision. The platform’s algorithm has one job: make it fit. It doesn't care about your composition, your subject, or your message. It will crop, zoom, and mangle your content however it needs to just to fill that 9:16 space.
This is how you end up with weirdly framed shots, people with the tops of their heads cut off, and a post that just screams "amateur." To keep your work looking polished and intentional, always resize your assets to the proper Instagram Story size of 1080x1920 pixels yourself. It's a non-negotiable step that separates the pros from everyone else.
Stop wasting time fighting with video editors. With ShortGenius, you can resize any video for perfect Instagram Stories in a single click, add professional captions, and apply your brand kit instantly. Transform your content workflow by visiting https://shortgenius.com to get started.