How to Edit Videos on iPhone Like a Pro
Learn how to edit videos on iPhone using powerful built-in apps and advanced techniques. Go from simple clips to polished, social-ready videos with this guide.
You don't need to spend a dime to start editing videos on your iPhone. For quick trims and simple filter adjustments, the built-in Photos app is surprisingly capable. And when you're ready to tackle a more ambitious project with multiple clips, titles, and music, Apple's free iMovie app is right there waiting for you.
Honestly, these pre-installed tools give you a powerful head start for creating polished content before you even think about third-party software.
Your iPhone Is Already a Powerful Video Editor
Before you even open the App Store, it's worth taking a moment to appreciate the editing studio you're already holding. Your journey into mobile video creation doesn't have to start with downloading a bunch of paid apps—for many creators, the native tools are more than enough.
Mastering on-device editing is becoming a crucial skill, not just a nice-to-have. Think about it: mobile devices are on track to generate about 75% of all video views by 2025, and short-form content is absolutely dominating our feeds. If you want to keep up, editing on the fly is the name of the game. If you're curious, you can read more about these video editing statistics to see just how big this trend is.
Choosing Your Built-In Tool
The real trick is knowing which Apple app to use for the job. Making the right choice upfront saves you a ton of time and frustration.
-
The Photos App: This is your best friend for speed and simplicity. Use it to quickly trim the dead air off the start or end of a clip, slap on a color filter, or make small tweaks to brightness and contrast. It’s perfect for those single-clip edits you need to get out the door fast.
-
iMovie: When you're telling a story that needs multiple video clips, a soundtrack, and some text overlays, iMovie is where you want to be. It gives you a proper timeline editor, letting you arrange scenes, drop in smooth transitions, and mix your audio for a much more professional, cinematic result.
Here's a quick comparison to help you decide at a glance.
Choosing Your iPhone Editing App
This table breaks down Apple's free video editing apps to help you select the best tool for your project.
| App | Best For | Key Features |
|---|---|---|
| Photos | Quick, simple edits on a single clip. | Trimming, cropping, filters, basic color/light adjustments. |
| iMovie | Multi-clip projects, storytelling, and adding polish. | Timeline editing, transitions, titles, music, and voiceovers. |
| Clips | Fun, quirky social media videos with special effects. | Live Titles (animated captions), stickers, and augmented reality effects. |
Ultimately, choosing the right app comes down to the scope of your video. For a quick share, Photos is perfect. For a more involved story, iMovie has you covered. And for something fun and flashy, give Clips a try.
The diagram below gives you a simple visual for this decision-making process, mapping out a typical iPhone video workflow.
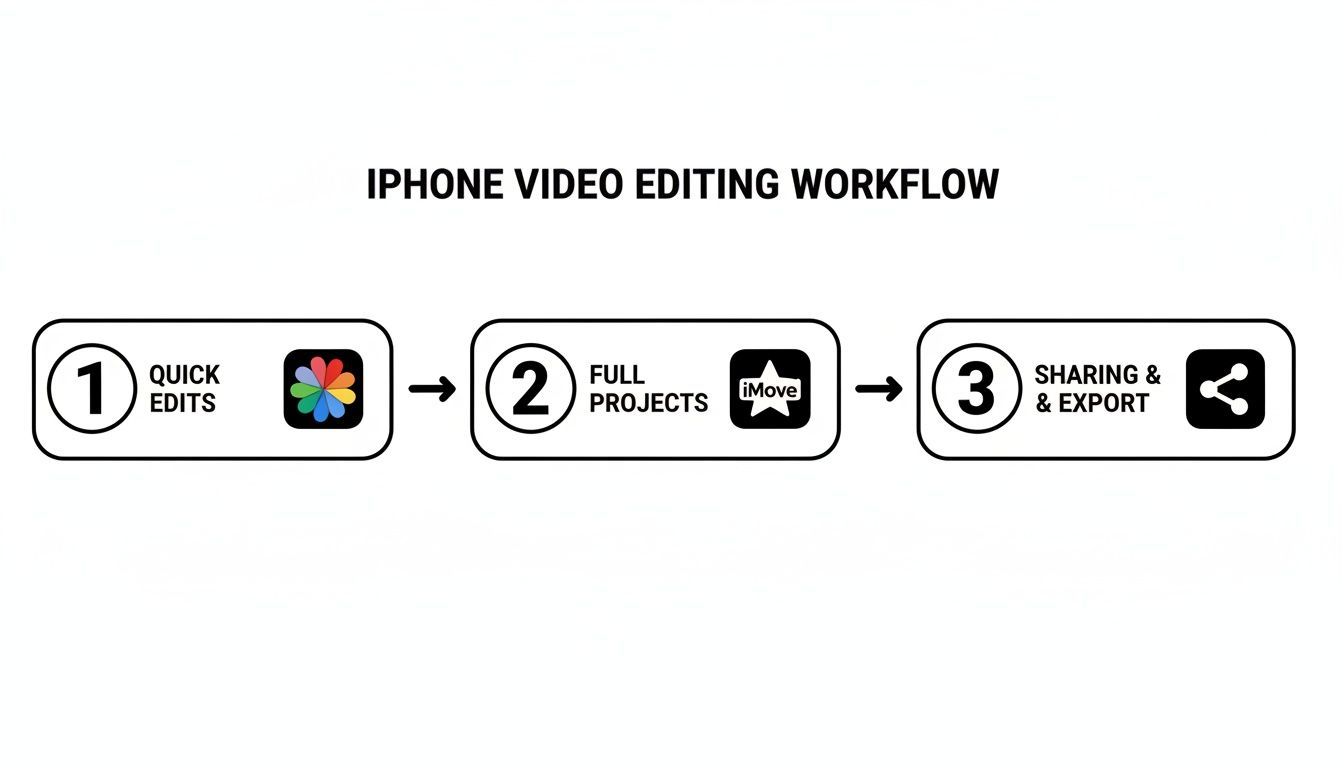
As you can see, the complexity of your project is what really dictates your starting point. You can go from simple tweaks to a full-blown production using nothing but the free tools Apple gives you.
Mastering the Essentials in Photos and iMovie
Before you even think about downloading a third-party app, it's worth getting your hands dirty with the tools Apple already gives you. Your iPhone's built-in Photos app is surprisingly powerful for making quick, meaningful edits right after you hit the record button.
Let's say you just shot a quick clip for a recipe tutorial. Open it in Photos, tap "Edit," and you'll see a simple visual timeline. The first thing I almost always do is trim the fat. Just drag the yellow handles at the start and end of the timeline to cut out the awkward moment you were setting up the shot or reaching to stop the recording. That one small fix instantly tightens up your video.
From there, you can give your clip a whole new vibe with a single tap. Swipe through the built-in filters like "Vivid" or "Noir." These aren't just lazy color overlays; they intelligently adjust contrast and tone, often giving your footage a more cinematic feel without any heavy lifting.
Fine-Tuning Your Video in the Photos App
Once you've nailed the trim and picked a filter, you can dig a little deeper. Tap the dial icon, and you’ll find a set of adjustment sliders that work just like they do for photos. This is where the magic happens.
- Exposure: Filmed in a dimly lit kitchen? A slight nudge to the exposure slider can brighten the entire scene, making everything much clearer.
- Highlights & Shadows: If you've got a bright window blowing out the background, you can pull the highlights down to bring back detail. Conversely, lifting the shadows can reveal what's happening in the darker parts of your shot.
- Contrast & Saturation: Want to make those fresh ingredients look irresistible? A little boost in contrast adds punch, while a touch more saturation makes the colors pop.
Pro Tip: When you're adjusting color and light, subtlety is key. Make small, incremental changes. The goal is to make your video look better, not obviously edited or unnatural.
Your single clip is now looking sharp. But what if you want to stitch it together with a few other shots to tell the full story? That's your cue to jump over to iMovie.
Assembling a Story in iMovie
Think of iMovie as your first real editing suite, right on your phone. It's where you take individual clips and weave them into a cohesive narrative. Back to our cooking video—you probably have a clip of chopping vegetables, another of the pan sizzling, and a final beauty shot of the finished dish.
Start a new "Movie" project in iMovie and bring those clips in. They’ll line up on a timeline, which is just a visual map of your video's sequence. Here, you can drag them around to get the order right—prep, cook, serve. It’s that simple.
The most important tool you'll use in iMovie is the split function. Let's say there's a boring pause in the middle of your sizzling shot. You don't need to re-film it. Just scrub the timeline to where the mistake is, tap the clip, and hit "Split." This cleanly slices your clip in two, letting you trim or delete the bad part without affecting the rest.
Finally, to make the cuts between your shots feel less abrupt, add a transition. Tap the small icon between two clips and pick something simple like a "Dissolve" or "Fade." These little touches make a huge difference, giving your video a smooth, professional flow instead of a series of jarring jumps.
Bringing Your Videos to Life with Sound

Visuals might be what catch someone's eye, but it's the audio that keeps them watching. A video with poor or non-existent sound just feels empty, almost amateurish. Getting the audio right turns a simple clip into something truly engaging, and the good news is you don't need a high-end studio to pull it off with your iPhone.
Adding a music track is often the quickest way to set a mood. If you're using iMovie, it's dead simple. You can pull a song from your own music library or browse the royalty-free theme music and sound effects that Apple includes right in the app.
Adding Music and Balancing Levels
Finding the perfect song is the easy part. The real skill comes in balancing its volume against any other audio in your video, like dialogue or ambient sound. It's a classic rookie mistake to let the background music completely drown out what's happening on screen.
Once you’ve dropped a music track into your iMovie timeline, just tap on it and look for the speaker icon. This will pull up a volume slider. As a general rule of thumb, if you have someone speaking, try lowering the background music to around 15-20% of its original volume. You want it to support the video, not fight for the spotlight.
The goal is to create a soundscape that feels completely natural. When done right, the audio and visuals blend so perfectly that the viewer doesn't notice the separate parts—they just feel the impact of the finished piece.
To stay out of trouble with copyright, especially for platforms like YouTube or Instagram, always use royalty-free music. There are tons of great places to find tracks, like Epidemic Sound, Artlist, or even YouTube’s own Audio Library.
Recording a Clean Voiceover
Sometimes, your video needs a bit of narration to explain what's happening or to add that personal, human touch. iMovie lets you record a voiceover directly onto your video timeline. Just move the playhead to where you want the narration to start, hit the plus (+) sign, and choose "Voiceover."
The quality of your voiceover, however, is all about your recording environment. Your iPhone's mic is surprisingly good, but you have to give it a fighting chance.
- Find a Soft Room: Don't record in an empty, echoey room. Spaces with carpets, curtains, and soft furniture are your best friend because they absorb sound and kill reverb. A walk-in closet filled with clothes is the classic home studio trick for a reason!
- Kill Background Noise: This is a big one. Turn off fans, AC units, refrigerators—anything that creates that low-level hum. You might not notice it, but your mic certainly will. For an even cleaner result, you can learn how to remove background sound from video during the editing process.
- Watch Your Distance: Holding the phone right up to your mouth is a no-go. It causes "plosives," those harsh, distorted "p" and "b" sounds. Keep the phone about six to eight inches away for a much cleaner, more natural sound.
Nailing these audio details is what separates a decent video from a great one. It’s how you transform a series of clips into a polished, professional story.
Getting Your Video Social Media-Ready
Editing for platforms like TikTok, Instagram Reels, and YouTube Shorts is a totally different beast. The content needs to feel alive and look like it belongs on a vertical screen. This is where you'll likely want to move past iMovie and jump into dedicated apps like CapCut or the mobile version of Adobe Premiere Rush. They just give you a much bigger creative toolbox.
These apps were practically born for the fast, trend-heavy world of short-form video. They have features built right in that are designed to grab someone's attention in the first three seconds—an absolute must when your audience is just one flick away from the next video.
Own the Vertical Frame
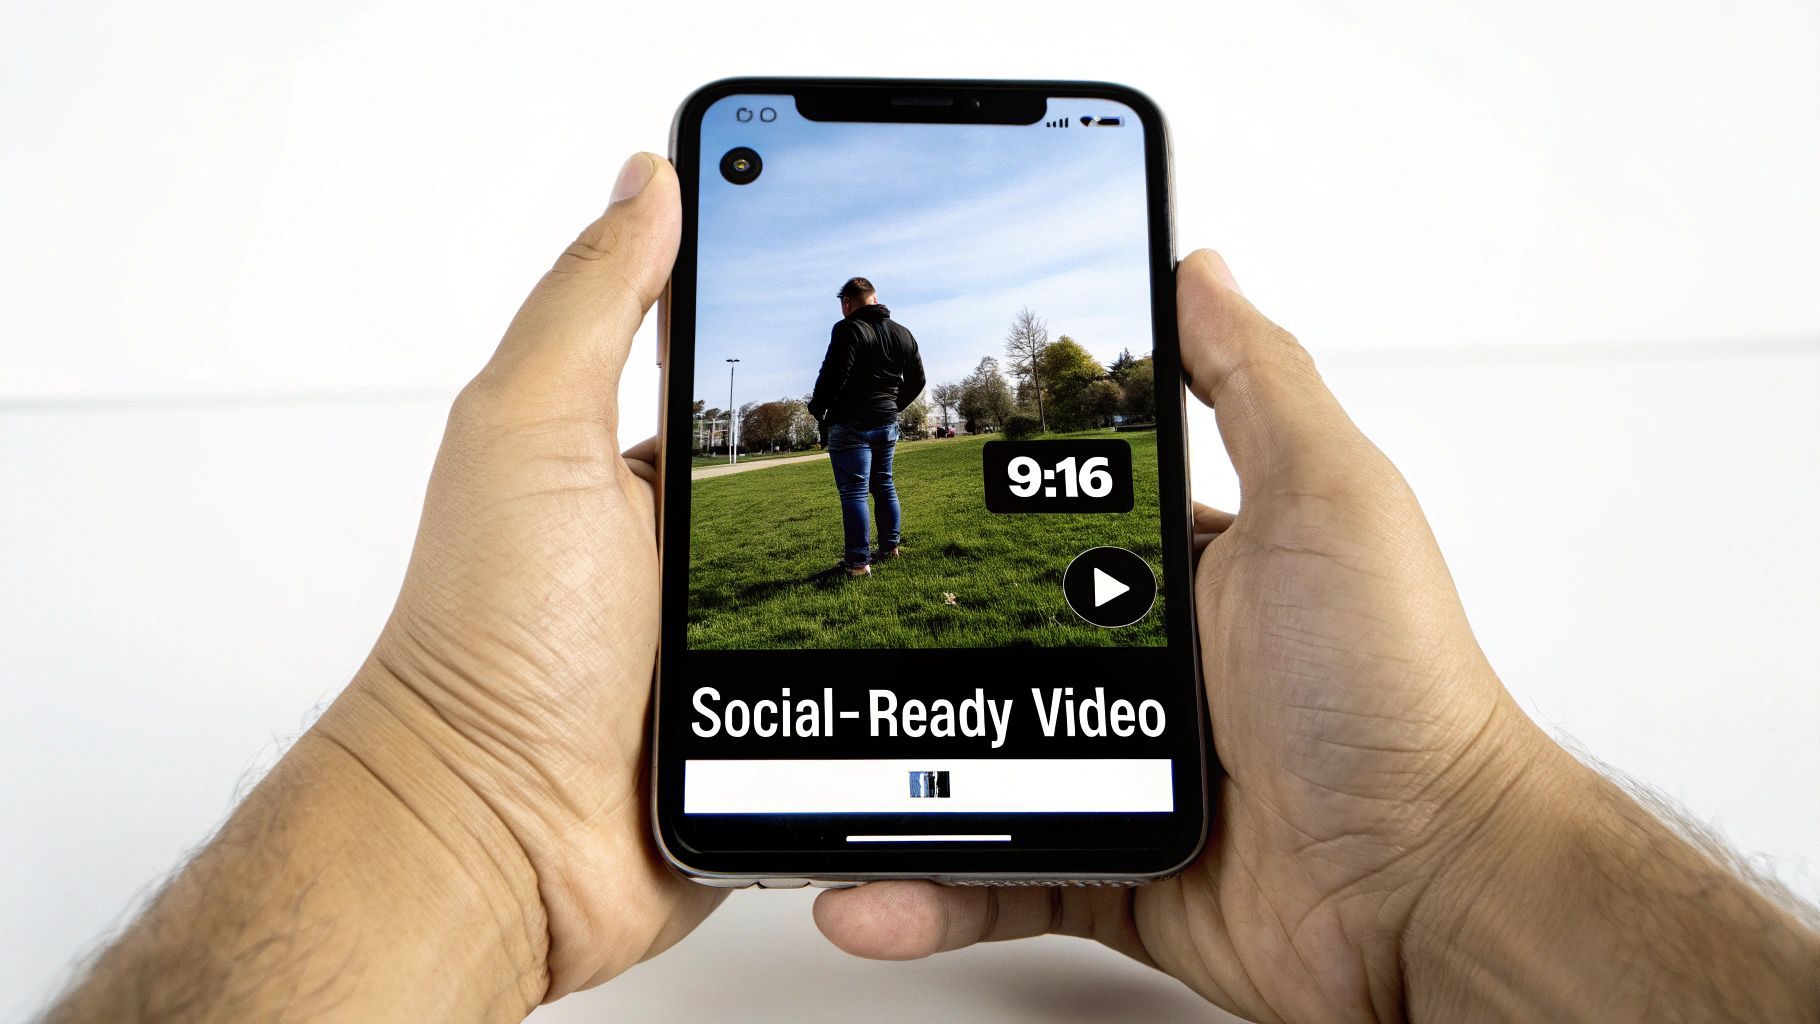
If there's one golden rule for social video, it's this: go vertical. Nothing gives away an amateur post faster than a horizontal video squeezed between big black bars. You want your content to fill the entire screen, and that process starts the moment you create a new project.
The very first thing you should do in an app like CapCut is select the 9:16 aspect ratio. This sets up your canvas perfectly for vertical platforms. If you happened to shoot your footage horizontally (in 16:9), you'll need to reframe it. This usually means zooming in and dragging the clip around to keep the most important action right in the center of that new vertical frame.
Hook Viewers with On-Screen Text
Let's be real: a lot of people scroll with the sound off. This makes text overlays and captions non-negotiable. They aren't just for conveying information; they're a powerful visual hook. CapCut, in particular, has a massive library of animated text styles, cool fonts, and effects that leave iMovie's basic titles in the dust.
A great strategy is to drop a bold, can't-miss title right at the beginning. Here's a simple but effective approach:
- A punchy headline: Use a big, clean font that instantly tells people what the video is about.
- Add some movement: Make the text pop, slide in, or fade on. A little animation goes a long way.
- Place it smartly: Make sure your text doesn't cover up the most important part of your video.
For formats like Stories and Reels, the turnaround time is lightning-fast. The time from editing to posting can literally be minutes. Marketers know that a mobile-first workflow is key to keeping up. In fact, a staggering 81% of consumers say they've taken action after watching short mobile videos, which is why creators are all-in on quick iPhone edits that feel native to the feed.
The best social media videos feel like they were made for the platform, not just reposted to it. Using native-style text, trendy audio, and a vertical format helps your content blend in seamlessly while standing out creatively.
Create a Signature Look with Color Grading
Having a consistent visual style helps people recognize your content instantly. Basic color grading is an easy win here. You don't have to be a professional colorist; just a few tweaks can give all your videos a cohesive look and feel.
Most editing apps offer both preset filters and manual adjustment tools. My advice? Instead of slapping a random filter on every time, try to develop your own "look" by adjusting the same settings consistently. For instance, you could always dial down the saturation just a touch for a moodier, cinematic vibe, or maybe you always bump up the warmth a little for a cozier feel.
This small step makes your entire feed look more professional and put-together. For creators who lean into that user-generated style, having tools to simplify this is a game-changer. If you're looking for ways to streamline your whole process, exploring AI-powered UGC ad creation can give you some incredible ideas on how to automate your content pipeline.
Speed Up Your Workflow with AI Tools
Let's be honest, editing video on your iPhone can be a real grind. But what if you could slash your editing time from hours to minutes? This isn't some far-off dream; artificial intelligence is already here, and it’s completely changing how creators work. Instead of getting bogged down in repetitive tasks, you can let AI do the heavy lifting.
You’ve probably already seen this in action. Take an app like CapCut. Its auto-captioning feature is an absolute game-changer. With just one tap, it listens to your video and spits out surprisingly accurate, perfectly timed captions. This is huge for accessibility and engagement, especially since so many people watch videos on mute these days.
Let AI Be Your Creative Partner
AI isn't just for the boring stuff, either. It’s quickly becoming a valuable creative sidekick. Feeling stuck for a script idea? AI can brainstorm topics, write out entire scripts, and even come up with catchy hooks to grab your audience's attention right from the start. This frees you up to concentrate on what really matters: your delivery and telling a great story.
This shift is happening fast across the industry. In 2025, about 51% of video marketers were already using AI to help create or edit their content. The results are pretty staggering, with some reporting that they can produce content 10x faster by using AI to generate templates and automatically select the best clips.
If you're looking to dive deeper, it's worth exploring the best AI video editing tools to see what else is out there.
Create a Batch Production Machine
One of the smartest ways to stay consistent without burning out is batch production. The idea is simple: film a bunch of videos in one go, then edit them all together in a single session. An AI-powered workflow makes this incredibly efficient. For example, you could use a tool like an AI ad generator to quickly draft scripts for several short ads, then shoot them all in an afternoon.
An organized system is key here. Many AI platforms give you a central hub to manage all your projects—scripts, video clips, and final edits all live in one place, which is perfect for batching.
Here’s my personal approach: I have a master template with my standard fonts, brand colors, and a favorite background music track. After I finish filming a batch of videos, I just apply that template to each one, make a few quick trims, and boom—a full week of content is ready in less than an hour.
When you combine batch production with AI tools, you build a content engine. You're not just an editor anymore; you become a producer who can pump out high-quality content consistently without the burnout. This is exactly how top creators scale their output.
Common Questions About iPhone Video Editing
Once you start editing videos on your iPhone, you'll inevitably hit a few snags or wonder how to take things to the next level. It happens to everyone. Let's walk through some of the most common questions that pop up, so you can solve problems quickly and get back to creating.
What Is the Best Free Video Editing App for iPhone?
For most people just getting their feet wet, Apple's own iMovie is the perfect starting point. It's probably already on your phone, it’s surprisingly powerful, and it won't overwhelm you. You can easily manage multiple clips, add titles, drop in transitions, and even record a voiceover—everything you need for a polished video.
But if your goal is to make content specifically for TikTok or Instagram Reels, you can't beat CapCut. It's also free and is absolutely packed with the trendy effects, slick text animations, and an amazing auto-captioning tool that social media creators swear by. It just gets the vibe of short-form video.
How Do I Improve My Video Quality on iPhone?
You can't add pixels that weren't there to begin with, so you can't magically turn a blurry video into a sharp one. But you can make what you have look a whole lot better. The trick is to master the adjustment tools right inside the Photos app or your editor of choice.
- Brightness and Contrast: Even a small tweak here can rescue a video shot in bad lighting, making it feel way more professional.
- Saturation: Want those colors to pop? A little bump in saturation makes everything look more vibrant, which works wonders for travel vlogs or food videos.
- Sharpness: Adding just a touch of sharpness can give your footage a crisper, more defined look.
Of course, the best way to get a high-quality result is to start with high-quality footage. Before you even hit record, pop into your iPhone’s Camera settings and make sure you’re shooting in at least 1080p HD. Better yet, switch to 4K at 30 fps to give yourself the most detail and flexibility in the edit.
Can I Add My Own Music to an iPhone Video?
You sure can. Both iMovie and CapCut let you bring your own audio into a project. With iMovie, you can pull in songs you've purchased on iTunes or use its library of royalty-free soundtracks. If you have an MP3 or another audio file, just save it to the Files app on your iPhone, and you can import it directly from there.
Quick heads-up: Always be careful with copyright. If you're posting your video anywhere public—especially if you hope to make money from it—you need to use music that you either own the rights to or that is explicitly labeled royalty-free. This is how you avoid copyright strikes and keep your channel in good standing. To learn more about the financial side of content creation, check out our guide on how much YouTube pays creators for their work.
How Do I Export a Video for TikTok or Instagram?
The key to a professional-looking social media video is getting the format right from the start. Before you even think about editing, set your project's aspect ratio to 9:16 (vertical). This is non-negotiable. It guarantees your video fills the entire screen on TikTok and Reels, which is what viewers expect.
When it’s time to export, 1080p is the sweet spot. It delivers fantastic visual quality that looks sharp on a phone screen, but the file size is still small enough to upload quickly and reliably.
Ready to stop grinding and start creating? ShortGenius unifies AI scriptwriting, video creation, and multi-channel publishing into one seamless workflow. Join over 100,000 creators who produce high-quality content in minutes, not hours. Try ShortGenius for free.