8 Crucial Video Editing Tips for Beginners in 2025
Unlock your potential with these 8 video editing tips for beginners. Learn pro workflow, color, audio, and pacing to create amazing videos from day one.
Diving into video editing can feel like learning a new language. With complex timelines, endless software options, and a sea of technical jargon, it's easy for beginners to get overwhelmed before even making the first cut. What if you could bypass the common frustrations and start creating polished, professional-looking videos right away? This guide is your practical roadmap.
We're cutting through the noise to bring you foundational, actionable video editing tips for beginners that professionals rely on every single day. These aren't just abstract theories; they are specific steps covering everything from intelligent project setup to the final, masterful touches that separate amateur work from engaging content. Mastering these techniques is the key to transforming raw footage into a compelling story that captivates your audience.
Whether you're aiming for YouTube growth, creating crisp social media ads, or producing polished corporate videos, these core principles will save you countless hours of trial and error. This list is designed to set you on a direct path to becoming a more confident, efficient, and skilled editor. Let's begin the process of turning your clips into content that truly connects.
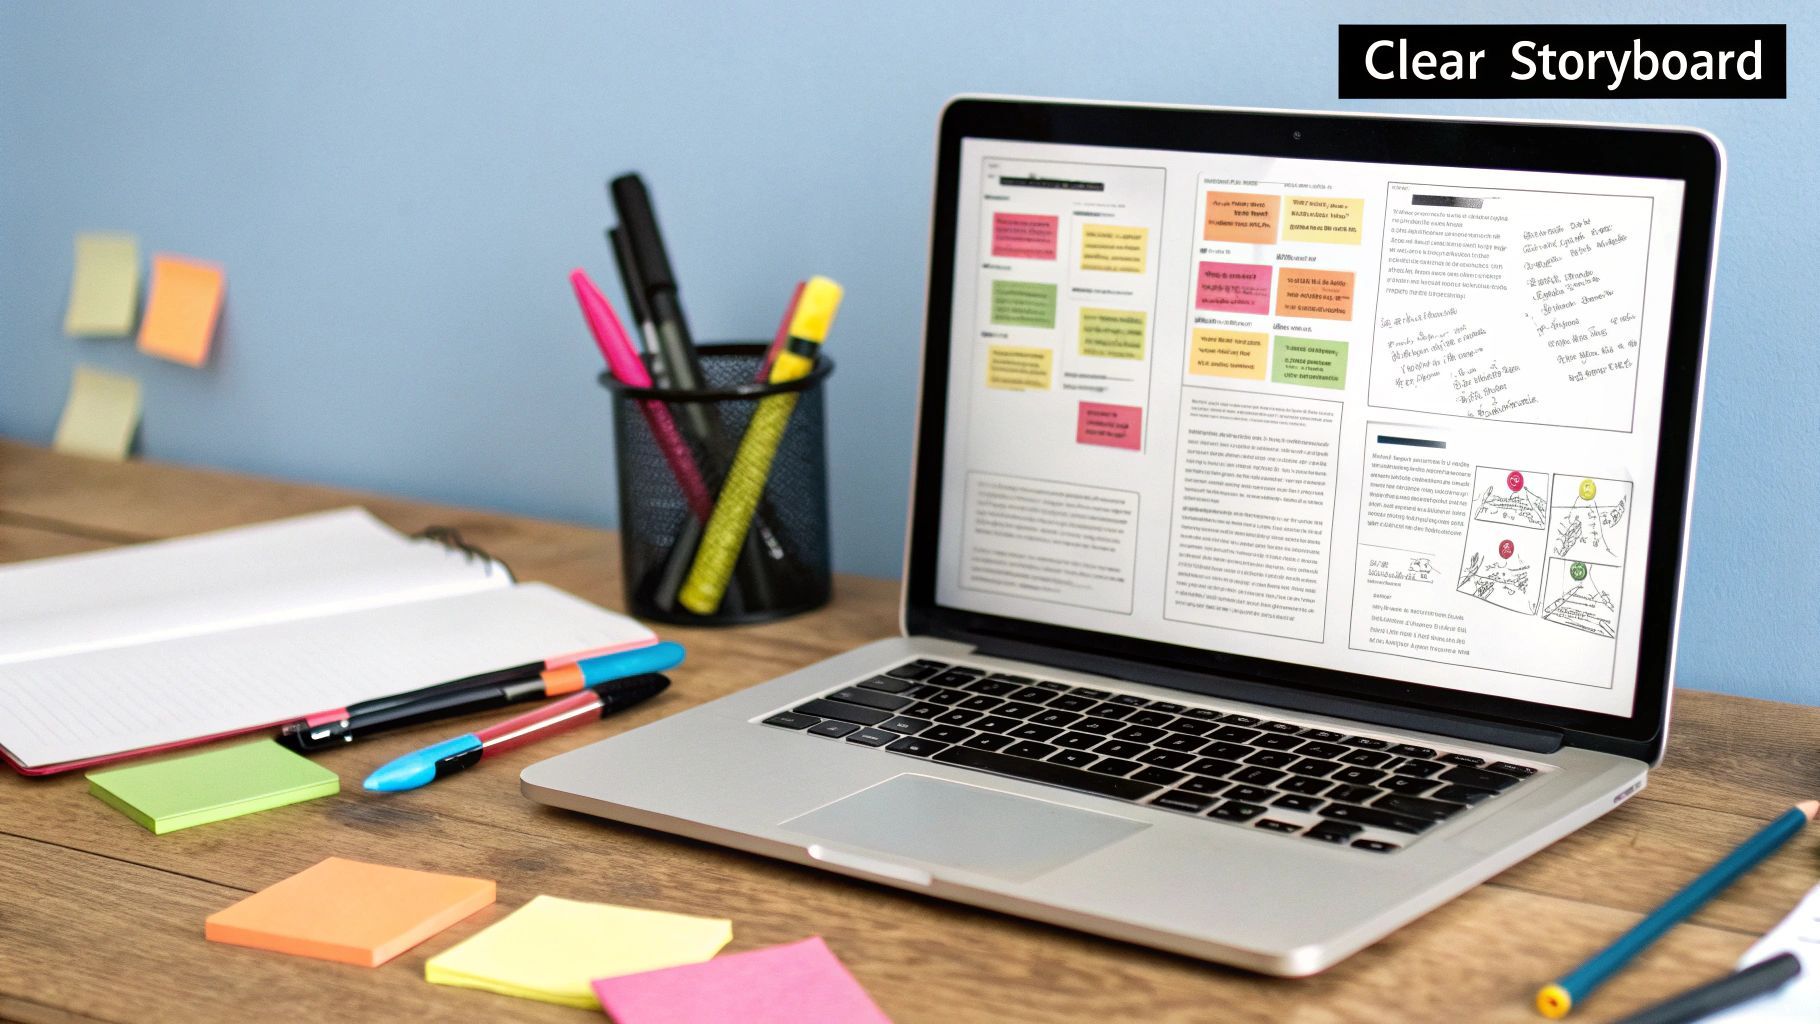
1. Start with a Clear Plan and Storyboard
One of the most impactful video editing tips for beginners happens before you even open your software. Jumping straight into your editing timeline without a roadmap is like trying to build a house without a blueprint. A clear plan, often in the form of a script or storyboard, provides the essential structure that guides your entire editing process, saving you hours of guesswork and frustration.
This pre-production step involves outlining your video's narrative, shot by shot. It doesn't need to be a masterpiece. A storyboard can be a series of simple sketches or even a text document describing each scene, the camera angle, any dialogue or voiceover, and intended background music or sound effects. This forces you to think critically about your story's flow and ensures you have all the necessary footage before you start cutting.
Why Planning is Crucial
Filmmaking pioneer Alfred Hitchcock was famous for meticulously storyboarding every single shot, believing the film was essentially "finished" before the cameras rolled. While you don't need that level of detail, the principle holds true. Creators like Casey Neistat build their vlogs around a clear narrative arc, planned in advance, which is why they feel so cohesive and engaging. This planning phase helps you identify gaps in your footage and establish a consistent pace and tone from the start.
How to Create a Simple Storyboard
You don't need expensive software to get started. Here are a few practical ways to map out your video:
- Use Free Digital Tools: Platforms like Milanote or Canva offer free storyboarding templates that are perfect for organizing your scenes visually.
- Create a "Paper Edit": For documentary-style content, write down timecodes of your best clips and quotes on index cards. Arrange them on a table to build your narrative structure before making a single digital cut.
- Write a Detailed Outline: A simple document outlining your video in three acts (beginning, middle, end) with notes on key shots, B-roll, and audio cues is often enough to create a powerful guide.
By investing a small amount of time in planning, you create an efficient workflow that makes the actual editing process smoother, faster, and more creative.
2. Master Keyboard Shortcuts for Efficiency
One of the most significant leaps in video editing speed comes from moving your hands off the mouse and onto the keyboard. Constantly clicking through menus for basic actions like cutting, trimming, or playback control breaks your creative rhythm. Mastering keyboard shortcuts is the single best way to streamline your workflow, allowing you to perform complex edits with rapid, intuitive keystrokes and dramatically reduce your project time.
This technique involves committing common commands to muscle memory, turning a slow, multi-click process into an instantaneous action. Instead of navigating to the razor tool, you simply press a key to make a cut. This is a fundamental skill for any serious editor and is the primary reason professionals can work so quickly and efficiently.
Why Shortcuts are Crucial
Professional editors, from those cutting feature films to YouTube creators like Marques Brownlee (MKBHD), rely almost exclusively on shortcuts. Taran Van Hemert, the editor for Linus Tech Tips, is famous for an incredibly optimized workflow built entirely around keyboard commands, allowing him to meet demanding production schedules. This approach keeps you focused on the creative aspects of your story rather than the technical operation of the software.
How to Learn Shortcuts Effectively
Memorizing every shortcut at once is overwhelming. Instead, focus on building the habit gradually. Here are a few practical ways to get started:
- Start with the Essentials: Begin by learning 5 to 10 of the most common shortcuts. Focus on play/pause (Spacebar), cut/add edit (Ctrl/Cmd+K), undo (Ctrl/Cmd+Z), and timeline zoom (+/-).
- Print a Cheat Sheet: Keep a physical or digital copy of your software’s most important shortcuts visible at your workstation. Refer to it constantly until the actions become second nature.
- Customize Your Workspace: As you identify your most-used actions, customize your keyboard shortcuts in your software's settings. Assigning your favorite commands to easy-to-reach keys creates a personalized, high-speed workflow.
By integrating shortcuts into your process, you transform video editing from a series of slow, deliberate clicks into a fluid and efficient creative experience.
3. Organize Your Media Files and Project Structure
One of the most critical video editing tips for beginners has nothing to do with cutting clips or adding effects. A messy project folder is a direct path to lost files, broken media links, and immense frustration. By creating a logical folder structure before you even import your first clip, you build a stable foundation that makes your entire editing process more efficient and secure.
This foundational step involves creating a master folder for your project and then organizing all related assets into specific subfolders. This means dedicating separate folders for your raw footage, audio files, graphics, music, and project save files. This systematic approach ensures that every asset has a designated home, preventing you from ever having to frantically search for a missing file again.

Why Organization is Crucial
This principle is a non-negotiable standard in professional post-production houses and a core lesson taught by editing educators like Larry Jordan. Production companies use standardized folder templates for every project to ensure seamless collaboration. For solo creators, this discipline is just as vital. It allows you to easily revisit old projects, repurpose assets, and avoid the dreaded "Media Offline" error that occurs when your editing software can't locate a source file.
How to Create a Bulletproof Project Structure
You can implement a professional-grade organization system in just a few minutes. Here are the key steps to get started:
- Create a Project Template: Make a master project folder containing subfolders like
01_Footage,02_Audio,03_Music,04_Graphics,05_Project_Files, and06_Exports. Simply duplicate this entire folder for every new video. - Use Consistent Naming Conventions: Name your files and folders with clarity. A great format is
YYYY-MM-DD_ProjectName_Description. This makes your files chronologically sortable and easily searchable. - Mirror Your Bins: Inside your editing software, create bins (folders) that mirror the structure on your hard drive. This creates an intuitive workflow where finding assets digitally is identical to finding them in your file system.
By dedicating time to organization upfront, you transform your workflow from chaotic to controlled, allowing you to focus your energy on the creative aspects of editing.
4. Learn Basic Color Correction Before Color Grading
One of the most confusing yet powerful video editing tips for beginners is understanding the difference between color correction and color grading. Many new editors use these terms interchangeably, but they are two distinct, sequential steps. Color correction is the technical process of fixing problems to make your footage look natural, while color grading is the creative process of applying a stylistic look to evoke a mood.
Before you try to make your video look like a moody cinematic masterpiece, you must first establish a clean, accurate, and consistent foundation. This means adjusting exposure, fixing white balance to remove unnatural color casts, and ensuring the contrast is balanced. Attempting to apply a creative color grade to poorly corrected footage is like painting on a dirty canvas; the final result will be muddy, inconsistent, and unprofessional.
Why Correction Comes First
Every professional production, from Netflix documentaries to Hollywood films, relies on a meticulous color correction pass first. This ensures that footage shot on different cameras, on different days, and in different lighting conditions all matches seamlessly. A wedding videographer, for example, uses color correction to make the footage from a dimly lit indoor ceremony match the bright, sunny outdoor reception shots. This foundational step creates visual continuity that the audience doesn't notice, which is precisely the point.
How to Approach Basic Color Correction
Mastering the basics of color correction involves more than just trusting your eyes. Here are some actionable steps to build a solid foundation:
- Trust Your Scopes, Not Just Your Eyes: Your monitor may not be perfectly calibrated, but video scopes (like the Waveform, Vectorscope, and Histogram) provide objective data about your image’s brightness and color. Learn to read these tools to set accurate black and white points.
- Fix White Balance First: Use your software's white balance tools (like an eyedropper on a neutral white or grey area) to eliminate any unnatural color casts from your footage. This single step can instantly make your video look more professional.
- Correct a "Hero" Shot: Find the best-looking clip in your sequence and perfect its color. Then, use it as a visual reference to match all other similar clips, ensuring consistency across the scene.
By mastering the technical discipline of color correction, you give yourself the perfect neutral starting point for the creative art of color grading later.
5. Use J-Cuts and L-Cuts for Professional Transitions
One of the most effective video editing tips for beginners to instantly elevate their work is mastering J-cuts and L-cuts. These are fundamental techniques that create smooth, professional transitions by separating the audio and video cut points. A straight cut, where both the audio and video change simultaneously, can feel jarring and amateurish. By staggering these cuts, you create a more seamless and engaging viewing experience.
An L-cut is when the audio from the first clip continues playing over the start of the second clip, while a J-cut is the opposite, where the audio from the second clip begins before its video appears. These techniques are named for the shape they make on the editing timeline. They work because they mimic how we naturally perceive the world, often hearing something just before or after we see it, which makes the edits feel invisible to the audience.
The infographic below illustrates the simple, three-step process for creating these professional split edits in your timeline.
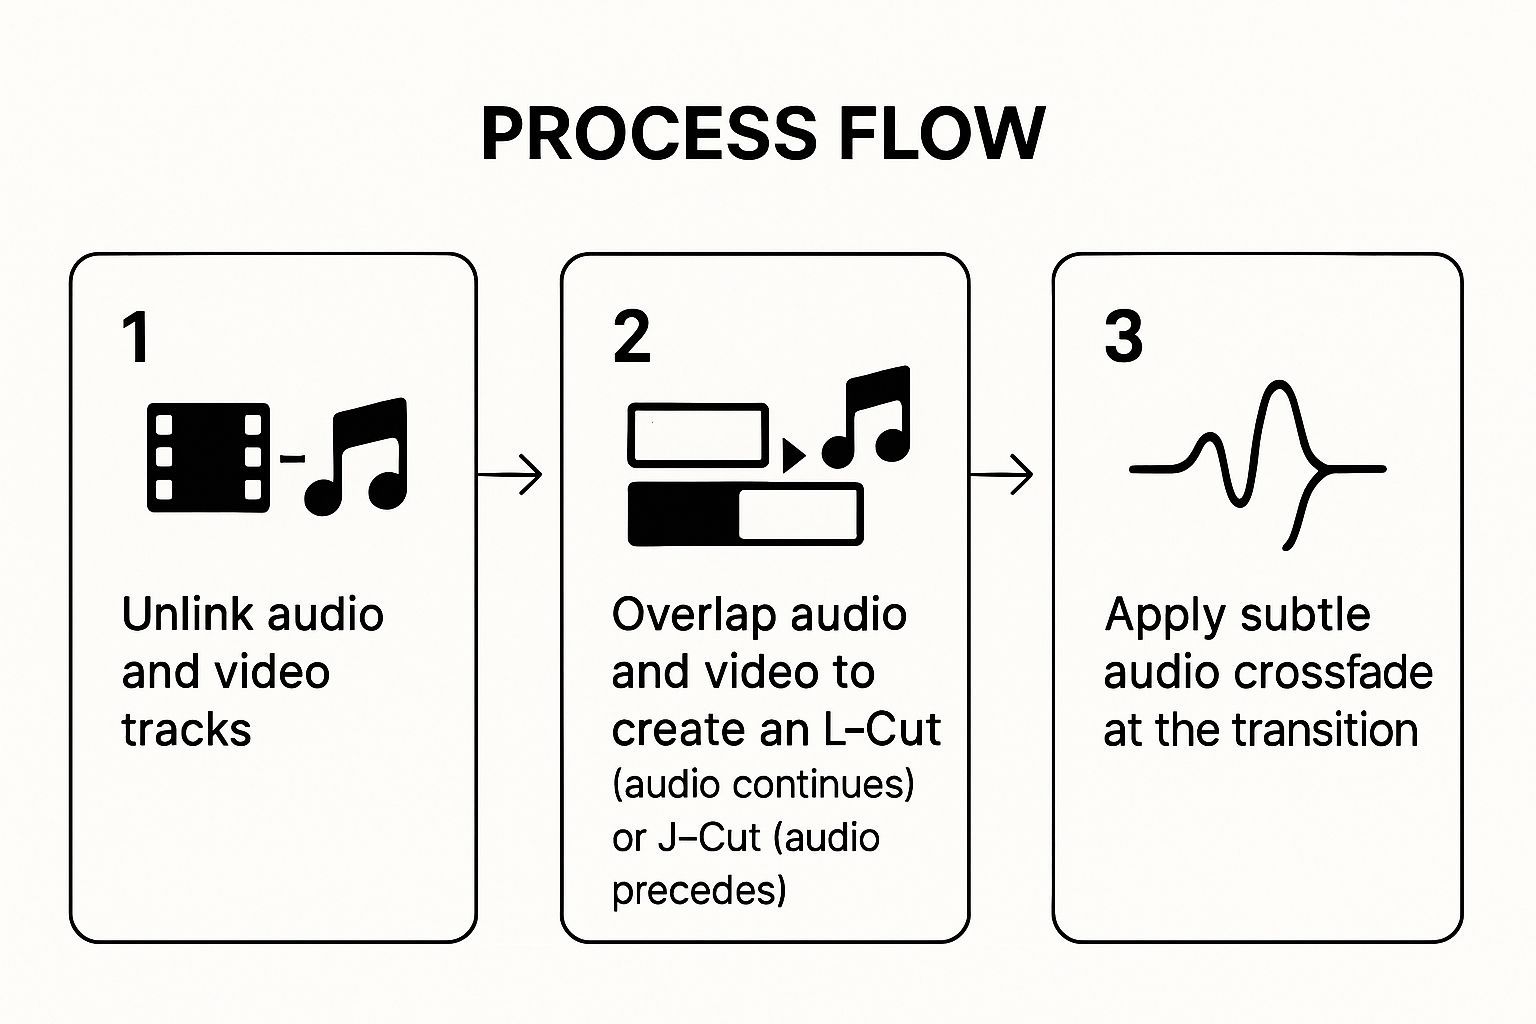
This workflow shows that by unlinking your tracks, you gain the precise control needed to overlap audio and video, creating a much smoother transition.
Why Split Edits are Crucial
Legendary film editor Walter Murch perfected these techniques to guide audience attention and maintain narrative flow. You see L-cuts constantly in interviews and documentaries, where a person’s voice continues as the video cuts to B-roll footage of what they are describing. This keeps the audience engaged with both the speaker's story and the visual context. Popular YouTube channels like This Guy Edits frequently break down how these seemingly simple edits are the bedrock of professional-quality video storytelling.
How to Create J-Cuts and L-Cuts
This technique is simple to learn in nearly any editing software. Here are the practical steps to start using them:
- Unlink Audio and Video: First, you need to separate the audio and video tracks for your clips. In most programs like Adobe Premiere Pro or DaVinci Resolve, you can do this by right-clicking the clip and selecting "Unlink" or by holding Alt (Windows) or Option (Mac) and clicking just the audio or video portion.
- Create the Overlap: For an L-cut, drag the end of the video clip to the left while leaving the audio in place. For a J-cut, drag the beginning of the audio clip to the left so it starts under the previous video clip.
- Add an Audio Crossfade: To avoid any abrupt audio pops or clicks at the transition point, apply a short audio crossfade (constant power) between the two audio clips. This ensures a seamless blend.
6. Keep It Simple—Avoid Over-Editing and Excessive Effects
One of the surest signs of an amateur editor is the impulse to use every tool in the box. A common beginner mistake is over-editing, where a video is cluttered with flashy transitions, excessive text animations, and distracting effects. True professional editing is often invisible; it serves the story and guides the viewer's focus without calling attention to itself. The goal is to enhance your message, not overwhelm it with editing gymnastics.
Resisting the temptation to add a star wipe or a page peel transition is a crucial step in developing a polished style. Simplicity and restraint produce a far more professional and watchable final product. When your editing is clean and purposeful, the audience remains engaged with your content, which is the ultimate objective. This "less is more" philosophy is one of the most valuable video editing tips for beginners to master.
Why Simplicity is Powerful
Legendary editor Walter Murch championed the idea of "invisible" editing, where the cut serves the emotional and narrative needs of the story above all else. This principle is seen across professional media. For instance, Apple's product launch videos use clean aesthetics and minimal, purposeful cuts to keep the focus entirely on the product. Similarly, tech reviewer MKBHD relies on simple, direct cuts and smooth camera movements to convey information clearly, making his videos feel authoritative and clean.
How to Practice Restraint in Your Edits
Adopting a minimalist mindset will instantly elevate your work. Here are a few practical ways to keep your editing simple and effective:
- Default to the Standard Cut: Make the simple "hard cut" your go-to for over 90% of your edits. It's clean, professional, and doesn't distract the viewer.
- Use Transitions with Purpose: Reserve dissolves for indicating a passage of time or a gentle shift in mood. Avoid novelty transitions unless they specifically fit a unique, stylized theme.
- Limit Your Fonts: Stick to two or three consistent fonts and styles throughout your entire video. This creates a cohesive and professional brand identity.
- Ask "Why?": Before adding any effect or transition, ask yourself, "Does this serve the story, or does it just look cool?" If it doesn't have a purpose, it's likely a distraction.
By focusing on clear storytelling and removing unnecessary flourishes, your videos will look more polished and hold your audience's attention far more effectively.
7. Prioritize Good Audio—Clean Dialogue and Sound Levels
One of the most crucial video editing tips for beginners has nothing to do with visuals. Audiences will forgive slightly shaky footage or imperfect lighting, but they will instantly click away from a video with bad audio. Prioritizing clean, balanced sound is non-negotiable because it directly impacts perceived quality and viewer retention, making it arguably more important than the video itself.
This means ensuring your dialogue is crisp and intelligible, background noise is minimized, and your music and sound effects support the content rather than overpowering it. Poor audio can make your message unclear and your production feel unprofessional, no matter how great your visuals are. Learning to properly balance your sound levels is a fundamental skill that separates amateur edits from polished, engaging content.
Why Good Audio is Essential
Think about your own viewing habits. You've likely abandoned a video because you couldn't understand what the speaker was saying or because of an annoying buzzing sound. This principle is why professional creators obsess over audio. Podcast-to-video content, for example, retains its audience by maintaining broadcast-quality audio standards. Even on platforms like TikTok, where video is consumed quickly, creators who prioritize clean audio see higher engagement because their message is easily understood.
How to Improve Your Audio in the Edit
You don't need to be a sound engineer to make massive improvements. Here are a few practical steps to clean up your sound:
- Set Your Levels Correctly: As a rule of thumb, your main dialogue should consistently peak between -12 dB and -6 dB. Background music should sit much lower, around -20 dB to -18 dB, to ensure it never competes with the speaker.
- Always Edit with Headphones: Your laptop or computer speakers will not reveal subtle issues like low hums, pops, or clipping. A decent pair of headphones is essential for hearing the full detail of your audio track and making precise adjustments.
- Use Audio Crossfades: Apply a very short audio crossfade (often just a few frames) at every cut. This simple action prevents the jarring "pops" or "clicks" that can occur when two separate audio clips are placed back-to-back, creating a smoother listening experience.
- Utilize "Ducking": Most editing software includes an "auto-ducking" feature. This automatically lowers the volume of your music track whenever dialogue is present, then raises it back up during pauses, ensuring your voice always remains the focus.
8. Edit for Pacing—Cut Out Dead Space and Maintain Rhythm
Pacing is the invisible rhythm that dictates how your video feels. It’s the flow determined by the length of your shots, the speed of your cuts, and the amount of dead air you leave in. For beginners, mastering pacing is one of the most transformative video editing tips, as it turns a slow, amateurish video into a tight, professional-looking piece of content that respects the viewer's time and attention.
In today's fast-moving digital landscape, audiences expect content that gets to the point quickly and maintains momentum. This means you must be ruthless in your edit, cutting out every unnecessary pause, filler word, and lingering shot. Good pacing isn't always about being fast; it's about making every second count. If a moment doesn't advance the narrative or evoke a specific emotion, it's likely dragging the entire video down.
Why Pacing is Crucial
Creators like MrBeast have built empires on the principle of extreme pacing, engineering their videos to eliminate any moment a viewer might get bored and click away. Similarly, the rapid-fire editing style popularized by creators on TikTok and Instagram Reels has conditioned audiences to expect concise, high-energy delivery. Learning to control your video's rhythm ensures your message is not only heard but also felt, keeping your audience engaged from the first second to the last.
How to Improve Your Video's Pacing
Implementing good pacing requires a critical eye and a willingness to trim aggressively. Here are a few practical techniques to tighten your edits:
- Cut on the Breath: Remove every "um," "uh," and long pause between sentences in your dialogue. This simple trick instantly makes the delivery sound more confident and energetic.
- Trim the Ends: Shave off a second or two from the beginning and end of almost every clip. Most clips contain dead space before the main action starts and after it finishes.
- Vary Your Shot Length: Create a dynamic rhythm by mixing quick cuts during high-energy moments with longer, more deliberate shots when you want to emphasize a point or let a moment breathe.
- Use the "J-Cut" and "L-Cut": Overlap your audio and video to create a smoother flow between shots. A J-cut is when the audio from the next clip begins before the video, and an L-cut is when the audio from the previous clip continues over the new shot.
By actively thinking about the rhythm of your video, you move beyond simply assembling clips and start crafting an intentional viewing experience.
8 Essential Video Editing Tips Comparison
| Technique | Implementation Complexity 🔄 | Resource Requirements 💡 | Expected Outcomes 📊 | Ideal Use Cases 💡 | Key Advantages ⭐ |
|---|---|---|---|---|---|
| Start with a Clear Plan and Storyboard | Moderate – requires upfront planning and revisions | Low – paper or digital tools like Canva or Milanote | Organized footage, clear narrative flow, less rework | All levels, especially beginners; collaborative projects | Saves editing time, prevents creative blocks, efficient collaboration |
| Master Keyboard Shortcuts for Efficiency | Moderate – steep initial learning curve | Low – time investment in memorization | Faster editing speed, fluid workflow | Professional editors, high-volume content creators | Reduces editing time 30-50%, reduces physical strain, speeds up workflow |
| Organize Your Media Files and Project Structure | Moderate – requires consistency and discipline | Low to Medium – time for setup and ongoing maintenance | Efficient file retrieval, fewer lost assets | All projects, teams, collaborative workflows | Saves time searching files, prevents data loss, seamless project handoff |
| Learn Basic Color Correction Before Color Grading | High – requires understanding color theory and scopes | Medium – calibrated monitor and software needed | Professional, consistent footage appearance | Films, documentaries, tech/product videos | Improves visual quality, fixes issues, creates neutral base for grading |
| Use J-Cuts and L-Cuts for Professional Transitions | Moderate – unlinking audio/video and precise timing | Low – basic editing skill and software functions | Smooth, natural scene transitions | Interviews, dialogue-heavy content, storytelling | Creates invisible edits, maintains dialogue flow, adds production polish |
| Keep It Simple—Avoid Over-Editing and Excessive Effects | Low to Moderate – requires strong editorial judgment | Low – focus on minimal effects | Clean, professional videos with timeless appeal | Corporate, documentaries, news, education | Enhances focus on content, reduces render issues, ages better visually |
| Prioritize Good Audio—Clean Dialogue and Sound Levels | High – learning audio tools and mixing techniques | Medium – headphones/monitors and software tools | Clear and balanced sound, higher viewer retention | All video content, especially dialogue-driven | Increases professionalism, improves viewer experience, easier than visuals |
| Edit for Pacing—Cut Out Dead Space and Maintain Rhythm | Moderate – requires judgment and attention to flow | Low – mostly time and practice | Engaging, well-timed videos with better retention | YouTube, social media, corporate, educational | Boosts viewer engagement, tightens narrative, adapts content for audiences |
Putting It All Together: Your Path to Editing Mastery
You've just navigated a comprehensive blueprint for transforming raw footage into polished, engaging video content. Mastering the art of video editing is a journey of continuous learning, but the eight foundational pillars we've explored provide a powerful and reliable launchpad. From the strategic foresight of planning and storyboarding to the subtle, professional touch of J-cuts and L-cuts, each tip is a crucial tool in your creative arsenal.
Remember, the goal is not just to learn the software, but to understand the language of visual storytelling. Effective editing is often invisible; it guides the viewer's emotions, clarifies the message, and respects their time without drawing attention to itself. By prioritizing clean audio, organizing your digital workspace, and mastering essential keyboard shortcuts, you are not just saving time. You are building the disciplined habits that separate amateur creators from professional storytellers. These practices free up your mental bandwidth, allowing you to focus less on the technical steps and more on the creative heart of your project: the narrative.
Key Takeaways for Your Editing Journey
As you move forward, keep these core principles at the forefront of every project:
- Structure is Freedom: A well-organized project with a clear plan is the fastest route to a creative and impactful final cut. Don't skip the prep work.
- Pacing is Everything: The rhythm of your edit dictates the viewer's experience. Actively cutting dead space and varying shot duration is one of the most powerful video editing tips for beginners to master.
- Sound is Half the Picture: Never treat audio as an afterthought. Crisp dialogue and balanced sound design can elevate a good video to a great one, while poor audio can ruin even the most stunning visuals.
- Simplicity is Strength: Resist the urge to use every effect and transition in your toolkit. Purposeful, motivated edits that serve the story will always be more effective than flashy but distracting techniques.
Your Actionable Next Steps
The transition from theory to practice is where true growth happens. Don't let this newfound knowledge sit idle. Your immediate next step is to open your editing software and consciously apply one or two of these concepts to your very next project. Perhaps you focus entirely on organizing your media files before you even place a clip on the timeline. Or maybe you dedicate your session to mastering five new keyboard shortcuts until they become muscle memory.
This iterative process of learning, applying, and refining is the essence of developing expertise. Don't be afraid to experiment, make mistakes, and re-edit your work. Each project is an opportunity to hone your skills and develop your unique creative voice. By consistently implementing these foundational video editing tips for beginners, you'll soon find yourself creating content that not only looks professional but also genuinely connects with and captivates your audience.
Ready to streamline your workflow and focus more on creativity? Many of the foundational steps, from scripting to captioning, can be accelerated with AI, and ShortGenius is designed to handle the heavy lifting for you. Explore how ShortGenius can automate tedious tasks and help you produce high-quality, branded video content faster than ever.