10 Pro Video Editing Tips to Elevate Your Content in 2025
Unlock your creative potential with these 10 pro video editing tips. Learn workflow, sound design, color grading, and AI tools to make better videos.
In a world saturated with video, simply hitting 'record' isn't enough. The real magic happens in the edit, where raw footage is transformed into a compelling narrative that captivates audiences. But moving from basic cuts to professional-quality video requires mastering specific techniques that separate amateurs from pros. This guide provides 10 actionable video editing tips designed for modern creators and marketing teams aiming to produce exceptional content.
We'll move beyond generic advice and dive into the nuanced skills that make a tangible difference. You will learn to implement advanced audio transitions like J-cuts and L-cuts, apply cinematic color grading, and optimize your entire workflow with strategic timeline organization and keyboard shortcuts. We will also cover practical methods for pacing, using B-roll effectively, and mastering export settings for different platforms.
Whether you're a solo influencer, a social media manager, or part of a creative studio, these insights will help you refine your process, save valuable time, and elevate your videos from good to unforgettable. Each tip is designed to be immediately applicable, helping you produce content that not only looks professional but also truly stands out and holds viewer attention.
1. L-Cuts and J-Cuts
One of the most effective video editing tips for creating a seamless, professional flow is mastering L-cuts and J-cuts. These techniques involve strategically overlapping your audio and video tracks to create smoother transitions between clips, guiding your audience's attention without jarring cuts.
An L-cut is when the audio from the first clip continues to play over the video of the second clip. Imagine a person speaking, and as they finish their sentence, the camera cuts to what they are looking at while their voice continues. A J-cut is the reverse: the audio from the second clip begins before the video cuts to it. This often happens in dialogue scenes where you hear a character start talking just before you see them on screen.
How to Implement L-Cuts and J-Cuts
These cuts are fundamental for creating a cinematic feel, commonly seen in everything from Hollywood films to high-quality YouTube documentaries. To use them effectively:
- Plan Ahead: Think about where L-cuts and J-cuts will be most impactful during the storyboarding or scripting phase. They are perfect for connecting related ideas or transitioning between speakers in an interview.
- Decouple Audio and Video: In your editing software, unlink the audio and video tracks of your clips. This allows you to extend or shorten one without affecting the other.
- Stagger the Edits: For a J-cut, drag the beginning of the audio from your second clip so it starts under the end of your first clip. For an L-cut, extend the audio from your first clip to overlap with the video of the second.
Using L-cuts and J-cuts gives your editing a sophisticated rhythm, making scenes feel more connected and engaging for the viewer.
2. Color Correction and Grading
Two of the most impactful video editing tips for elevating your production value are color correction and color grading. While often used interchangeably, they are two distinct steps. Color correction is the technical process of fixing issues and standardizing footage, ensuring that white looks white and colors appear natural and consistent across all clips. Color grading is the creative process of applying a stylized look to evoke a specific mood or feeling.
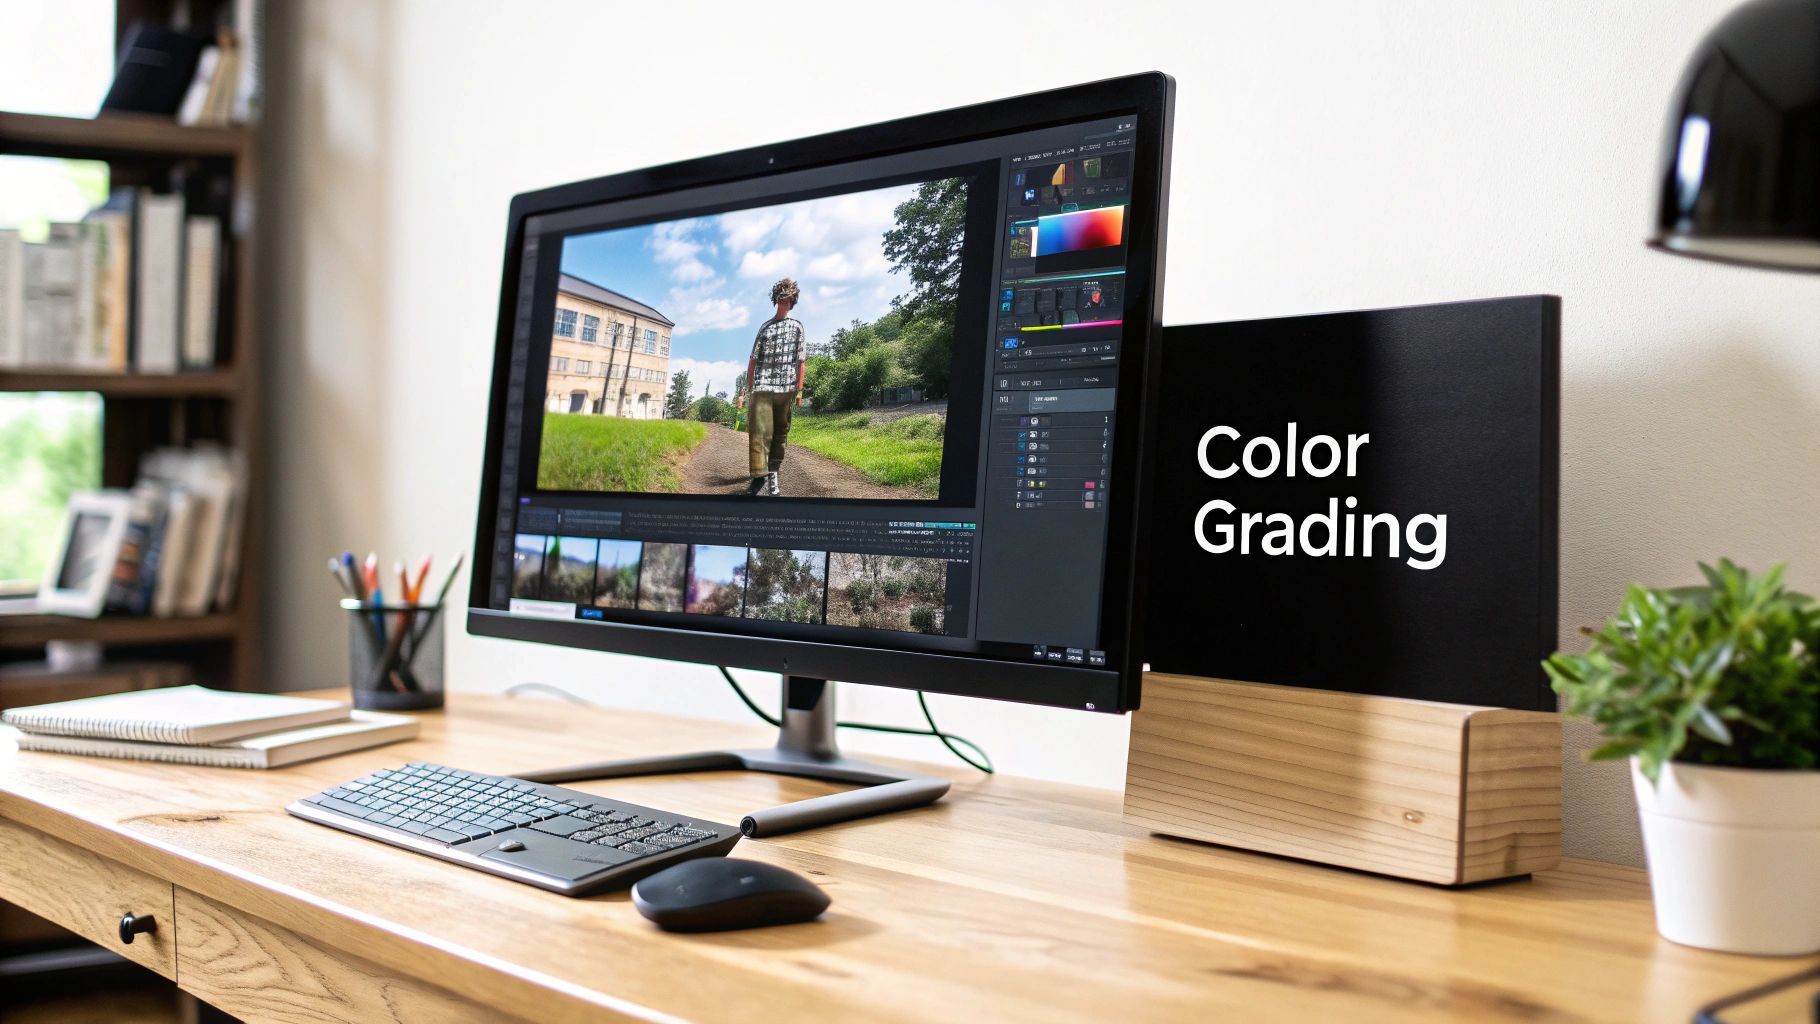
This one-two punch transforms footage from amateur to professional, creating a cohesive visual language. Think of the popular teal and orange look in action films to create contrast and energy, or the desaturated, cool tones used in dramas to convey a somber atmosphere. These aesthetic choices guide the viewer's emotional response and reinforce your brand's identity.
How to Implement Color Correction and Grading
Mastering color is fundamental to giving your videos a polished, cinematic quality. Here’s how to approach it effectively:
- Correct First, Grade Second: Always begin by correcting your footage for exposure, white balance, and saturation. This creates a clean, neutral baseline before you apply any creative styles.
- Use Scopes for Accuracy: Don't rely solely on your eyes. Use tools like waveform monitors, vectorscopes, and RGB parades in your editing software to make precise, data-driven adjustments for technically accurate colors.
- Apply Grades with Adjustment Layers: Instead of grading each clip individually, apply your color grade to an adjustment layer placed over your timeline. This allows you to make non-destructive global changes and maintain consistency easily.
- Create and Use LUTs: For brand consistency, save your final color grades as Look-Up Tables (LUTs). This allows you to quickly apply your signature look to future projects, saving time and ensuring a uniform aesthetic.
By separating the technical and creative processes, you can ensure your videos are not only visually correct but also emotionally resonant and stylistically unique.
3. Pacing and Rhythm with Cuts
One of the most powerful video editing tips for controlling viewer emotion is mastering pacing and rhythm. This technique involves strategically managing the frequency and duration of your cuts to manipulate the video’s energy. Proper pacing can build suspense, create excitement, or establish a sense of calm, making it a fundamental element of effective storytelling.
Pacing dictates the speed at which your story unfolds. Rapid, quick cuts, like those seen in action sequences or high-energy vlogs, create a feeling of intensity and urgency. In contrast, slow pacing with longer, lingering shots, common in dramatic films or nature documentaries, allows the audience to absorb the atmosphere and connect more deeply with the scene.
How to Implement Pacing and Rhythm with Cuts
Controlling the rhythm of your edits is essential for keeping viewers engaged and guiding their emotional journey. To use this technique effectively:
- Vary Your Shot Lengths: Avoid a monotonous rhythm by mixing long, medium, and short shots. Use longer takes to establish context or build tension, and use shorter cuts to emphasize action, deliver a punchline, or highlight key details.
- Sync to Sound: Align your video cuts with the beat of a music track or the cadence of a voiceover. This synchronization creates a satisfying and professional rhythm that enhances the viewing experience and reinforces the video’s mood.
- Match Pacing to Emotion: Consider the emotional arc of your story. Accelerate the cutting pace during moments of high excitement or conflict, and slow it down during reflective or calm periods to let the message resonate with your audience.
By consciously controlling your cuts, you transform your editing from a simple assembly of clips into a deliberate, impactful form of storytelling.
4. Motion Graphics and Animated Text
Integrating motion graphics and animated text is a powerful video editing tip for elevating your content from amateur to professional. These elements involve using animated graphic elements and typography to add visual interest, communicate key information, and guide the viewer's attention, making your message more dynamic and memorable.

From a simple animated lower third introducing a speaker to a full-screen kinetic typography sequence, motion graphics make information easier to digest. An animated title can establish the topic and tone of your video, while graphic overlays can highlight important data points or call-to-actions without interrupting the primary footage. Think of the slick intros on a popular YouTube channel or the data visualizations in a corporate video.
How to Implement Motion Graphics and Animated Text
Motion graphics are essential for branding and storytelling, used everywhere from social media ads to broadcast news. To use them effectively:
- Define a Purpose: Ensure every animation serves a clear function, whether it's to introduce a topic, emphasize a point, or guide the eye. Avoid purely decorative elements that can distract from your message.
- Maintain Brand Consistency: Match the animation style, fonts, and color palette to your brand identity. This consistency reinforces brand recognition across all your video content.
- Synchronize with Audio: Time your animations to appear and disappear in sync with the music, sound effects, or narrative beats. This creates a cohesive and professional viewing experience.
By thoughtfully applying motion graphics, you add a layer of polish and clarity that significantly enhances the production value and engagement of your videos.
5. Audio Mixing and Sound Design
One of the most overlooked yet critical video editing tips is dedicating time to audio mixing and sound design. This process involves balancing, equalizing, and layering all your audio elements like dialogue, music, and sound effects to create a professional and immersive soundscape. While great audio often goes unnoticed, poor audio is immediately distracting and can significantly lower the perceived quality of your entire production.
Audio mixing is the art of ensuring every sound element sits perfectly in the mix, with clear dialogue and well-balanced music. Sound design is the creative process of adding effects and ambient sounds to build a world and evoke emotion. Think of the intense, layered sound in a film like Dunkirk or the crisp narration in a high-quality documentary.
How to Implement Audio Mixing and Sound Design
A polished audio track elevates the viewing experience, making your content feel more professional and engaging. To improve your audio:
- Layer Your Tracks: Separate dialogue, music, ambient noise, and sound effects onto their own tracks in your timeline. This gives you granular control over each element’s volume and presence.
- Prioritize Dialogue: Your primary audio, usually dialogue or narration, should be the clearest element. Use EQ to cut muddy low-end frequencies and compression to even out volume levels.
- Use Headphones: Edit your audio using a good pair of studio headphones. This allows you to hear subtle imperfections, background noise, or balance issues that laptop speakers might miss.
- Consider Mobile Viewing: With most content consumed on mobile, specific audio considerations are key. For a detailed guide on this, check out this resource on Mobile-First Mixing and EQ Leveling.
6. Keyboard Shortcuts and Workflow Optimization
One of the most impactful video editing tips for boosting productivity is to master keyboard shortcuts and build an efficient workflow. While creative techniques are vital, the speed at which you execute them separates amateurs from professionals. A streamlined process allows you to spend less time clicking through menus and more time refining your story.
Workflow optimization involves standardizing your editing process, from file organization to project setup. Keyboard shortcuts are the tactical component, allowing you to perform common actions like cutting, trimming, and adding effects with a single keypress instead of navigating with a mouse. Together, they can reduce editing time by 30-40%, a massive advantage for creators on tight deadlines.
How to Implement Shortcuts and Optimize Your Workflow
Adopting a structured approach is essential for handling multiple projects and maintaining creative momentum. To implement this effectively:
- Start Small: Don't try to learn every shortcut at once. Begin with the most frequent actions, like the blade tool (razor), selection tool, and ripple delete. Print a shortcut cheat sheet for your specific software and keep it nearby.
- Standardize Project Bins: Create a consistent folder structure for every new project. For example, have dedicated bins for
01_Footage,02_Audio,03_Graphics, and04_Exports. This simple habit saves immense time searching for assets. - Build Templates: For recurring content like a YouTube series or social media ads, create a project template. Include your branded intro/outro, common lower thirds, color grading presets, and audio effects already in the timeline.
This systematic approach minimizes repetitive tasks, reduces friction in the creative process, and ensures consistency across all your video projects.
7. Transitions and Visual Continuity
Beyond a simple cut, transitions are powerful storytelling tools that guide the viewer from one shot to another. While hard cuts are the professional standard, the deliberate use of dissolves, fades, or wipes can set a mood and enhance narrative flow. The key is using them with purpose, ensuring they serve the story rather than just decorating it.
Transitions are the effects used to bridge two clips together, such as a fade-to-black to signify the end of a chapter or a quick wipe to add energy to an action sequence. Visual continuity is the principle of maintaining consistency in elements like lighting, framing, and color grading between shots. This ensures that even with a simple cut, the transition feels seamless and doesn't distract the viewer.
How to Implement Transitions and Visual Continuity
Using transitions effectively is a hallmark of professional video editing. Poorly chosen or overused effects can make a video feel amateurish. To use them well:
- Default to Cuts: The most effective transition is often no transition at all. A clean, hard cut is invisible and keeps the focus on your content. Use more stylized transitions sparingly and with intent.
- Match the Tone: A soft dissolve works well for a nostalgic or documentary-style transition, while a fast-paced whip pan suits high-energy vlogs or music videos. The effect should always match the emotional tone of the scene.
- Maintain Consistency: When building a video, stick to just one or two types of transitions. This creates a consistent visual language that your audience will understand, making your video feel more polished and cohesive.
Mastering this balance is one of the most impactful video editing tips for elevating your content from good to great, ensuring your edits enhance the story instead of detracting from it.
8. Timeline Organization and Nesting
A clean timeline is a fast timeline. This crucial video editing tip involves strategically arranging, grouping, and labeling clips, effects, and audio tracks. Nesting, or placing a sequence inside another, allows you to condense complex sections into a single, manageable clip, preventing your project from becoming an overwhelming web of edits.
Timeline organization is the practice of methodically structuring your project to improve efficiency. This means using consistent color-coding for different types of footage (e.g., A-roll, B-roll, graphics) and clearly labeling every track and clip. Nesting is ideal for grouping multi-layered effects, a finished scene, or a standardized intro/outro sequence into one container, simplifying your main timeline significantly.
How to Implement Timeline Organization and Nesting
This professional workflow, common in feature films and broadcast television, is essential for any serious editor looking to scale their production and collaborate effectively.
- Establish a System: Before you start, decide on a clear naming convention and color-coding scheme. Document it so you (or a collaborator) can understand the project at a glance.
- Nest Strategically: Don't just nest everything. Group related elements, such as a complex title sequence with multiple layers of text and effects, or a color-graded scene that you want to apply a universal effect to.
- Keep Your Master Clean: Your main editing sequence should be as simple as possible. Use it to assemble your nested scenes, B-roll, and primary audio, treating the nested sequences like building blocks.
Proper timeline hygiene saves countless hours by making projects easier to navigate, troubleshoot, and hand off, turning a potentially chaotic process into a streamlined one.
9. Using B-Roll and Establishing Shots Effectively
One of the most important video editing tips for elevating your storytelling is the effective use of B-roll and establishing shots. B-roll is any supplemental footage used to enrich your primary footage (A-roll), while an establishing shot sets the scene, orienting your viewer to a new location or context. Used together, they add visual variety, maintain engagement, and provide crucial context that can transform a simple video into a compelling narrative.
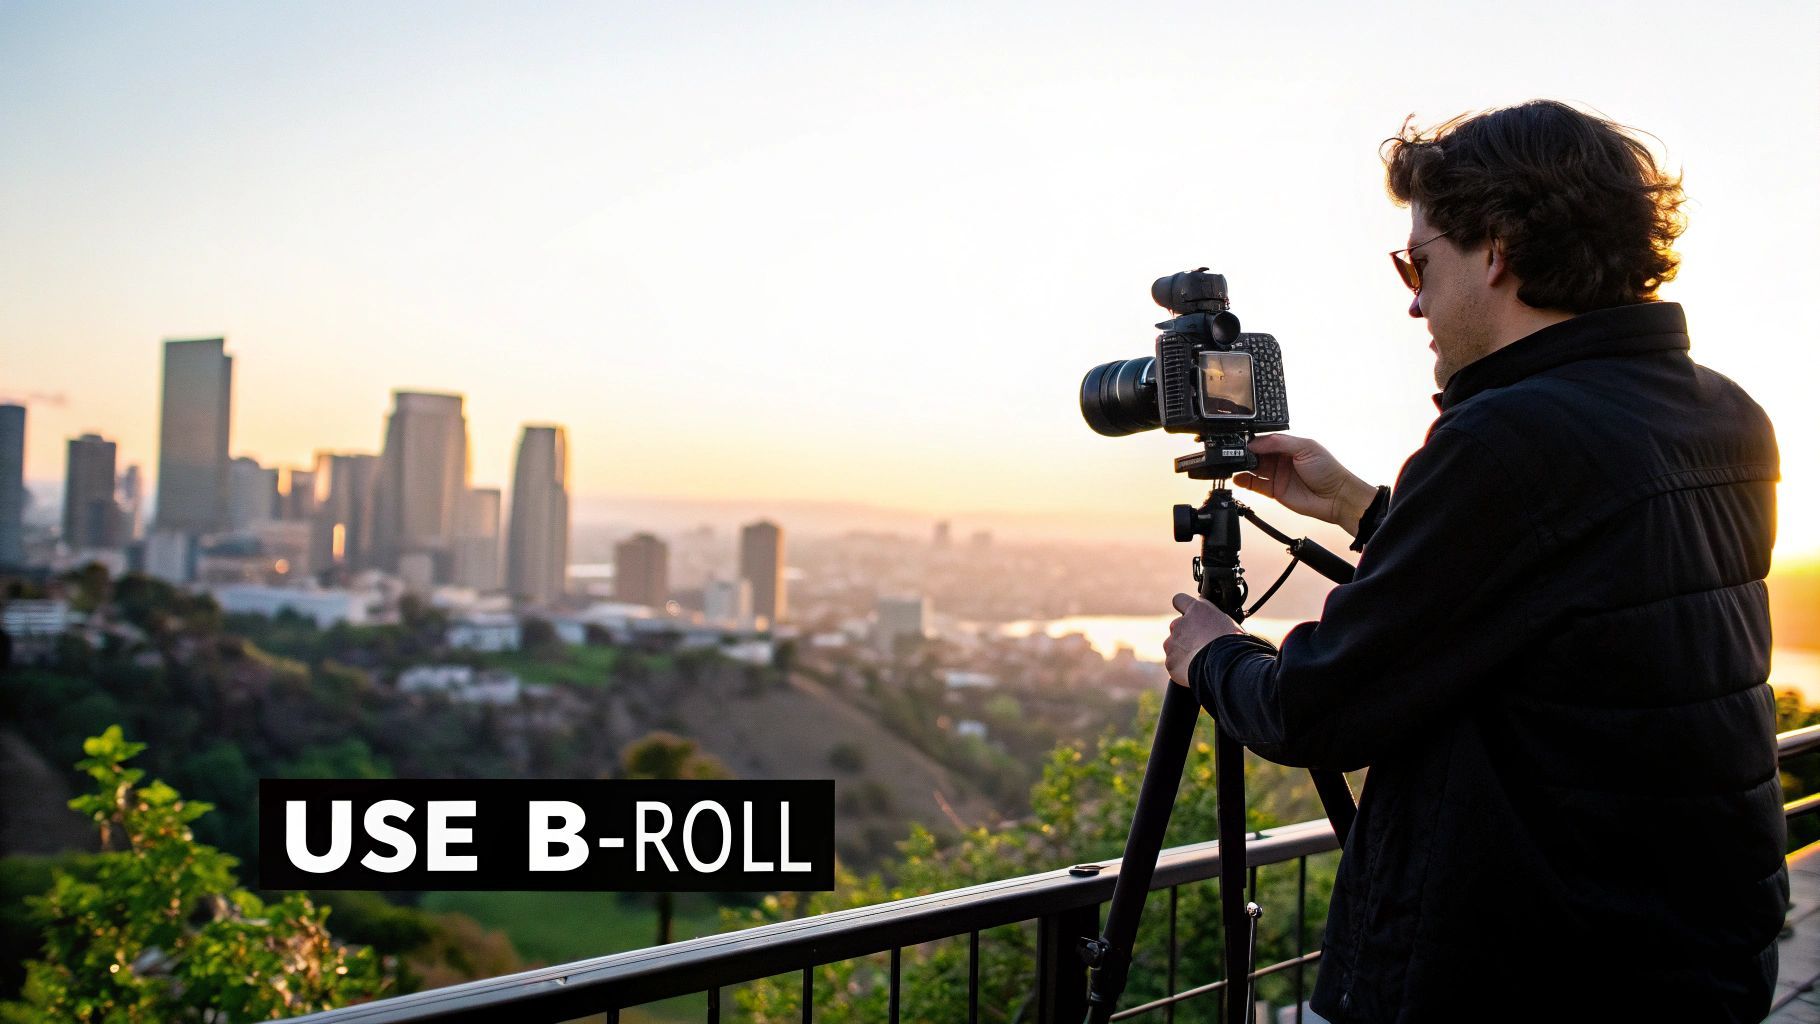
An establishing shot might be a wide view of a city skyline before cutting to an interview inside a building. B-roll could be close-up shots of a product being used in a tutorial or footage of a crowd reacting during a speech. These elements break up the monotony of a single shot, making your video more dynamic and professional.
How to Implement B-Roll and Establishing Shots
From documentaries to travel vlogs, this technique is fundamental to visual storytelling. It helps "show, don't tell," making abstract concepts concrete and reinforcing your message. To use them effectively:
- Gather Ample Footage: A common rule is to shoot at least two to three times more B-roll than you think you will need. This gives you plenty of options in the edit to find the perfect shots to match your narration or A-roll.
- Vary Your Shots: Capture a mix of wide, medium, and close-up shots. For establishing shots, try different angles and times of day to set the mood. Detail shots and macro footage can add immense visual interest.
- Ensure Relevance: Every B-roll clip should support the narrative. If you are discussing efficiency, show B-roll that visually represents speed or organization. The footage must add value, not just fill time.
- Use It to Hide Edits: B-roll is perfect for covering jump cuts in your A-roll, such as when you remove a mistake or a pause from an interview. This creates a seamless viewing experience.
10. Version Control and Export Optimization
One of the most crucial, yet often overlooked, video editing tips is implementing a robust system for version control and export optimization. This dual approach protects your work from being lost while ensuring the final product looks its best on every platform. It's the professional framework that separates polished content from amateur mistakes.
Version control is the practice of saving iterative copies of your project, creating a clear history of your edits. Export optimization involves tailoring your final render settings to meet the specific technical requirements of platforms like YouTube, Instagram, or broadcast television. Together, they prevent catastrophic data loss and guarantee your video maintains its quality after upload.
How to Implement Version Control and Export Optimization
This disciplined process is essential for any serious creator, from solo YouTubers to large creative agencies, preventing lost work and delivery headaches. To integrate this into your workflow:
- Establish a Naming Convention: Don't just save over your old project file. Create a clear system like
ProjectName_v1,ProjectName_v2, andProjectName_client_feedback_v3. This makes it easy to roll back to a previous stage if needed. - Backup Strategically: Maintain at least two backups of your project files and source media. A common professional practice is the 3-2-1 rule: three total copies, on two different types of media, with one copy off-site (like cloud storage).
- Create Export Presets: Instead of guessing settings every time, create export presets in your editing software for each platform you post on. Research the ideal bitrate, resolution, and codec for YouTube, TikTok, and Instagram, and save them for one-click use.
Proper versioning and optimized exports save immense time and stress, ensuring your hard work is never lost and always looks flawless.
10-Point Video Editing Tips Comparison
| Technique | Implementation Complexity 🔄 | Resource Requirements ⚡ | Expected Outcomes 📊 | Ideal Use Cases 💡 | Key Advantages ⭐ |
|---|---|---|---|---|---|
| L-Cuts and J-Cuts | Medium 🔄 — precise audio/video sync | Low ⚡ — standard NLE, good audio | High 📊 — smoother, natural transitions | Interviews, trailers, documentaries | ⭐ Professional, maintains viewer focus |
| Color Correction and Grading | High 🔄 — color science & control | High ⚡ — calibrated monitors, software/plugins | Very High 📊 — consistent look, cinematic mood | Narrative film, branded content, music videos | ⭐ Raises production value, sets tone |
| Pacing and Rhythm with Cuts | Medium-High 🔄 — storytelling judgement | Low ⚡ — editing skills, music timing | High 📊 — controls emotion and engagement | Action, drama, music videos, sketches | ⭐ Shapes emotional response, improves flow |
| Motion Graphics and Animated Text | High 🔄 — animation & timing skills | Medium-High ⚡ — motion software, design time | High 📊 — increases clarity and engagement | Intros, explainers, branding, broadcasts | ⭐ Communicates info quickly, boosts branding |
| Audio Mixing and Sound Design | High 🔄 — technical audio expertise | High ⚡ — quality mics, monitors, plugins | Very High 📊 — immersive, clear soundscape | Film, podcasts, commercials, narrative | ⭐ Essential for perceived professionalism |
| Keyboard Shortcuts & Workflow Optimization | Low-Medium 🔄 — initial learning curve | Low ⚡ — time to customize, templates | High 📊 — faster turnaround, higher throughput | High-volume editors, YouTubers, studios | ⭐ Greatly improves speed and consistency |
| Transitions & Visual Continuity | Medium 🔄 — planning and subtlety | Low-Medium ⚡ — NLE effects, careful shooting | High 📊 — preserves immersion, clearer edits | Narrative, documentary, broadcast | ⭐ Keeps edits invisible and story-focused |
| Timeline Organization & Nesting | Medium 🔄 — discipline and conventions | Low ⚡ — time for naming, folders | High 📊 — easier collaboration and revisions | Feature films, episodic, team projects | ⭐ Reduces errors, speeds up revisions |
| Using B-Roll & Establishing Shots | Medium 🔄 — extra planning and coverage | Medium ⚡ — more shooting time, storage | High 📊 — visual variety, context, coverage | Documentaries, vlogs, tutorials, corporate | ⭐ Enhances storytelling, covers edits smoothly |
| Version Control & Export Optimization | Medium-High 🔄 — workflow rigor | High ⚡ — storage, backups, export tools | High 📊 — reliable delivery across platforms | Client deliverables, broadcast, streaming | ⭐ Prevents loss, ensures platform compatibility |
Supercharge Your Workflow with AI
You’ve explored the foundational pillars of exceptional video editing, from the narrative power of L-cuts and J-cuts to the critical importance of disciplined timeline organization. Mastering these ten video editing tips will undeniably transform your raw footage into compelling, professional stories that capture and hold audience attention. Each technique, whether it's the subtle art of pacing or the technical precision of color grading, is a vital tool in your creative arsenal.
But mastering the craft is only half the battle. The modern content landscape demands not just quality, but also speed and consistency. This is where the true revolution in video production is happening. The single biggest bottleneck for creators, marketers, and agencies alike isn't a lack of ideas; it's the immense amount of time required for manual editing.
Bridging Skill with Speed: The AI Advantage
This is where artificial intelligence transforms from a buzzword into your most valuable assistant. AI-powered platforms are not here to replace your creativity but to amplify it. Imagine applying the principles of dynamic pacing, smooth transitions, and engaging motion graphics, but doing so in minutes instead of hours. Tools like ShortGenius automate the repetitive, time-consuming tasks that bog down your workflow, such as generating scripts, finding relevant B-roll, adding perfectly timed captions, and resizing your final video for every social media platform.
This automation allows you to shift your focus from tedious technical execution to high-level creative strategy. Instead of spending hours on a single video, you can produce a week's worth of high-quality content in the same amount of time. Integrating AI means you can consistently apply the expert video editing tips you've just learned, ensuring every piece of content meets your brand's standard of excellence without leading to burnout. To truly supercharge your video editing, consider integrating some of the best AI tools for content creators to see how they can fit into your unique process.
Your Next Steps to Smarter Editing
The path forward is clear: combine your growing editing skills with the power of intelligent automation. The future of video editing isn’t about choosing between manual skill and AI assistance; it's about a powerful synergy between the two. By embracing this hybrid approach, you unlock unprecedented efficiency, allowing you to scale your content output, experiment more freely, and ultimately, dedicate your valuable time to what matters most: telling great stories.
Ready to apply these advanced video editing concepts without the hours of manual work? ShortGenius (AI Video / AI Ad Generator) is designed to automate the entire process, from script to final render, so you can focus on creativity and strategy. Try ShortGenius today and start creating professional-quality videos in minutes.