So posten Sie ein YouTube-Video auf Instagram: Meistern Sie es wie ein Profi
Entdecken Sie, wie Sie ein YouTube-Video auf Instagram posten – mit einfachen Schritten, Profi-Tipps und Tricks, um Reichweite und Engagement zu maximieren.
Thinking about how to post a YouTube video on Instagram? It's a common goal, and the best approach is to treat it as a content repurposing strategy. The general idea is to download your own YouTube video, give it a good re-edit for a vertical format like 9:16, and then upload it as an Instagram Reel or Story. This isn't just a copy-paste job; it's about breathing new life into your hard work and reaching a totally different crowd.
Why Sharing YouTube Videos on Instagram Works
Beyond the how, let's talk about the why. Reformatting your long-form YouTube videos for Instagram is more than a simple time-saving trick; it's a smart strategy for growing your audience and making your brand stronger. You're not just making another post. You're building a bridge between two of the biggest platforms out there, each with its own unique vibe and user habits.
When done right, this approach turns your Instagram profile into a powerful discovery tool for your YouTube channel. A slick, well-edited clip can stop a scroller in their tracks—someone who might have never stumbled upon your content otherwise.
Tap Into a Highly Engaged Audience
Lass uns ein reales Beispiel betrachten. Stell dir vor, du hast gerade eine detaillierte 15-minütige Produktbewertung auf YouTube gepostet. Du könntest einen knackigen 30-Sekunden-Highlight-Ausschnitt nehmen – vielleicht das Auspacken oder eine schnelle Demo einer Schlüssel-Funktion – und daraus einen energiegeladenen Instagram Reel machen. Plötzlich greifst du auf ein ganz neues Publikum zu.
Dieser kleinen Vorschau kann Tausende von Aufrufen und Kommentaren einbringen, was neugierige Zuschauer zum Link in deiner Bio drängt, um das volle Video anzuschauen. Das schafft einen fantastischen Trichter, der Traffic und potenzielle Abonnenten direkt zu deinem Hauptkanal leitet.
Und die Daten unterstützen das: Ein massives 76,9 % der Instagram-Nutzer sind auch auf YouTube, was eine enorme Überschneidung des Publikums schafft, die du nutzen kannst. Zudem verbringen Instagramm-Nutzer eine Menge Zeit mit Kurzform-Videos; Reels machen jetzt über 50 % der Zeit aus, die auf der App verbracht wird. Das macht Cross-Posting zu einer Selbstverständlichkeit, um die Reichweite deines Contents zu maximieren. Für einen tieferen Einblick kannst du mehr über diese Instagram-Nutzerstatistiken lesen.
Behandle deinen Instagram-Content als den promotionalen Trailer für dein YouTube-"Hauptereignis". Wenn du das tust, schaffst du ein kohärentes Content-Ökosystem, in dem jede Plattform die andere unterstützt. Das stärkt deine Gesamtmarke und baut eine engere Community auf.
Maximizing Your Content Lifecycle
Jedes Video, das du produzierst, ist eine große Investition in Zeit, Aufwand und Kreativität. Es einfach nur auf YouTube liegen zu lassen, bedeutet, dass du nicht das Maximum herausholst. Das Repurposing deines Contents gibt dir viel mehr Kilometer aus einem einzelnen Video, indem du es an unterschiedliche Betrachtungsgewohnheiten auf Plattformen anpasst.
Bevor du anfängst, dein Video zu zerschneiden, hilft es zu wissen, wo es auf Instagram landen wird. Jede Format hat seine eigenen Stärken, also solltest du deine YouTube-Clips darauf zuschneiden.
Instagram Video Format Cheat Sheet
Hier ist eine schnelle Referenzanleitung zu den Hauptvideoformaten von Instagram. Das hilft dir, die beste Art zu finden, deinen YouTube-Content für jeden Platz anzupassen.
| Format | Aspect Ratio | Max Length | Best Use for YouTube Content |
|---|---|---|---|
| Instagram Reels | 9:16 (Vertical) | 90 seconds | High-energy clips, quick tips, or viral-worthy moments from a longer video. Great for reaching new audiences. |
| Instagram Stories | 9:16 (Vertical) | 60 seconds per slide | Behind-the-scenes clips, Q&A segments, or interactive polls related to your YouTube video. Creates urgency. |
| Instagram Feed | 1:1 (Square), 4:5 (Portrait) | 60 minutes | Longer, polished clips that act as mini-tutorials or condensed versions of your main YouTube video. |
Indem du strategisch darüber nachdenkst, welche Teile deines YouTube-Videos du wo postest, kannst du dich an die schnelle, mobil-first Welt von Instagram anpassen und die Leute zurück zu deinem Hauptkanal für tieferen Content lenken. Es geht darum, deinen Content schlauer arbeiten zu lassen, nicht härter.
Your Essential YouTube to Instagram Toolkit
Bevor du dein YouTube-Video auf Instagram bekommen kannst, musst du die richtigen Tools parat haben. Denke daran als an deine Pre-Production-Setup – der Schlüssel, um ein Landschaftsvideo in etwas zu verwandeln, das sich in der vertikalen Welt von Instagram wie zu Hause fühlt. Deinen Workflow zuerst zu sortieren, spart später eine Menge Kopfschmerzen und lässt dich dich auf Kreativität konzentrieren, nicht auf Kämpfe mit Software.
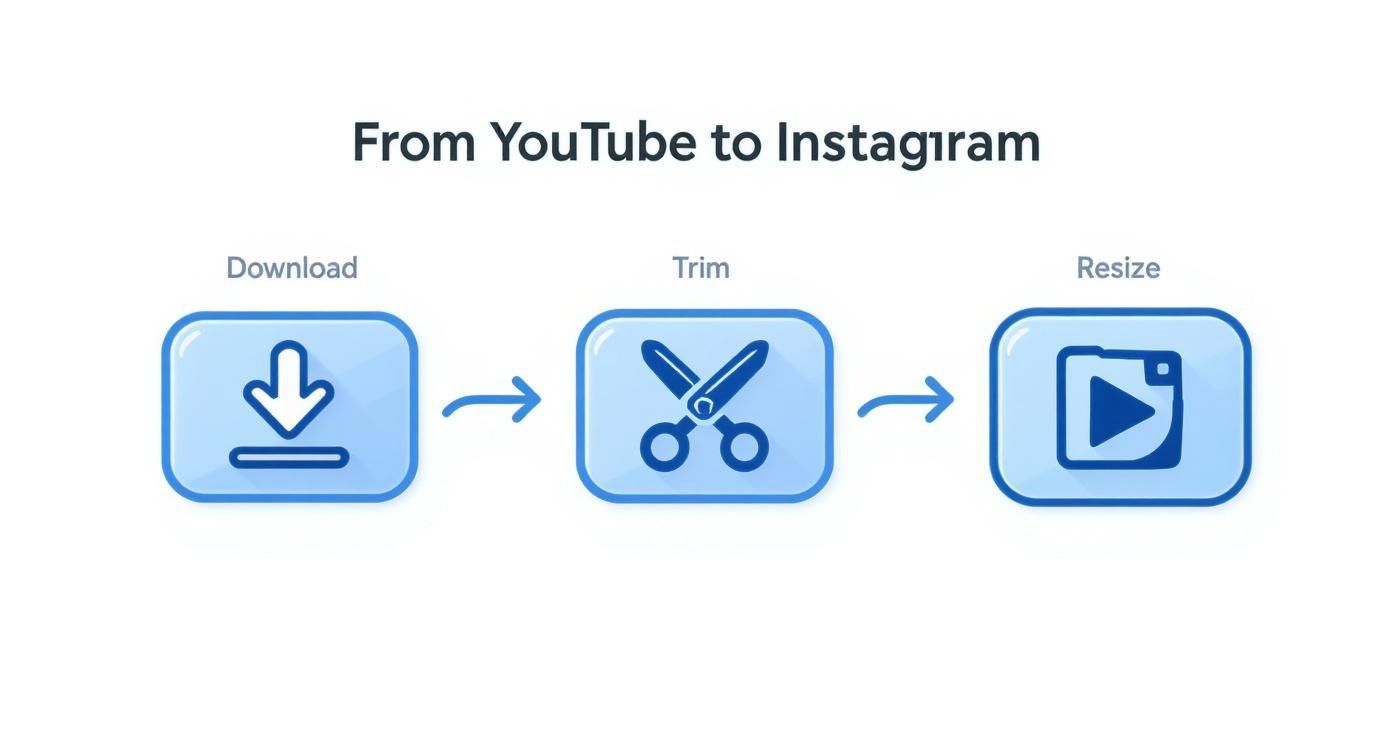
Die gute Nachricht? Du brauchst kein professionelles Editing-Studio. Die meiste schwere Arbeit kann von einer Handvoll leistungsstarker, oft kostenloser Tools erledigt werden. Dein Prozess zerfällt in drei Hauptjobs: Die Videodatei holen, sie auf die besten Teile kürzen und sie für einen Handybildschirm anpassen.
Zuerst brauchst du einen zuverlässigen YouTube-Video-Downloader, um eine hochwertige Version deines Videos zu ziehen. Auch wenn du die Original-Projektdatei irgendwo hast, ist es manchmal einfach schneller, die finale Version direkt von YouTube herunterzuladen. Achte nur darauf, dass du nur deinen eigenen Content oder Videos herunterlädst, für die du die Erlaubnis hast.
Choosing Your Video Editor
Mit der Videodatei auf deinem Computer ist es Zeit, einen Editor zu wählen. Hier machst du die meiste Arbeit, also ist es wirklich wichtig, einen zu finden, der zu deinem Skill-Level und deiner Arbeitsweise passt. Glücklicherweise hast du jede Menge Auswahl, von super-einfachen Web-Apps bis zu voll ausgestatteten mobilen Editoren.
Hier sind ein paar meiner Go-to-Empfehlungen:
- Clipchamp: Das ist ein fantastischer, kostenloser, web-basierter Editor von Microsoft. Es ist ein toller Einstieg, wenn du nur schnell ein Video auf 9:16 anpassen, die Enden kürzen und eine Datei zum Hochladen bereit machen musst, ohne eine steile Lernkurve.
- CapCut: Es gibt einen Grund, warum diese mobile und Desktop-App bei Creators beliebt ist. Sie ist vollgepackt mit Features wie Auto-Untertitel, coolen Effekten und super-einfachen Reframing-Tools, die dein Video so aussehen lassen, als wäre es von Anfang an für Instagram gemacht.
- iMovie/InShot: Wenn du alles lieber auf deinem Handy machst, sind iMovie (für iPhone) und InShot (für Android und iOS) beide solide Optionen für grundlegende Schnitte und Anpassungen.
Der beste Editor für dich hängt wirklich von deinem persönlichen Workflow ab. Wenn du gerne am Computer sitzt und eine Menge Content batchweise erstellst, sind Clipchamp oder die Desktop-Version von CapCut perfekt. Aber wenn du immer unterwegs bist, ist ein mobil-first-Powerhouse wie CapCut schwer zu schlagen.
Streamlining the Creative Process
Das Geheimnis, Content zu repurposen, ohne auszubrennen, ist, es so einfach wie möglich zu machen. Versuchen, manuell Dutzende kurzer, knackiger Clips aus einem langen Video zu ziehen, kann schnell zu einem massiven Zeitfresser werden. Genau hier können AI-gestützte Tools das Spiel komplett verändern.
Stell dir vor, du hast gerade ein 20-minütiges YouTube-Video fertiggestellt. Die alte Methode beinhaltet, durch die gesamte Timeline zu scrollen, mehrere einminütige Schätze zu finden, die besten Hooks zu identifizieren, sie genau richtig zu schneiden und dann jedes für Instagram zu formatieren. Es ist mühsam.
Das ist der perfekte Moment, um ein Tool einzusetzen, das speziell für diesen Job gebaut ist. Für Creators, die das auf Autopilot stellen wollen, kann eine Plattform wie https://shortgenius.com die überzeugendsten Clips aus deinen langen Videos automatisch finden und erstellen. AI für die anfängliche schwere Arbeit bei der Clip-Auswahl und Formatierung zu nutzen, gibt dir einen riesigen Vorsprung. Du kannst deine Zeit damit verbringen, die besten Teile zu verfeinern, statt jeden Clip von Grund auf zu bauen. Es verwandelt eine mehrtägige Plackerei in einen viel schnelleren, kreativeren Prozess.
Formatting Your Video for a Vertical World
Alright, you've got the video file downloaded. Now for the fun part: turning that horizontal YouTube clip into something that looks like it was made for Instagram. This is more than just a technical step; it’s where you creatively adapt your content to fit a whole different platform and audience. Skipping this can make your video look out of place and, honestly, a bit lazy.
The big shift is reframing for a mobile screen. Most modern video editors handle this easily. I'm a big fan of CapCut for this because it’s free and surprisingly powerful, but these same ideas apply whether you're using Adobe Premiere or another app. The first thing you'll do is change the project's aspect ratio from the classic widescreen 16:9 to Instagram’s vertical 9:16.
This workflow breaks down the core process: grabbing your video, trimming it down, and resizing it for Instagram.
Getting the technical specs right is one thing, but making it genuinely compelling is another.
Reframing Your Shots for Impact
Once you switch to 9:16, you'll probably see your horizontal video floating in the middle with ugly black bars on the top and bottom. This is the number one giveaway that a video was just slapped onto Instagram without any thought. Don't do that.
Instead, you need to reframe. This means zooming in and repositioning the video to fill the entire vertical screen. You might have to get creative and pan across the shot to keep the main action—whether that’s your face, a product demo, or a landscape—in the center of the frame. It's a bit of hands-on work, but it ensures your audience sees what's important.
Pro Tip: What if your original video has crucial text or graphics near the edges? Reframing can cut them off. A great workaround is the "blur fill" effect. Most editors have this feature, and it fills the empty space with a blurred, blown-up version of your video. It looks way more professional than black bars.
Adding Native Instagram Elements
To really make your video pop, you need to add the kind of elements Instagram users are used to seeing. This is how you make recycled content feel fresh and built for the platform.
Here are a few things that make a huge difference:
- Animated Captions: So many people watch videos on their phones with the sound off. Adding dynamic, auto-generated captions is non-negotiable. It makes your content accessible and helps grab attention in a busy feed. CapCut can actually generate these for you with a single tap.
- Trending Audio: Your YouTube video already has sound, but consider adding a trending song or audio clip at a very low volume underneath it. This can give the Instagram algorithm a little nudge to show your Reel to more people who are engaging with that trend.
- Text Overlays: Use bold text to highlight key takeaways, pose a question, or add a clear call-to-action. Something as simple as "Full video link in bio!" can make a real impact on driving traffic.
Vertical video has totally changed the game. Instagram knows this, which is why they keep extending the maximum length for Reels—they want creators to bring their deeper stories over from other platforms. And it works. Reels now have an average engagement rate of 1.22%, which easily beats other post types. If you're a data nerd, you can find more insights in these social media statistics.
By taking these extra steps, you’re not just reposting. You’re being a smart creator who understands that different platforms require different approaches.
Getting Your Video Seen: Uploading and Optimizing
https://www.youtube.com/embed/xuAMtJKGHbc
Okay, so you've got your perfectly edited, vertical-friendly video clip. Now for the fun part: getting it in front of the right audience on Instagram. Just dumping the video onto the platform and hoping for the best isn't a strategy. To really make this work, you need to think like the Instagram algorithm and understand what makes users stop scrolling.
Where you post your video—whether it's a Reel, a Story, or a classic Feed post—completely changes the game. Each format has its own unwritten rules and user expectations. A one-size-fits-all approach just won't fly here.
Crafting a Post That Grabs Attention
For both Reels and Feed videos, the content around your clip is just as critical as the video itself. This is your moment to stop the scroll, add some much-needed context, and ultimately drive people back to your YouTube channel.
Make sure you nail these two elements every single time:
- Create a Custom Cover Image: Never let Instagram choose a random, blurry frame for your thumbnail. A clean, eye-catching cover image with a clear title makes your profile grid look professional and gives people a reason to tap play when they see it on the Explore page.
- Write a Hook-Worthy Caption: Start your caption with a bang. Ask a provocative question or make a bold statement to spark curiosity. Keep that first line short and punchy, then you can add more detail and a clear call-to-action, like "Watch the full breakdown on YouTube! Link in bio."
Choosing the Right Hashtags and Audio
Think of hashtags and audio as Instagram’s built-in discovery tools. Using them strategically is how you break out of your follower bubble and get your content in front of fresh eyes. It’s a simple step, but it makes a massive difference.
You'll want to use a mix of broad, specific, and niche hashtags. For a tech review channel, that might look like #TechReview (broad), #ProductUnboxing (niche), and #NewGadget2025 (very specific). The sweet spot is usually around 5-10 highly relevant tags.
Don't just repurpose content; repurpose with intent. Each platform has a unique culture. Tailoring your YouTube clips with native elements like trending audio and platform-specific captions is what separates a successful strategy from a lazy cross-post.
This tailored approach is non-negotiable. Data shows that Reels have a 2.08% engagement rate for influencer content, blowing away the 0.42% for standard videos. But that success hinges on making the content feel like it was made for Instagram.
If you're looking for a complete walkthrough that covers every single detail, check out this detailed guide on posting YouTube videos to Instagram.
Common Cross-Posting Mistakes to Avoid
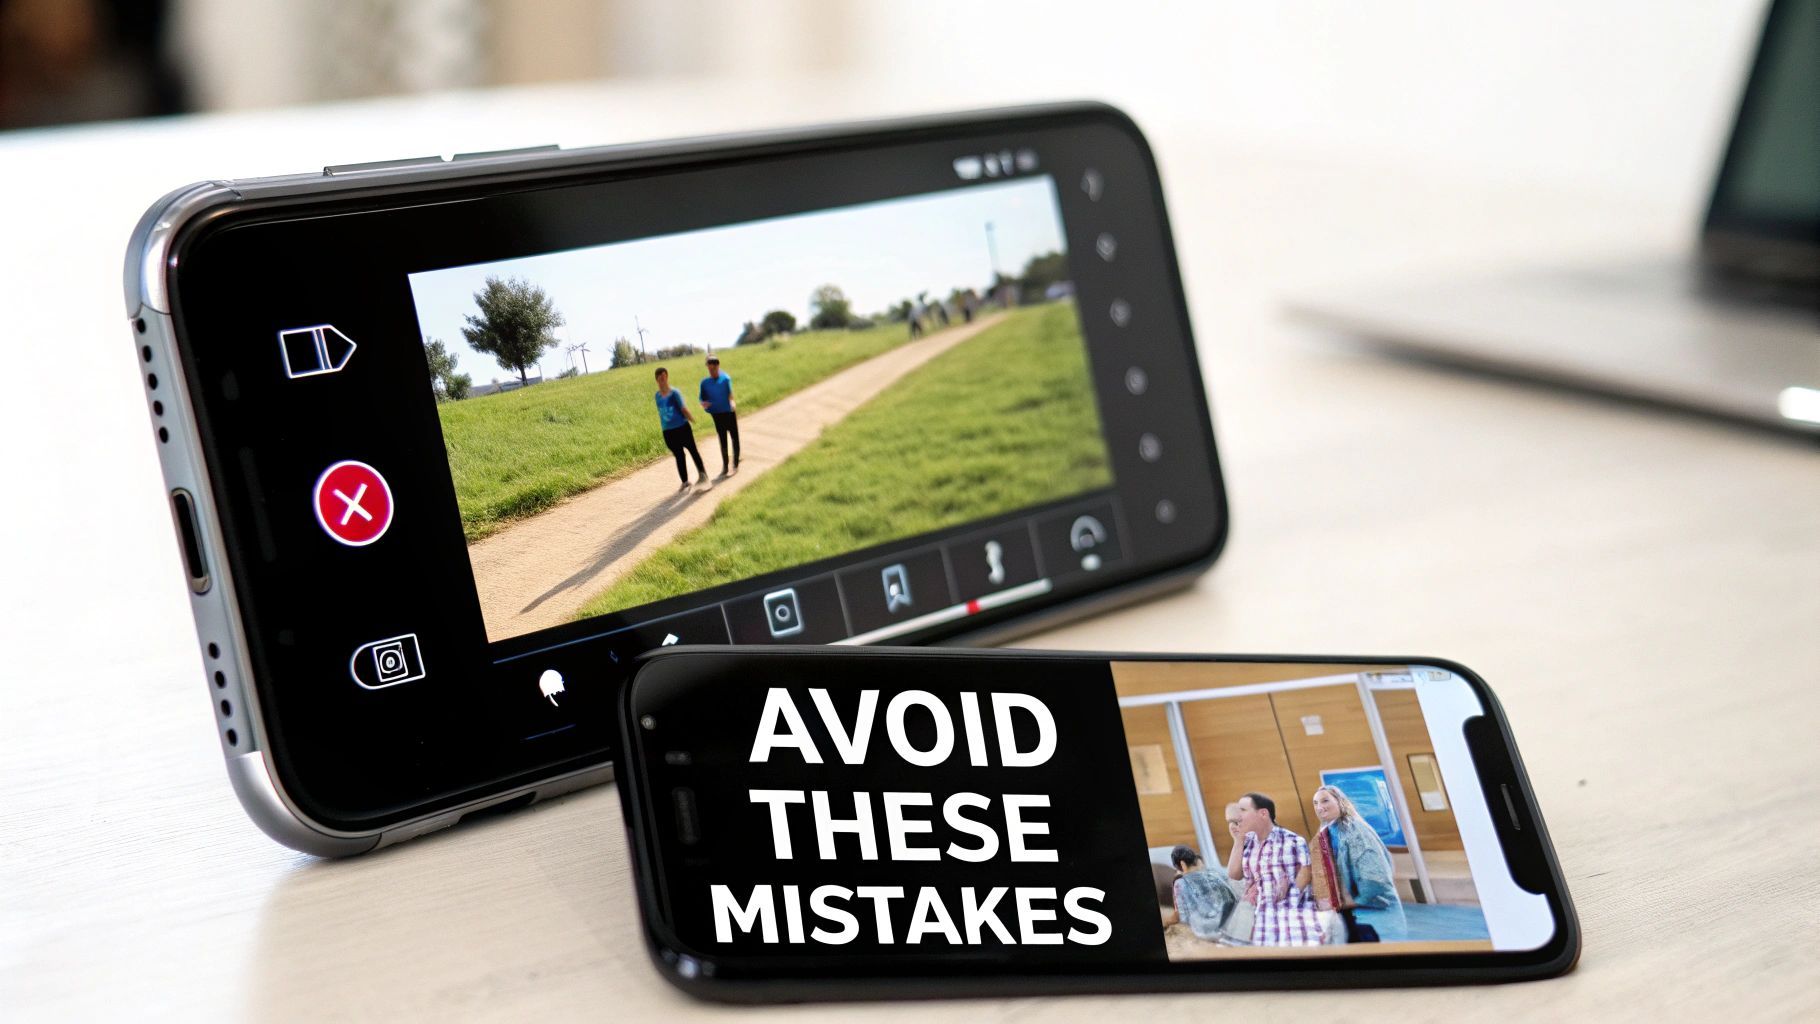
We've all seen it: the classic horizontal YouTube video crammed into a vertical Instagram frame. It’s a dead giveaway that the content wasn't made for the platform, and it’s one of the quickest ways to get your audience to scroll right past.
These small, avoidable errors can tank your reach and engagement. Let's walk through the most common pitfalls I see creators make so your repurposed content looks polished, native, and genuinely effective. The biggest offender is, without a doubt, ignoring the aspect ratio. This creates the infamous "letterbox" effect—a tiny video swimming in huge black bars. It just screams low effort.
Forgetting Instagram Is All About Speed
Another classic mistake is dragging your feet with the intro. On YouTube, you have a bit of time to warm up. On Instagram, you have practically none. The pace is lightning-fast, and if you don't hook someone in the first 2-3 seconds, they're already gone.
This means you can't just chop off the first 60 seconds of your YouTube video and call it a day. You have to dig through your original video to find the single most exciting, surprising, or valuable moment. Lead with your best stuff. Think of your clip as a movie trailer, not just a random scene.
Key Takeaway: Your goal is to create a compelling, standalone piece of content that sparks curiosity. It should make viewers feel like they're missing out if they don't click over to watch the full video. That mental shift from "excerpt" to "trailer" is everything.
Ignoring How People Actually Use Instagram
Just uploading the raw video file is a huge missed opportunity. Instagram has its own culture and its own set of tools that users expect to see. When you ignore them, your content feels like an outsider.
Here are a few simple ways to make your video feel right at home:
- Forgetting Captions: I can't stress this enough: a massive number of people watch videos with the sound off. If you don't have on-screen text or captions, you're essentially showing them a silent film they can't understand. Use Instagram’s auto-caption feature or, even better, burn them into the video yourself.
- Skipping Trending Audio: Even if your original audio is great, adding a popular Reel sound at a very low volume can give the algorithm a signal. It helps categorize your content and can push it to a much bigger audience.
- A Missing Call-to-Action (CTA): You have to tell people what you want them to do next. Don't just assume they'll know. End your caption with a clear, direct instruction like, "Watch the full breakdown on my YouTube channel—link in bio!"
By sidestepping these common mistakes, your efforts to post a YouTube video to Instagram will pay off with way more engagement and, hopefully, a lot more traffic back to your channel.
Got Questions? I’ve Got Answers
When you're first figuring out how to post a YouTube video to Instagram, a few common questions always pop up. I've heard these from countless creators, so let's clear up the confusion right away.
So, Can I Just Post My Entire YouTube Video on Instagram?
Honestly, you can't, and you really shouldn't. Instagram is a different world—it’s all about quick, punchy content.
Reels have a 90-second limit, and even though Feed videos can be longer, people just don't have the attention span for a full-length YouTube video there. The best move? Think of your Instagram clip as a movie trailer for your YouTube video. Pull out the most exciting highlight or a juicy teaser that leaves people wanting more.
Then, hit them with a clear call-to-action to send them over to your YouTube channel. It's the perfect way to use Instagram as a powerful promotion tool without trying to force a square peg into a round hole.
Is This Going to Cannibalize My YouTube Views?
Absolutely not. It's actually the opposite. When you do it right, sharing clips on Instagram can be one of the best things you do for your YouTube channel's growth. You're tapping into a massive audience that might never have found you otherwise.
Think about it: a simple "Full video link in bio!" is your bridge. You're building a direct pipeline of new, interested viewers right to your long-form content. This strategy drives up views, watch time, and subscribers on YouTube. The key is to make the platforms work together.
How Do I Deal With the Weird Aspect Ratios?
This one is non-negotiable: you have to edit for vertical. Specifically, a 9:16 aspect ratio. This is the native format for Reels and Stories, and it’s what gives viewers that full-screen, immersive experience on their phones.
Please, don't be the person who just uploads a horizontal 16:9 video with those ugly black bars at the top and bottom. It looks lazy and screams "repost." Take the extra five minutes to open your project in an editor, set the canvas to 9:16, and reframe your shots. Make sure the action is always centered in that vertical frame. It’s a small step that makes your content look polished and professional, showing you actually understand the platform.
Ready to turn your long-form videos into a library of engaging social media content without the manual effort? ShortGenius uses AI to find the best moments in your videos, automatically reformatting them into ready-to-publish clips. Speed up your workflow and scale your content creation at https://shortgenius.com.